


A fail-proof Mysore Pak recipe that will show you how to make mysore pak at home with fool proof visual cues, pro tips, & timestamps, so that you can get it right every single time.
And you know the best part? This perfect, delicious crumbly Mysore Pak requires only 3 ingredients & 10-15 minutes to make! Makes for the perfect Diwali sweet to indulge in or wow your guests!
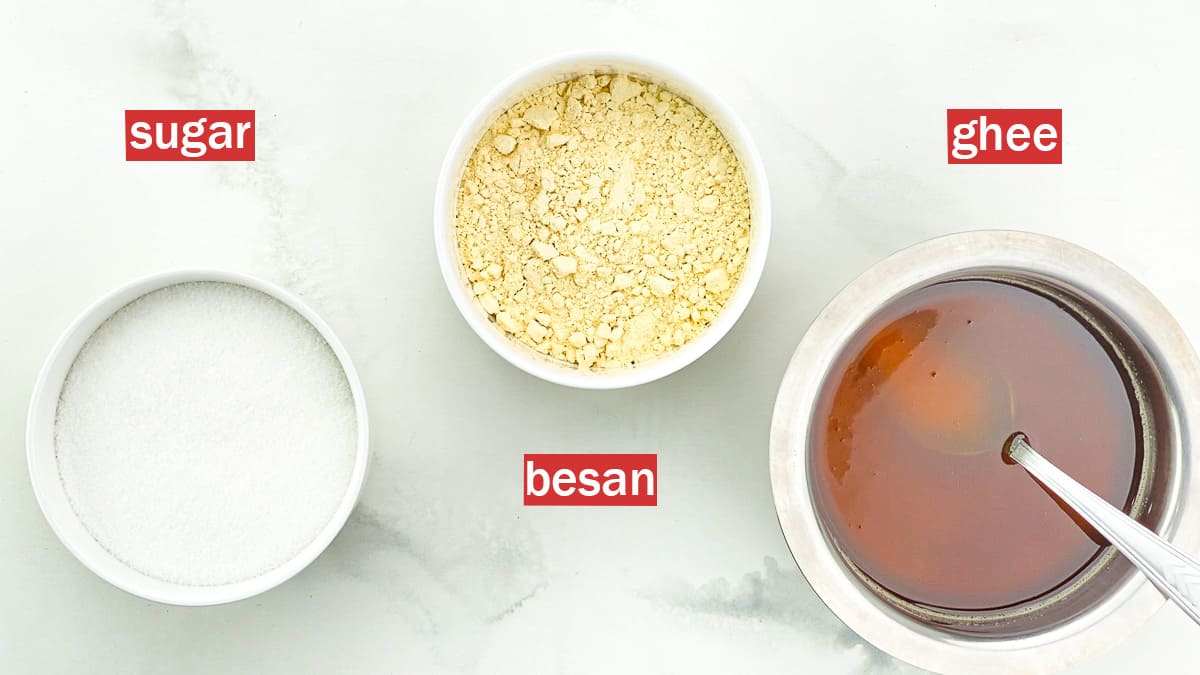
If you aren't familiar with this dish, Mysore Pak is a popular South Indian sweet dish, which is primarily made with besan, sugar and ghee.
Though there are a few different ways this dish can be made as - mysore pak can be soft, hard or crumbly. And you can certainly substitute some of these ingredients with others.
But in my (very biased) opinion, this crumbly version (with lots of layers and air pockets) is the best, as it's neither too hard to bite into, nor too soft and mushy, it's got just the perfect crumbly texture that will melt-in-your-mouth.
And of-course this dish can be made all year round, but it's especially perfect around Diwali, when you might have many guests visiting on relatively short notice, whom you can now wow by whipping up homemade Mysore Pak, which trust me is a rarity!
That being said, consider this fair warning - I would suggest you read this recipe / see the video a couple of times, before you first attempt it - even the notes / tips etc. Because even though this recipe requires only 3 ingredients, and takes only 10-15 minutes to make, there is very little room for error with this one.
That is also the reason why I have given as many details as possible (complete with do's and don'ts AND exact time stamps) for this recipe. AND even shared a recipe video! But if you still have any additional questions, feel free to drop me a comment, and I'll get back to you really soon!
On to the recipe..
The 3 Ingredients You Need
Ingredient notes
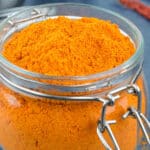
Besan - Use sieved besan to get rid of all knots
Sugar - Use granulated sugar and not powdered sugar
Ghee - Start with melted ghee for this recipe, the timings for heating will stay consistent then
How to Make Mysore Pak (Step by Step Recipe with Tips & Timestamps)
Step 1
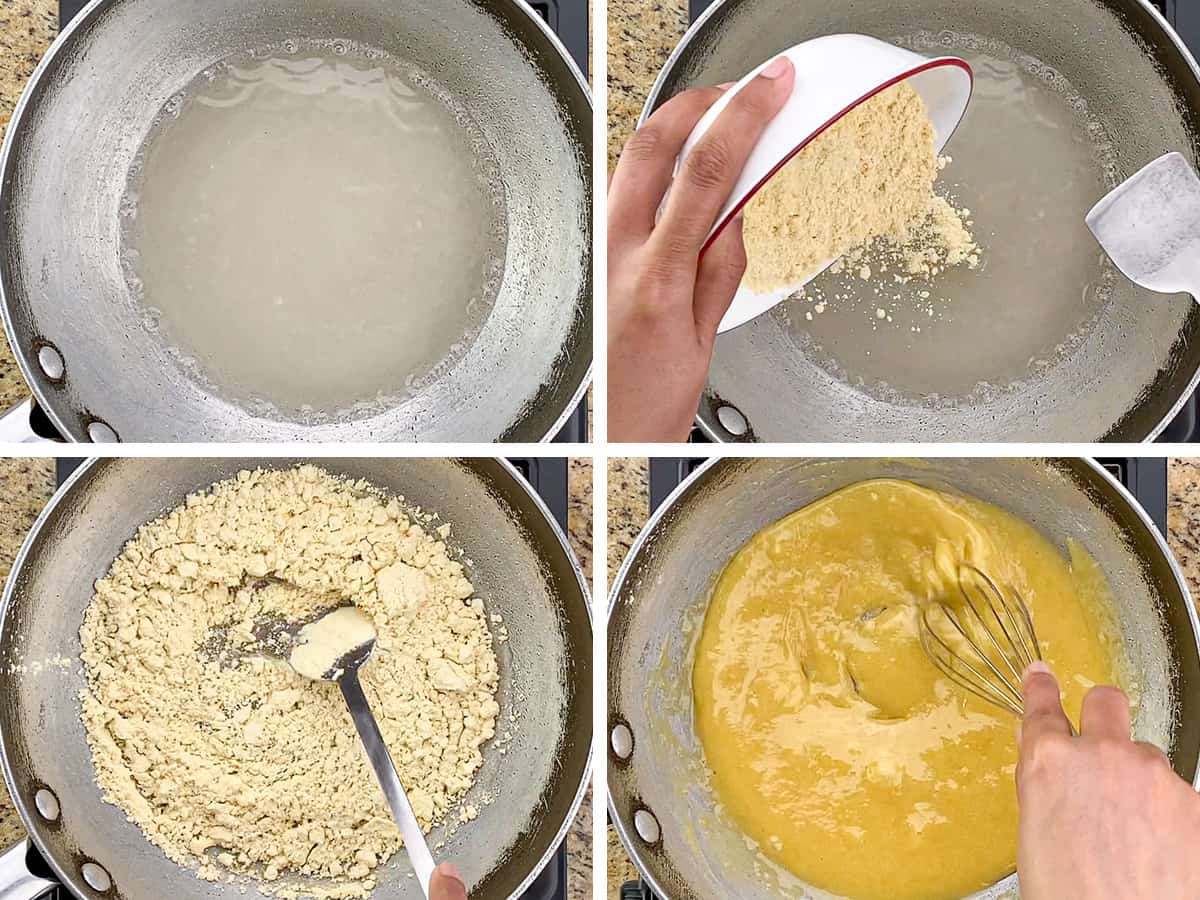
In a thick bottomed pan, take 1 cup sugar + ¼th cup water (basically just enough water to cover the sugar).
Tip (and Time Stamp): Do not use a non-stick pan, as high temperatures may mess with the coating. Also, note down the time you switch on the gas to make the sugar syrup. In my case, it was 4 pm. And I'll keep updating the actual time it took me for this whole recipe, as we go on.
Step 2
Start heating the sugar water mix on medium heat (stirring intermittently) till there is a very light boil.
And as soon as you switch on the flame for the sugar syrup - in a separate pot, also start heating the 1 cup melted ghee on a low flame.
Tip (and Time Stamp): It is important to start heating the ghee at the same time (and on a low flame) that you turn on the gas for the sugar syrup (in my case 4 pm) - as it will ensure the ghee is warm enough without overheating/getting burnt. Because the ghee has to be just at the right temperature, not cold, not room temperature, but not boiling/burnt.
Coming to the sugar syrup - ensure that you do not overcook the mix, this step is complete as soon as there is a very light boil. Overcooking will significantly alter the consistency of the final product. I switched on the gas at 4 pm, and there was a light boil at 4.03 pm.

Step 3
Once you see the light bubbles on the sugar syrup, add ½ cup sieved besan to this sugar syrup, and mix it in, stirring continuously. Ensure to keep an eye on the ghee also, so that it doesn't overheat.
Tip (and Time Stamp): It is important to stir continuously, so that there are absolutely no knots in the besan. You can also use a whisk to make it easier to get rid of all the knots. This step took me 2 more minutes, and it was 4.05 pm by the time the besan was all mixed in. Total time so far - 5 minutes.
Step 4
Once the besan is all mixed in, add the hot ghee (slowly, in 3 parts). Ensure to stir continuously, till all the ghee is mixed in.
Tip (And Time Stamp): It is important to add the ghee in 3 parts (about ⅓rd cup at a time), to give time for the sugary besan mix to absorb all the ghee before you add more.
Moreover, as soon as hot ghee touches the besan mix, it will instantly cook parts of it, and at this point you will also be able to see the many layers that are getting created.
Which is why at this time, it is critical (more than ever) to keep stirring continuously, because that's what will keep creating all those delicious layers and air-pockets.
It took me 2 minutes to incorporate all the ghee, which means at this point it was 4.07 pm. Total time so far - 7 minutes.

Step 5
From this point on, just ensure you stir continuously, till you can see all the different layers, and the ghee starts coming out in the sides. At which point, you must switch off the gas, and pour the mix in a container immediately.
Tip (And Time Stamp): Once you see the ghee leave the sides, turn off the gas immediately. This should take about 2-3 minutes from the time all the ghee was added, but this time might vary, so keep a watch out for when ghee leaves the sides.
In my case, it took me 3 minutes, which means my mysore pak was ready at 4.10 pm (Total 10 minutes from the start).
But this time can vary by a few minutes depending upon the kind of cooktop you are using, and for this recipe a few seconds here and there could mess with the consistency, so pay very careful attention here. The ghee leaving the sides is the best indicator your mysore pak is ready.
Also, there should be a little ghee leaving the sides, not a whole pool of ghee.
If you over-cook it, you will get hard Mysore Pak.
On the other hand, if you under-cook it, you will get soft Mysore Pak with barfi like texture.
The goal, in this case, is to get a crumbly soft texture, which holds firm, but breaks easily, and one that has a lot of layers and air-pockets.

VERY IMPORTANT!! Choose the container you pour this mix into wisely. It needs to be able to withstand high temperature, and should be a little thick all around - steel/glass containers will work well.
Also consider the shape and the size of the container you choose, as the shape will determine the shape of the mysore pak and the size will determine the thickness.
I use this rectangular Pyrex glass storage container for this quantity of Mysore Pak.
FINAL Step
Let it rest for 10-15 minutes before you break it into squares (or rectangles) to serve.
After you pour the mix into the container of your choice, it will bubble a little, before it settles down.
DO NOT try to flatten it or help it settle in any way. This might mess with the layers that will develop naturally. I'd say leave it alone for 10-15 minutes, and then cut and serve.
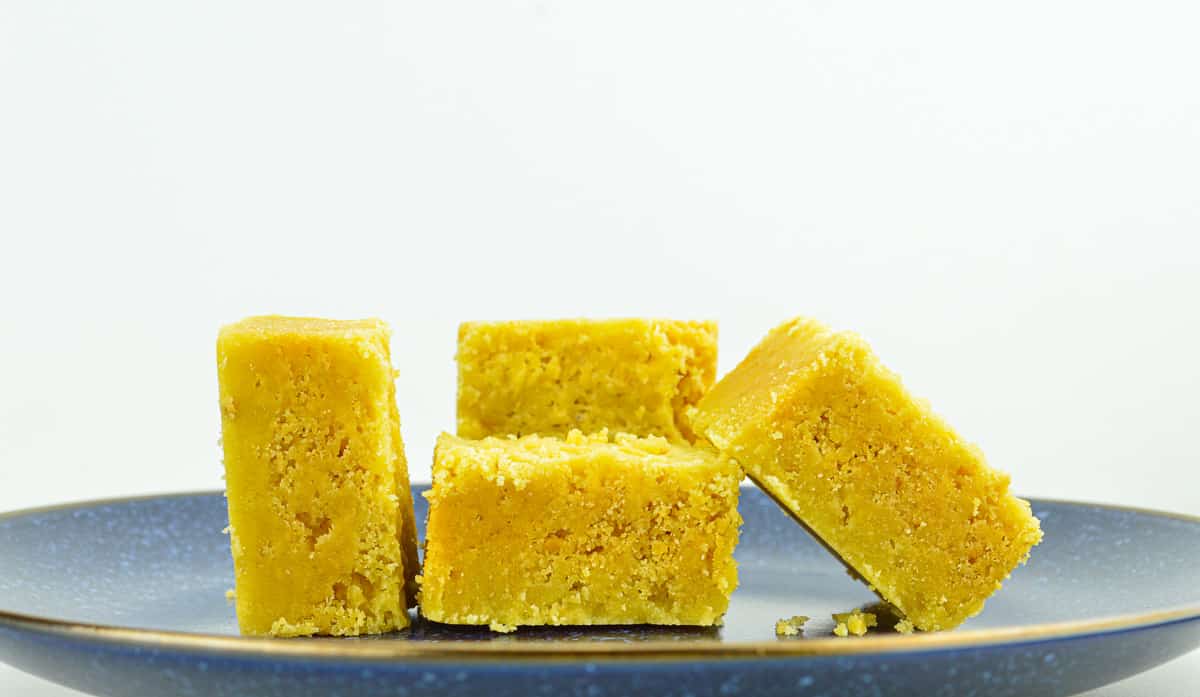
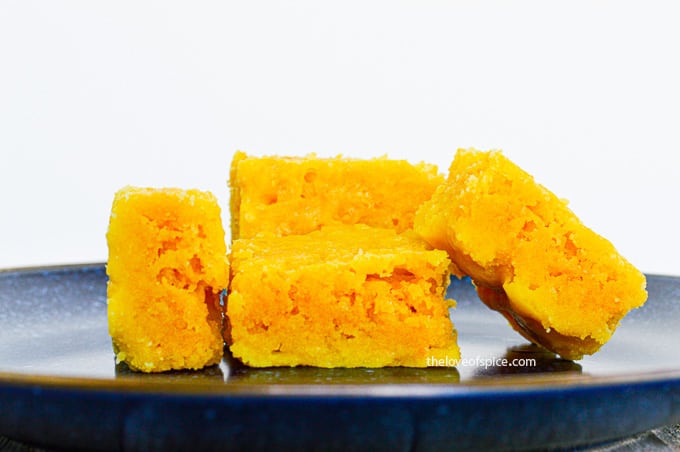
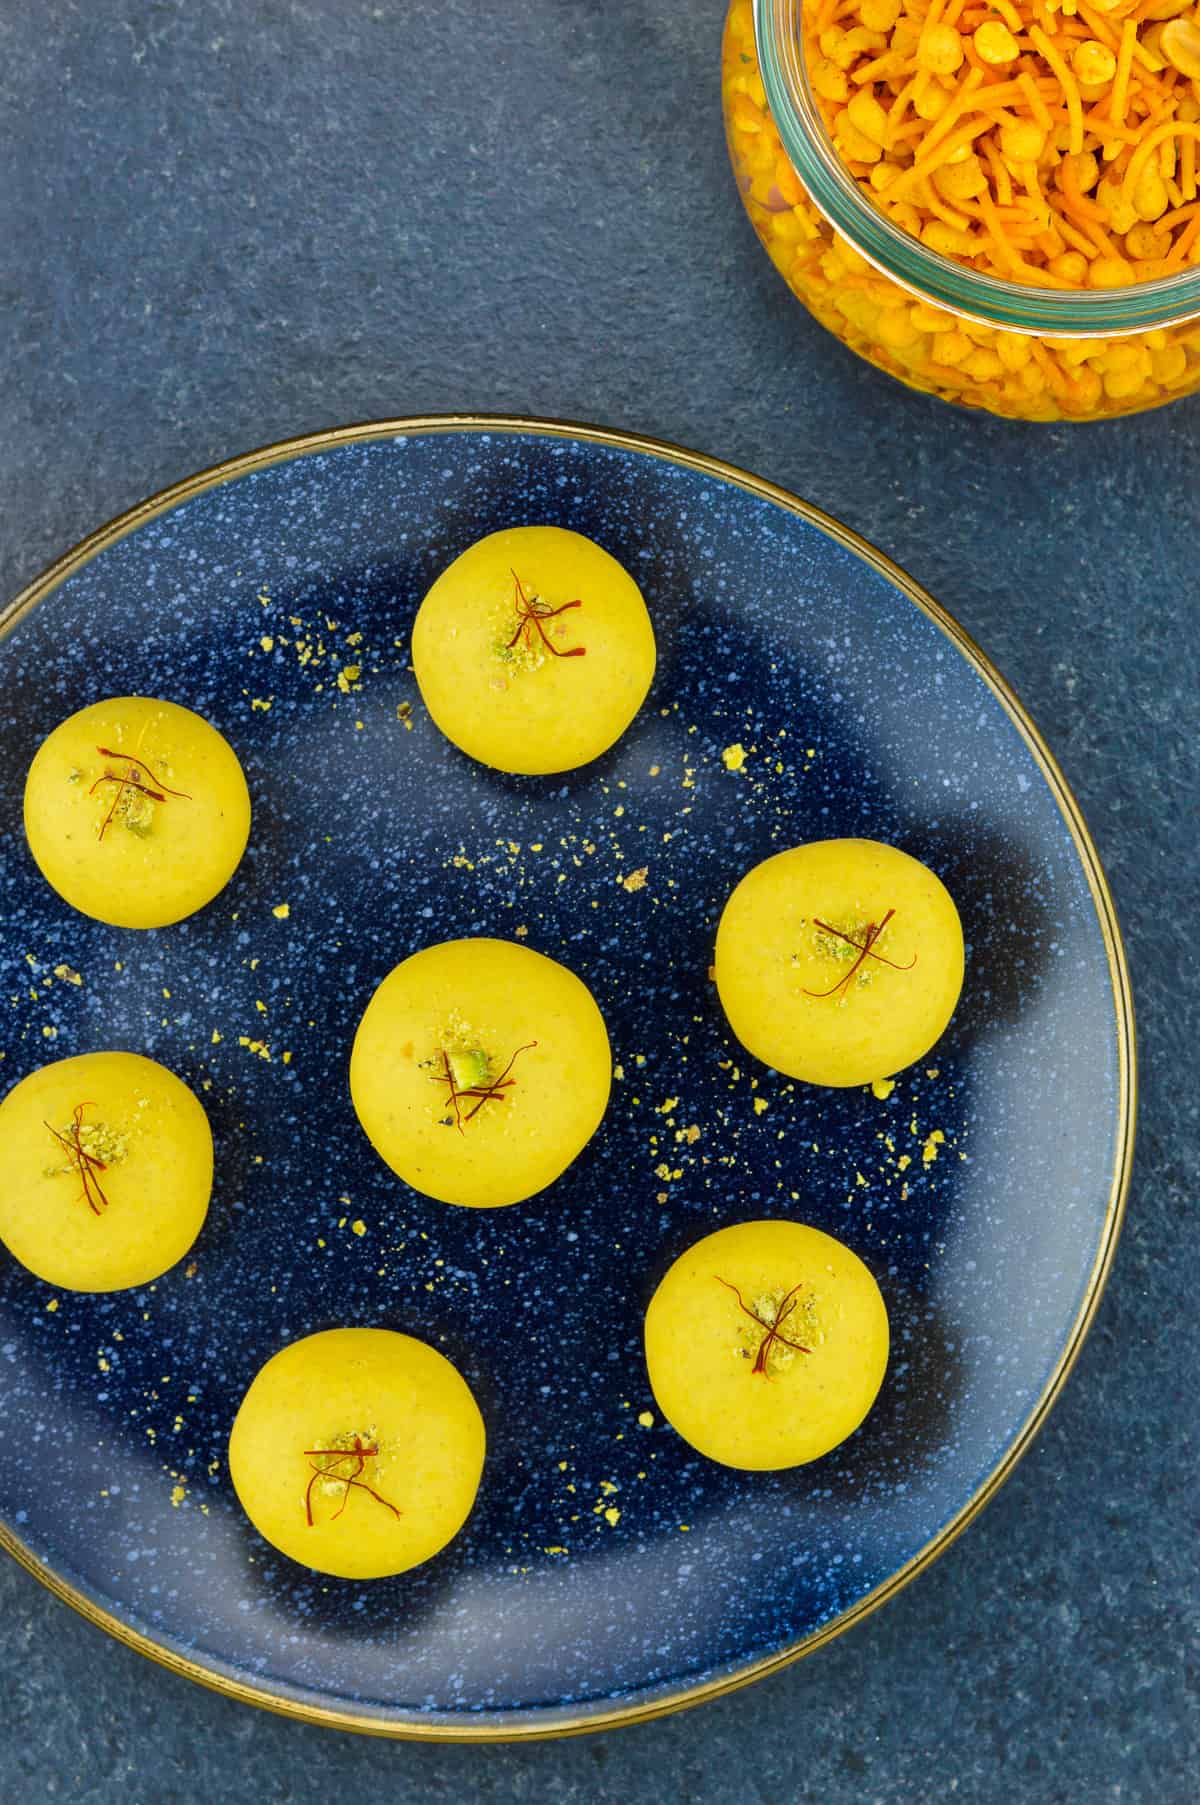
What does an ideal crumbly Mysore Pak look like?
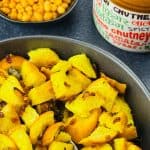
The ideal crumbly Mysore Pak will have lots of air pockets and layers, and will appear a little brown in the center, but yellow on top & bottom (see featured image).
The color varies in this manner because we pour the mysore pak mix into the container at a certain temperature, and the top & the bottom are exposed (and are in immediate contact with either container or air) & cool down immediately, but the center retains warmth, and continues to cook and brown.
Note:
This recipe calls for continuous stirring, and scraping (the bottom and the sides) to mix everything well, create air pockets, and also to avoid having a burnt layer at the bottom or sides.
Which admittedly is quite the hand workout, but all the stirring and scraping is very critical to how this recipe turns out, so it's not something that is optional.
Recipe Video
This is the kind of recipe that has a low margin for error, so in addition to the step by step photos above, it will be helpful to actually see someone make it, and so I am sharing a video recipe of me making mysore pak. In the hope that you'll find value in seeing how it is made. If you still have questions, I am happy to answer in the comments below. 🙂
Variations
Hard Mysore Pak - Some (very few) people prefer a version of mysore pak that is harder & firmer than this crumbly variety that I have shared. For this version, you need to only cook the besan mix for a few more minutes than mentioned in the recipe. But this can get tricky, because a minute here and there might make it too hard to even bite into.
Soft Mysore Pak - This softer version of mysore pak is more like Barfi, and is more widely loved. A lot of people prefer this texture over the crumbly mysore pak. For this version, you need to remove the besan mix a few minutes earlier than mentioned in this recipe. But again, you will need to determine the best time because if you remove it too soon, you will get that raw besan taste in your mouth.
Jaggery Mysore Pak - In this version, sugar is replaced with jaggery. I personally have not tried this, but it's on my list to try, especially since I have already replaced white sugar with jaggery in my day to day cooking.
Frequently Asked Questions
It's difficult to salvage the mysore pak if it has all turned into powder that doesn't bind. But you can repurpose it and make a version of kheer by adding it to milk & stirring until it dissolves, and garnishing with nuts & saffron. Or adding a little ghee to bind them into ladoos.
Since mysore pak has a small margin for error, there is not much you can do to repair and rectify it after the fact, once you have poured it from the pan & let it set. So if mysore pak has turned into a halwa, the best thing to do is eat the halwa, and try again. It's a tricky recipe to get right at the first go.
More Indian Sweets to Try
Eggless Nankhatai
Delicious Besan Ladoo
Churma Ladoo Recipe
As always, I hope you found this recipe useful. If you did, please let me know your rating ⭐️ and feedback ? in the comments below, or simply rate the recipe right on the recipe card. I'd really appreciate it. ❤️

Mysore Pak Recipe
Equipment
Instructions
- In a thick bottomed pan, heat up 1 cup sugar + ¼th cup water (on medium heat), stirring intermittently, till you get a very light boil.
- Also, as soon as you switch on the flame for the sugar syrup - in a separate pot, start heating the 1 cup melted ghee on a low flame. It is important to start heating the ghee at the same time, so that the ghee is warm enough, without getting overheated/burnt.
- Once you see the light bubbles on the sugar syrup, add ½ cup sieved besan to this sugar syrup, and mix it in, stirring continuously, to ensure no knots are formed in the besan flour.
- Once the besan is all mixed in, add the hot ghee (slowly, in 3 parts), and ensure to stir continuously, till all the ghee is mixed in. It is important to add about ⅓rd cup of ghee at a time, to give time for the sugary besan mix to absorb all the ghee before you add more.
- Once you've added all the ghee, just ensure you stir continuously, till you can see all the different layers, and the ghee starts coming out at the sides. At which point, you must switch off the gas, and pour the mix in a container immediately.
- After you pour the mix into the container of your choice, it will bubble a little, before it settles down. DO NOT try to flatten it or help it settle in any way. This will mess with the layers that will develop naturally. I’d say leave it alone for 10-15 minutes, and then when it firms up a little, cut it into squares / rectangles to serve.
Notes
- Choose the container you pour this mix into wisely. It needs to be able to withstand high temperature, and should be a little thick all around – steel/glass containers will work well. Also consider the shape & size of the container - the shape will determine the shape of the mysore pak and the size will determine the thickness.
- Ghee leaving the sides is a good indicator that mysore pak mix is ready. But there should be a little ghee leaving the sides, not a whole pool of ghee. A whole pool of ghee means you have over-cooked it, and you will get hard mysore pak, which can get too hard to even bite into.
- On the other hand, if you turn off the heat too soon, then you have likely under-cooked it, and you will get softer barfi like texture. Which is okay if that's what you are going for. But be careful to not take it off the heat too soon, where the besan is not fully cooked, because then you'll be able to taste the raw uncooked besan.
Nutrition
Video Recipe
If you'd like FREE recipes and meal prep ideas delivered directly to your email inbox every Friday in one short email, then subscribe to the Foodie Friday list HERE, and never run out of ideas on what to cook over the weekend or prep for the week ahead. 🙂

Dr Shivangi says
I really loved the way you divided the recipe into time tags and explained all the errors that can be comitted while making Mysore Pak. Thanks for this recipe! My mother was looking for one! 🙂
LoveOfSpice says
Oh I am glad you found this recipe then. I would love to hear how it turned out for her (if she tries it). 🙂
Suhasini says
You made me crave for mysorepak now
LoveOfSpice says
I hope you try this recipe, it will soothe your craving. 🙂
Priya Florence Shah says
Yummy! Who doesn't love Mysore Pak.
LoveOfSpice says
A rare few. Most folks adore this treat! 😀
BellyBytes says
This is one of my favourites and I will try out this version s the one recipe I did follow did not have a porous pak .....
LoveOfSpice says
Thank you! I look forward to hearing how it turned out for you.
Ramya Abhinand says
Thi is something similar to the version my mother in law makes. The crumbly texture, yet melt in the mouth. But I must confess, I never get it right. Time to give it another try.
LoveOfSpice says
I hope you do, and love it as much as I do. 🙂
Sonia Chatterjee says
I have stayed in Mysore for 5 years and this used to be a personal favorite. The picture itself brought up so many memories.
LoveOfSpice says
As it happens, I have never tried Mysore Pak in Mysore, but I have heard there is a famous shop on Bangalore Mysore Road that serves mouth watering Mysore Pak.
Rachna says
Very methodical recipe, Shantala. Like I mentioned I somehow have never liked Mysore Pak but I am sure it will help those who want to make it.
LoveOfSpice says
Thank you, Rachna.
Sanch @ Sanch Writes says
I agree...the crumbly version is the best! I don't make or eat Indian sweets too much though because I find them a bit too sweet for my liking. This is in spite of having a sweet tooth!
LoveOfSpice says
That's interesting. I don't have a sweet tooth, so I find most things too sweet. So I limit my intake to only things I truly love in this department. This is definitely included in my list.
Shailaja Vishwanath says
I am actually cutting down on sweets over the last few months but a post like this can destroy all my resolve! Excellent, step by step recipe, Shantala! I love the time tags 🙂 Makes it even simpler.
Also I have a craving for Mysore Pak now!
LoveOfSpice says
Hehe..I totally understand. This is why I have been really focusing on my fitness routine, because all the experimenting and taste testing is completely messing with my calorie count. 😀
Puru says
I love crumbly mysore pak. ?
LoveOfSpice says
Me too! 😀