


An Instant Pot Ghee recipe that is ready in 10 minutes, requires minimal monitoring, and turns out consistently perfect every single time. So much so that once you try this recipe for making homemade ghee in the Instant Pot, you'll never want to make it any other way or be tempted to buy pricey store-bought ghee again.
Jump to:
What is Ghee?
Ghee is a delicious and distinctly flavored fat, that has grown in popularity over the world in the past few years.
But Indians have known, used and loved it for ages! In-fact it's a required ingredient to make most Indian sweets, the 'x' factor that makes the sweets that much more delicious.
And because it's shelf stable and has a generously high smoke point, it can easily replace regular cooking oils.
Benefits of Ghee
It's every single foodie's not-so-secret wish to hear that something delicious is actually good for them. But most delicious things are not. However ghee is the exception to the rule.
This liquid gold of the culinary world is delicious and good for you.
Here I'm highlighting only a few of the many wonderful benefits of ghee..
- It's a nutritional powerhouse, containing many fat soluble vitamins, that aid a wide variety of bodily functions ranging from brain health to immune system.
- It's a good source of energy, and an excellent source of good fat, as it's high in monosaturated Omega-3s, the same heart healthy fats found in salmon.
- It's considered to have many anti inflammatory and anti viral properties, and is known to aid the digestive system by helping heal and repair the stomach lining.
Why Make Homemade Ghee?
It's been several years now that we haven't used store bought ghee. And we started because it was really simple to make ghee at home, plus it was so much more delicious.
But these days, especially since the world has seemingly woken up to the many benefits of ghee, it's become super over-priced too. So it's an absolute no-brainer to make ghee at home, for us anyway.
Making Ghee from Unsalted Butter
Traditionally ghee used to be made from the cream of milk. But that's a much longer process that involves first getting the cream of milk, and then whipping it to separate the white butter from the milk, then making ghee from that white butter.
In this recipe, I have made ghee from store-bought unsalted butter. And you can go with the brand you want, but I usually use the Costco brand Kirkland Unsalted Butter or Kerrygold Irish Butter. The latter is pricier than the former, but the ghee comes out super delicious. I usually reserve that one for special occasions or making sweets etc. But any brand of unsalted butter will work.
Ghee Vs Clarified Butter
Ghee and clarified butter are two terms that are used almost interchangeably, but ghee is NOT the same as clarified butter. There is a difference!
Butter consists of butterfat, milk solids, and water. Regular grocery store butter consists of 80% butterfat, 16-18% water, and 2-4% milk solids. Some European brands have butter that has 82% butterfat, and homemade butter usually has an even higher % of butterfat.
This is important because higher the % of butterfat, the more flavorful it gets, and the baked goods that it's used in turn out more flakier.
Clarified Butter is 100% butterfat. Because it's made by heating butter on medium flame, whereby the water evaporates & the milk solids separate and sink to the bottom.
Ghee is also 100% butterfat, but unlike with clarified butter, where butter is cooked only to the point where milk solids separate, for making ghee - butter is cooked to the point where milk solids start to caramelize.
How to Make Ghee in Instant Pot
When I first started making ghee at home, I used to do it on the stovetop, which was a fairly simple and straightforward process of cooking the butter on medium heat, and adjusting the heat to ensure that the ghee doesn't bubble over, till the milk solids separate & caramelize.
Instant Pot has helped make this relatively simple process even more hands off and hassle free, and also cut down the time to make ghee by almost half.
All you need to do is turn on the Instant Pot in Saute (normal) mode, and cook the butter till first the milk solids separate from the fat (at this point you get clarified butter), and then the milk solids start to caramelize.
Visual cues are your best friend when it comes to knowing if ghee is ready. You need to hit cancel & turn off the heating when the surface of the ghee is covered by white bubbles and the color turns golden, with the milk solids turning lightly reddish.
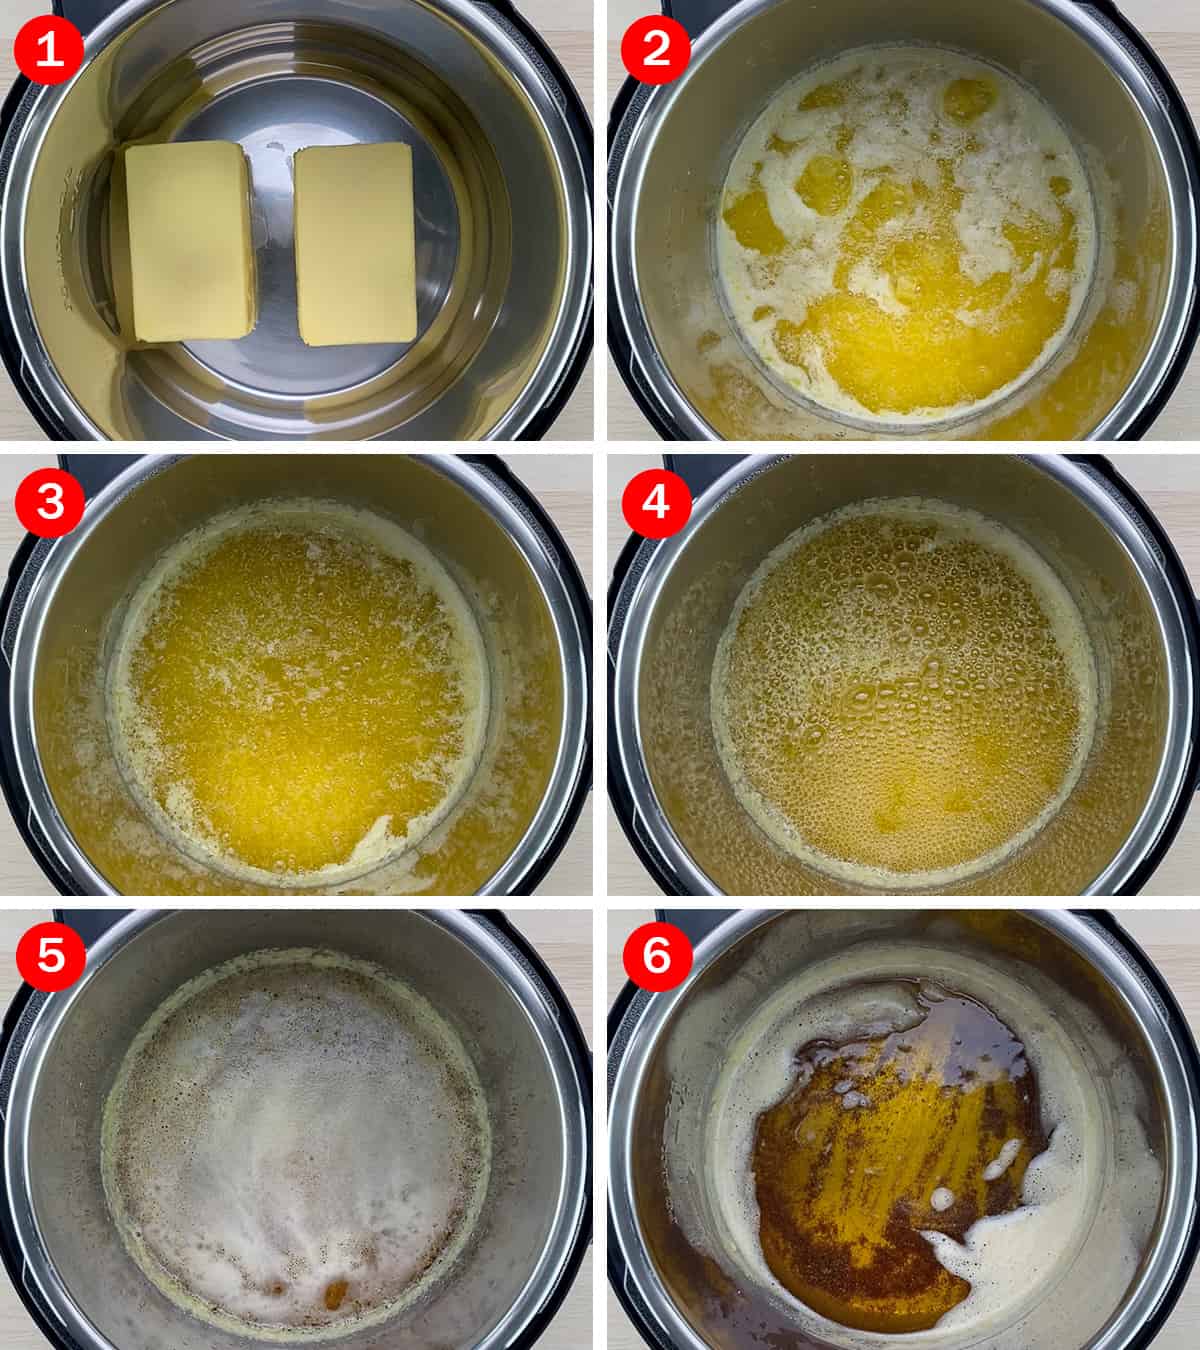
In the Instant Pot this takes about 10 minutes for about 1 pound of refrigerated butter. But this time can vary based on the quantity and temperature of butter. Frozen butter will take a little longer to melt, and it'll be faster using room temperature butter. However the visual cues will stay the same, so it's best to focus on them.
And pay careful attention in the last few minutes, in this case from the 7-8 minute mark to ensure you switch off the ghee at the right time, and don't burn it.
Especially because the ghee will cook for a few minutes even after you have switched off the heat, and turn deep golden in hue, so it's best to account for that.
That being said, do not wait for the ghee to turn deep golden in hue before you hit cancel, because then it’s likely that the ghee will burn in the few extra minutes it keeps cooking after you hit cancel.
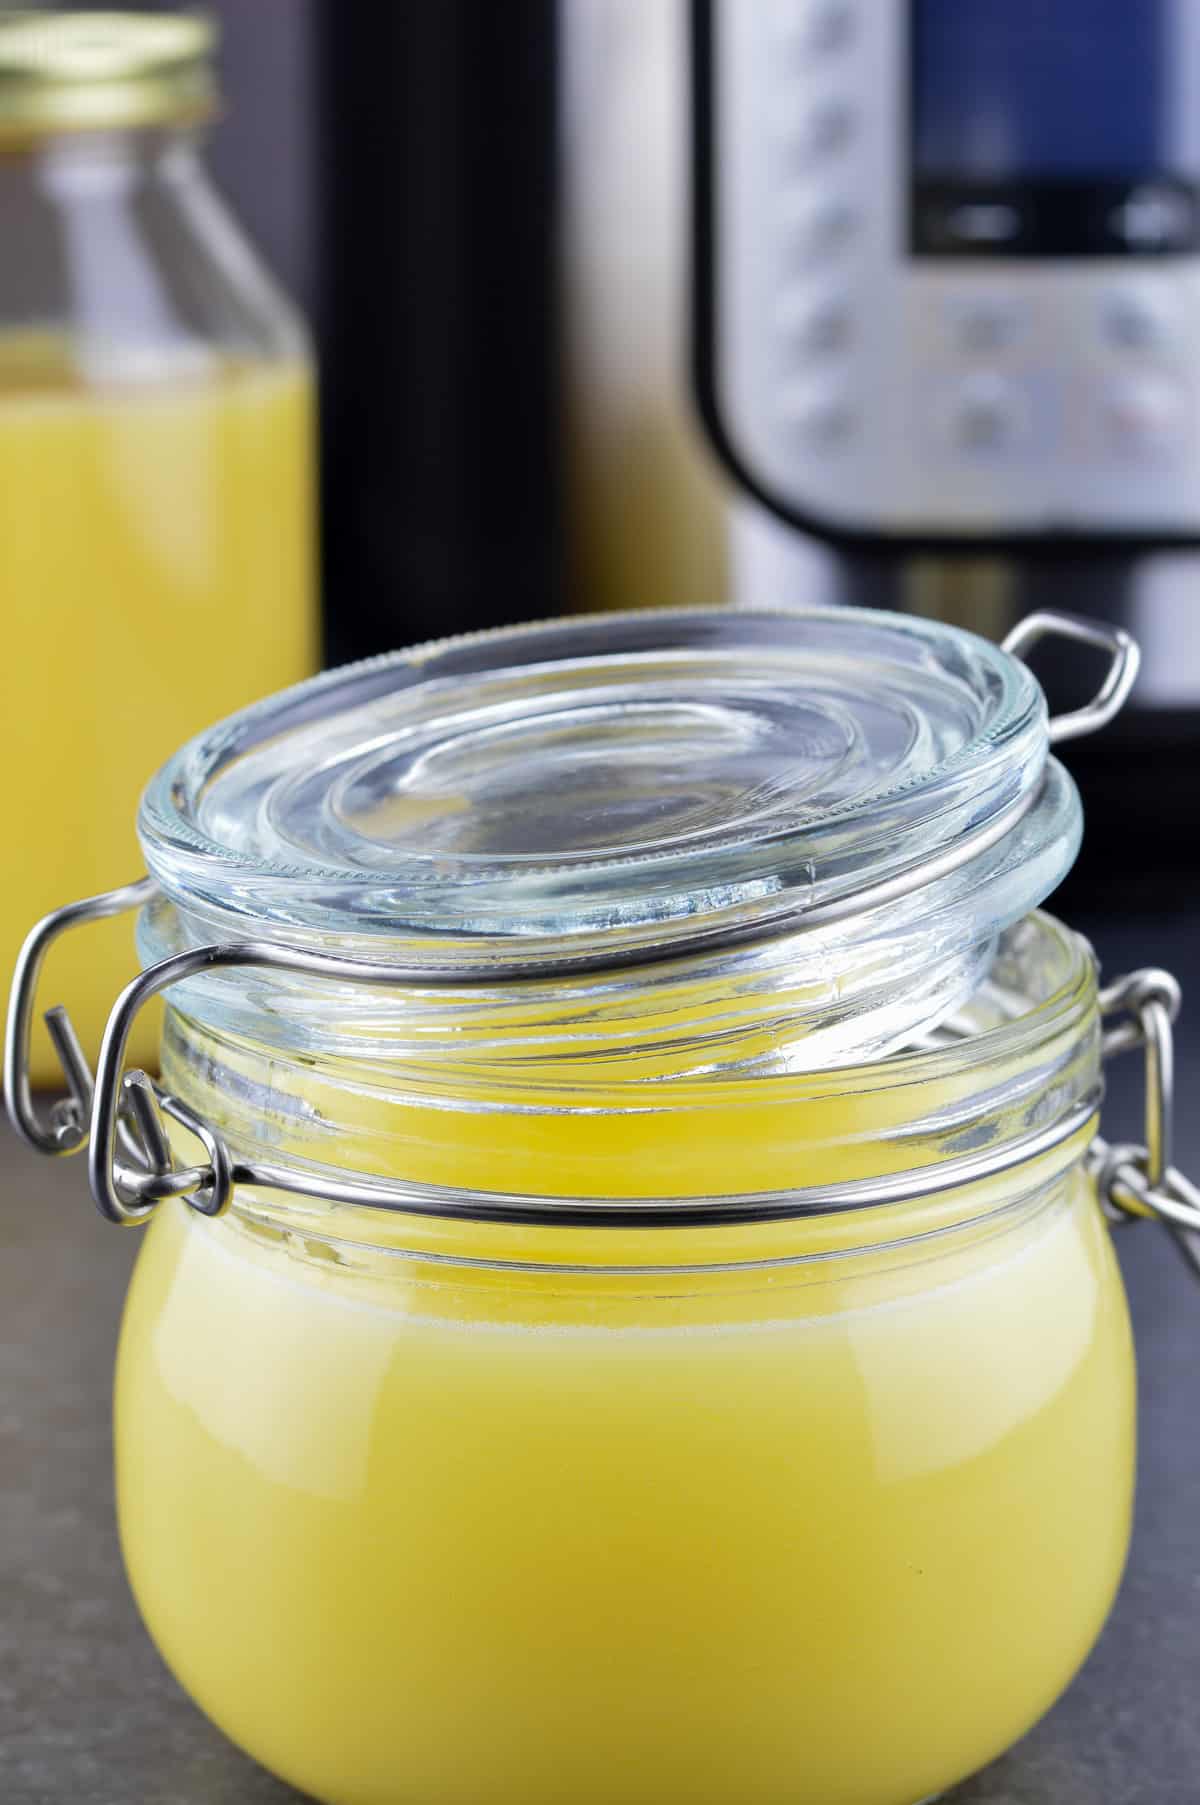
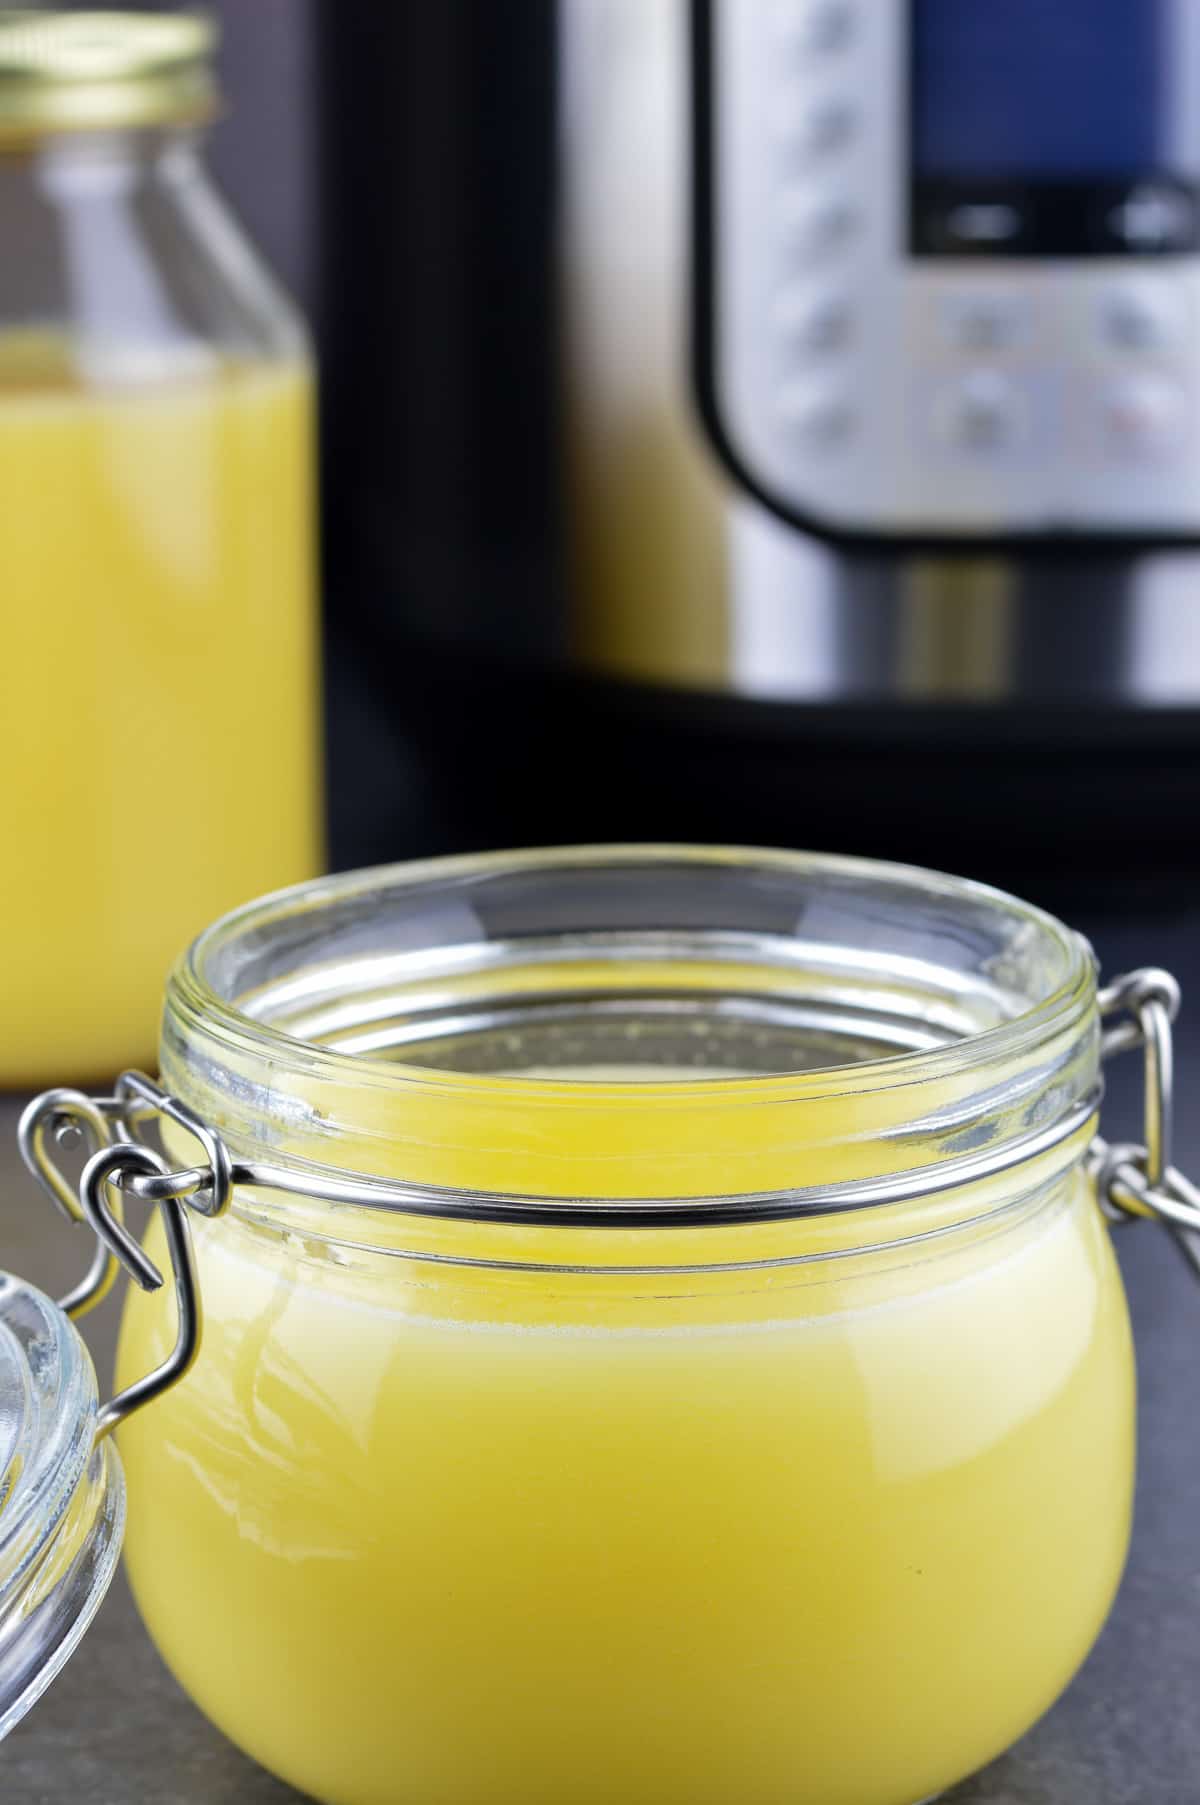
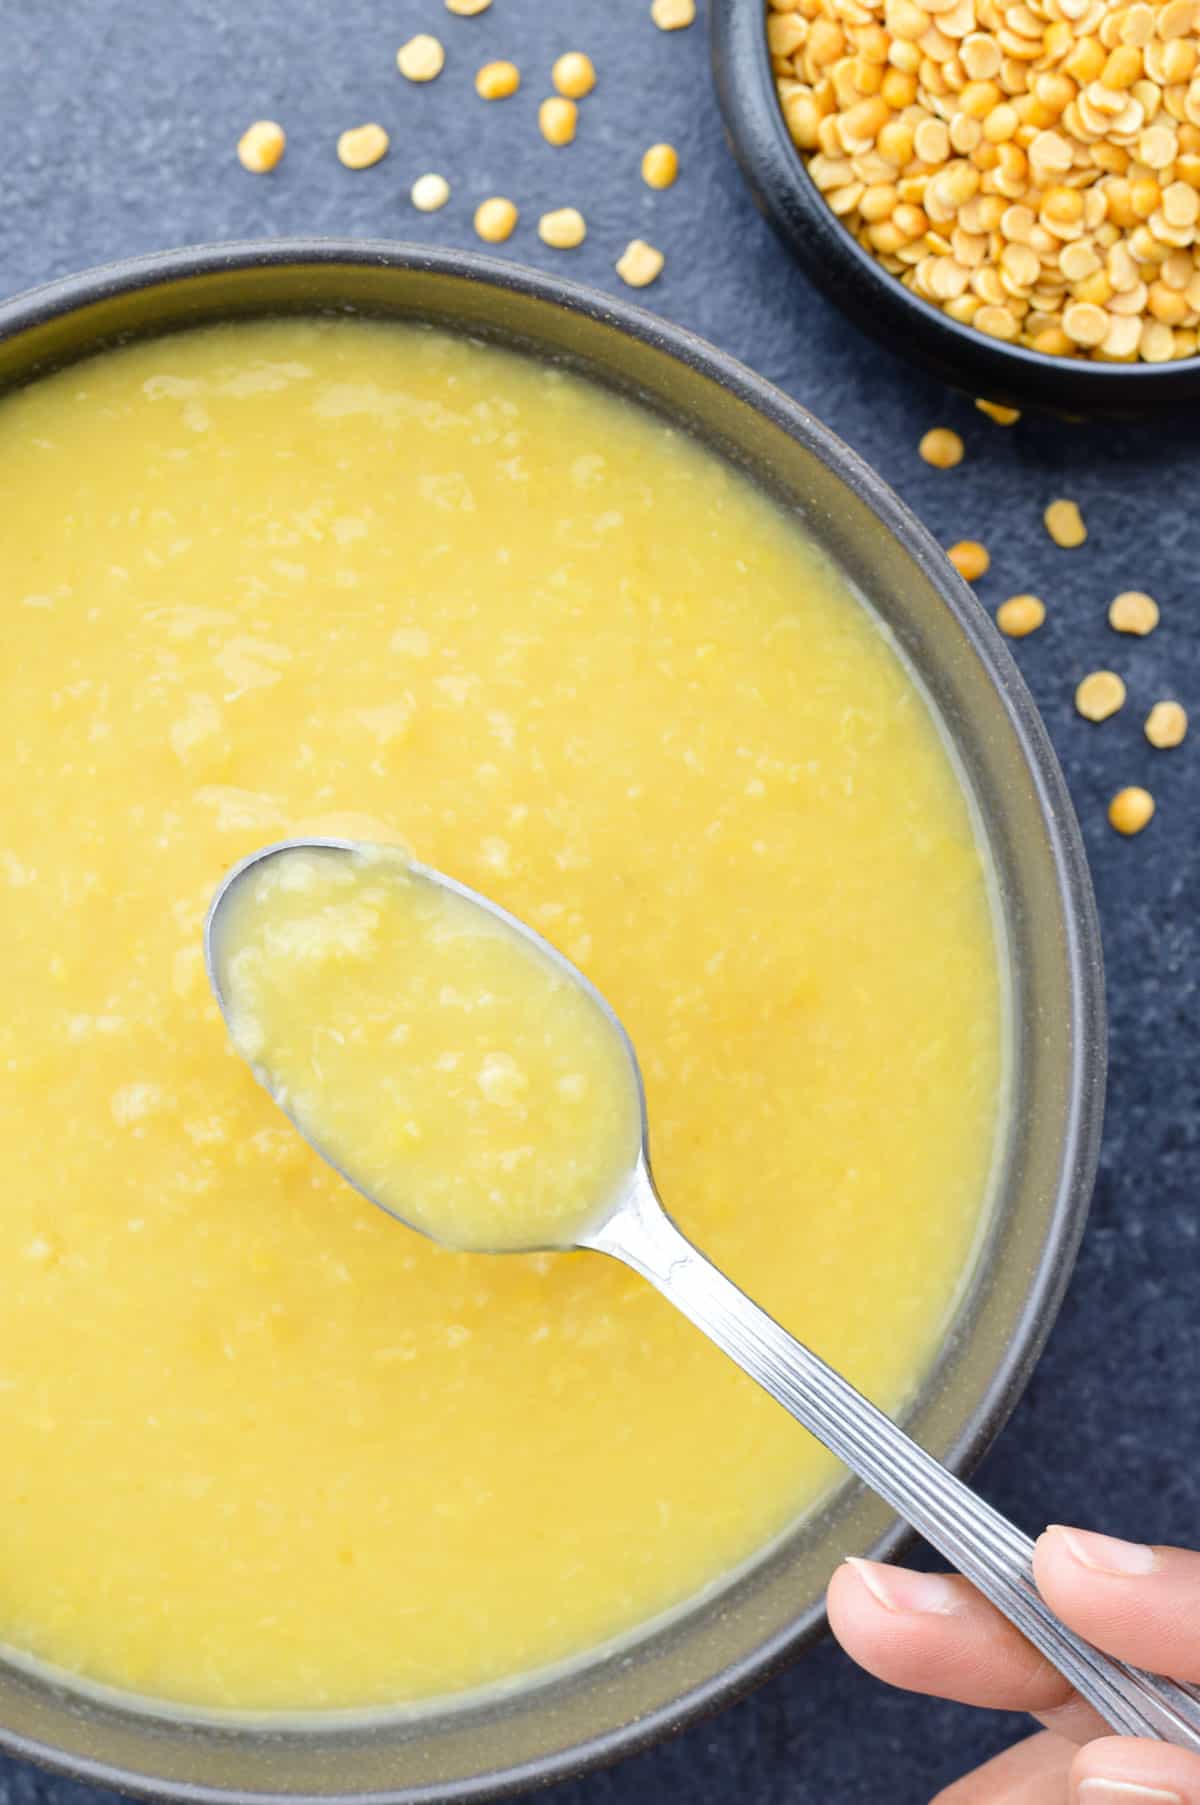
Once the ghee is ready, let it cool to about room temperature. Then strain it using a muslin cloth or a regular steel strainer, to separate the milk solids from the ghee.
Storing Homemade Ghee
You can store homemade ghee in a clean airtight glass container at room temperature. Or even refrigerate it.
But I always store ghee at room temperature, because I almost always use it within a month or two. Also, it's useful to have room temperature ghee on hand for recipes like this nankhatai which specifically calls for grainy room temperature ghee.
Just ensure to always use a clean and fresh spoon while dipping into a jar of stored ghee.
Serving Suggestion
Ghee has endless number of uses. You can use it as a replacement for butter, or for sautéing and even deep frying because of the high smoke point.
On a daily basis, we use ghee on our rotis and parathas, and for making the majority of Indian sweets like this mysore pak or besan ladoos.
Frequently Asked Questions
If the milk solids & ghee have tuned brownish black, the ghee is burnt. You can avoid this by keeping an eye on the ghee during the last couple of minutes when it's getting ready. Turn off the heat as soon as the milk solids have started turning light red, and the ghee is light golden in color. Ghee will cook for a few minutes even after you turn off the heat, and turn a deeper shade of gold. But do not wait for it to turn deep gold before you turn off the heat, else it will burn in the few additional minutes it keeps cooking after you turn off the heat.
You can use the leftover milk solids in many ways, from spreading it on your toast or rotis, or using it for making roti dough, and even making delicious Indian sweet treats like ladoos and milk cakes. Alternatively you can simply mix it in with sugar, and rice, and even in your coffee.
Ghee is made from unsalted butter. But yes, you can make it from salted butter too. The timings will vary. It will take a few minutes less using salted butter.
Watch How to Make It (Clear Visual Cues)
Recipes Using Ghee
⭐️ Bakery Style Nankhatai
⭐️ Delicious Ghee Dal
⭐️ Chicken Ghee Roast
⭐️ Wheat Flour Ladoos
⭐️ Crumbly Mysore Pak
As always, I hope you found this recipe useful. If you did, please let me know your rating ⭐️ and feedback ? in the comments below, or simply rate the recipe right on the recipe card. I'd really appreciate it. ❤️

Instant Pot Ghee
Equipment
Ingredients
- 1 lb unsalted butter refrigerated
Instructions
- Put sticks / blocks of refrigerated butter in the inner pot of the Instant Pot.
- Start Instant Pot in saute mode - normal.
- Butter will first melt, then turn milky, and you will see an almost white layer on top.
- After this, the butter will start to bubble up.. and eventually these bubbles will clear out. But it's at this point, that you must start watching closely, because once this initial layer clears out, it will only take a few minutes for the ghee to be done.
- Very soon - the color will start to deepen, milk solids will start to separate, and the bubbles will become smaller and smaller.
- When the bubbles cover the entire surface, and the ghee appears lightly golden in color -- hit cancel. This takes about 10 minutes for 1 pound of refrigerated butter, but the time can vary based on quantity and temperature of the butter. Visual cues will not vary. (see notes)
- The ghee will continue to cook for a couple of minutes even after you have hit cancel, and it will have a deeper golden hue when done.
- Allow ghee to cool to room temperature, and then strain it to separate the milk solids.
- Store ghee in a clean airtight glass container.
Notes
FAQs How to avoid ghee from burning?
Ghee is burnt if it has turned brownish black. To avoid this, turn off the heat as soon as the froth covers the top, the milk solids have started turning red, and ghee is light golden in color. The ghee will cook for a few minutes even after the heat is turned off and turn deep golden in hue. If you wait till the ghee is deep golden to turn off the heat, the ghee will most likely be burnt. What to do with leftover milk solids?
Spread it over toast or rotis & parathas, mix it in with sugar or rice, use it in the dough to make Indian breads, or make Indian sweet treats like ladoos and milk cake. Can you use salted butter to make ghee?
Ghee is made from unsalted butter. If you are using salted butter, it will cook faster, so for a pound of salted butter, keep an eye for visual cues at the 6 minute mark instead of 8 minute mark.
Nutrition
Video Recipe
This post was first published in 2020, and has been republished with updated instructions, images, as well as a recipe video in March 2025.


Melissa says
Instructions were very clear and the video was super helpful. Ghee turned out great.
The Love of Spice says
Thank you so much! Glad you found it helpful.