


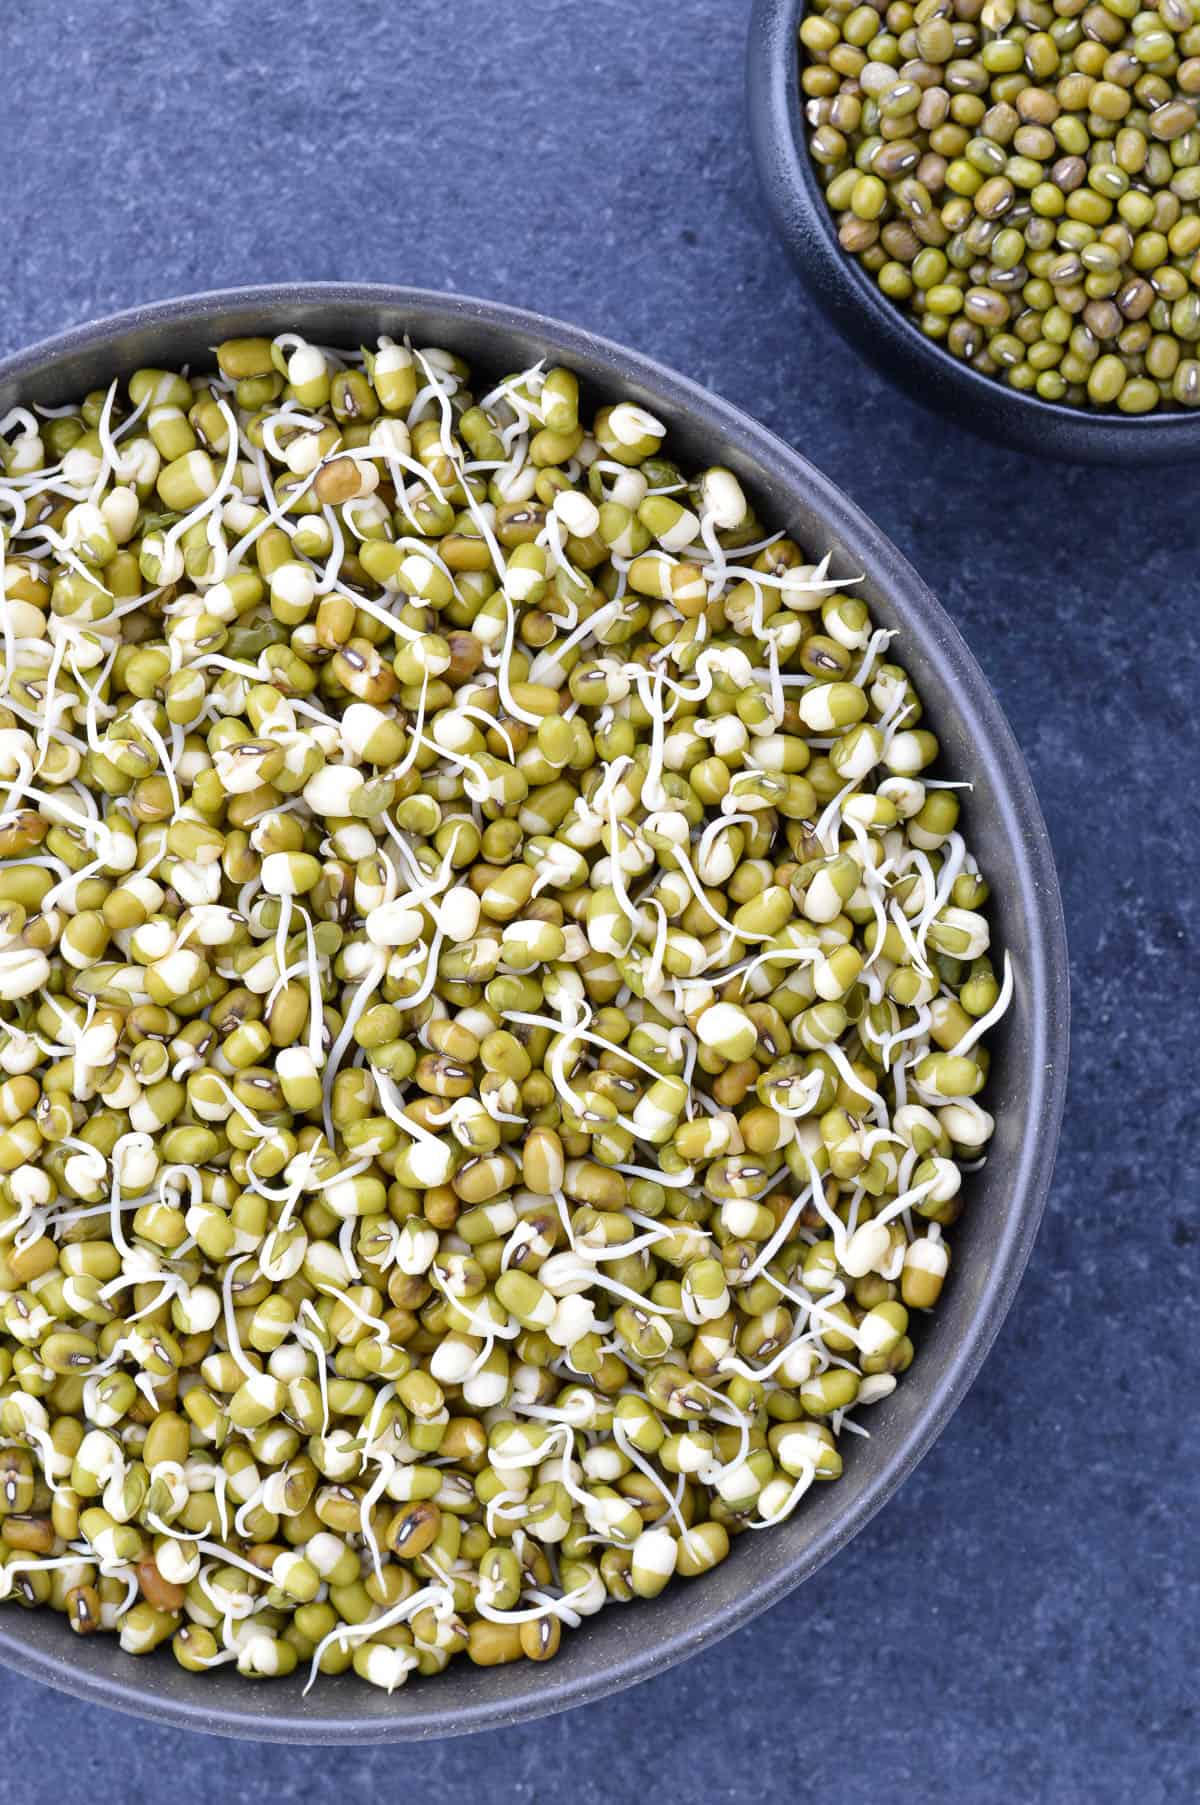
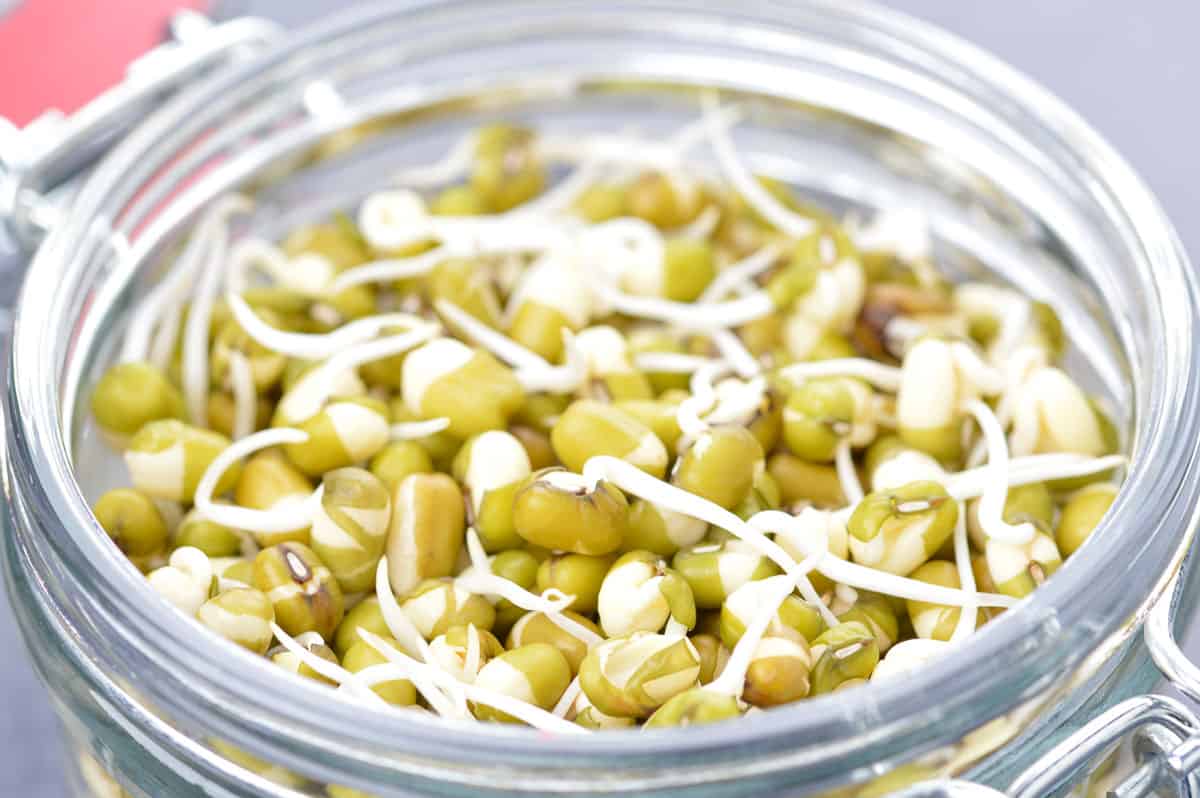
Mung beans are packed with healthy nutrients, and are one of the best sources of plant based protein. When sprouted to get mung bean sprouts (moong sprouts) - they contain lesser calories, and yet more antioxidants and essential amino acids.
This is a detailed step by step guide on how to sprout mung beans at home, shared along with many different alternative ways of sprouting moong beans at home, including an Instant Pot option to sprout mung beans quickly.
Sprouting beans is pretty simple and easy! There is not much to it. There are only two main components to it - first is soaking the bean, till the outer shell cracks open, and then providing it with a suitable environment to sprout. That's all there is to it.
And there are many different ways you can choose to do this, which is what I'll share with you in this post, along with my personal go-to method for sprouting mung beans, which I've found is the quickest, easiest, and most hassle free method to get mung bean sprouts (moong sprouts).
Jump to:
- How to Sprout Mung Beans
- Soaking Mung Beans
- Sprouting Mung Beans
- 1. Muslin Cloth Method for Sprouting Mung Beans
- 2. Sprouting Mung Beans in a Jar / Pot / Tray
- 3. Mung Bean Sprouts using Instant Pot
- How Do You Know When Mung Bean Sprouts Are Ready
- Key Recipe Notes
- Storing Moong Sprouts
- Frequently Asked Questions
- Mung Bean Sprouts (Moong Sprouts) Recipes..
- Mung Bean Sprouts (Moong Sprouts) | How to Sprout Mung Beans - with Instant Pot Option
How to Sprout Mung Beans
For sprouting any beans in general, and mung beans in particular, you first need to soak it till the outer shell cracks open, and then set it in an environment that will help the beans sprout.
Here's the step by step method to sprout mung beans, shared along with do's and don'ts, and pro tips to soak and sprout moong beans faster.
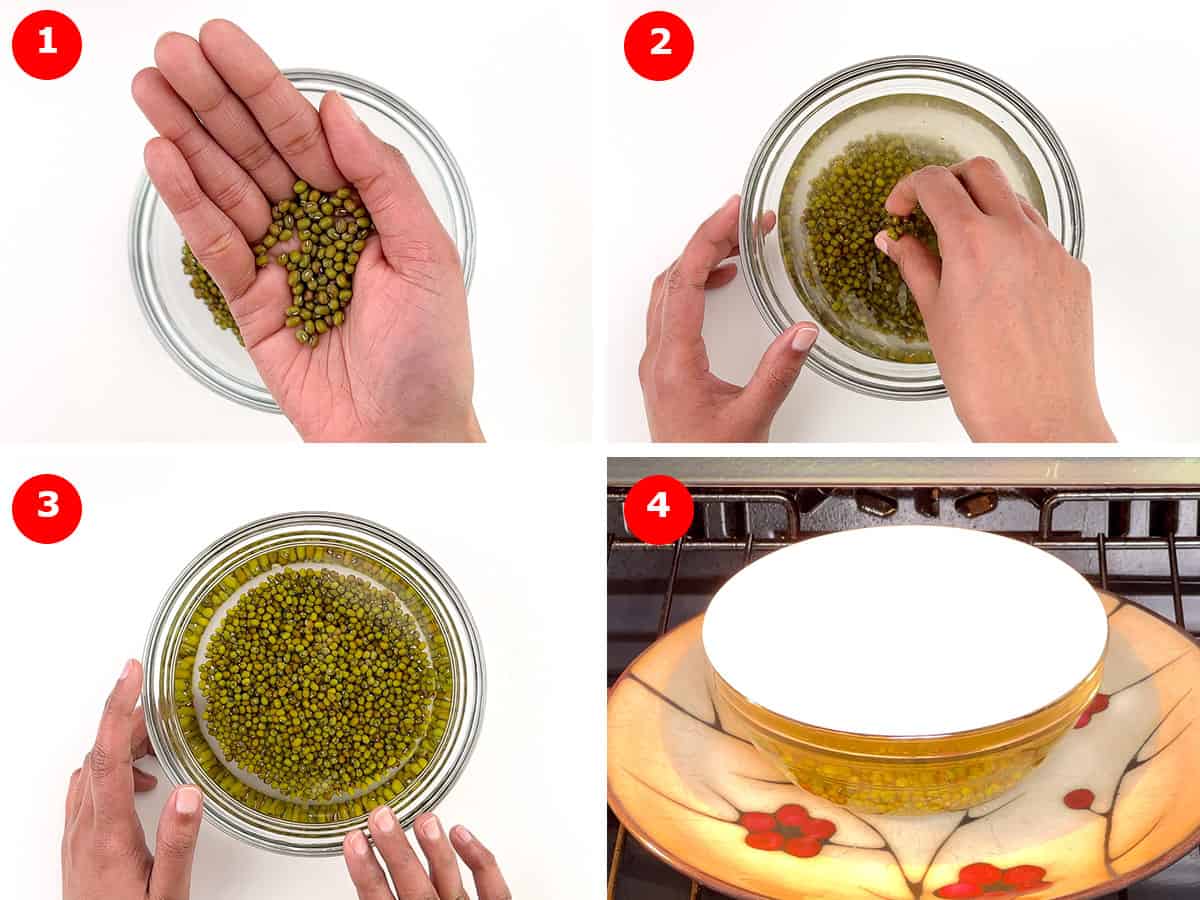
Soaking Mung Beans
- Start with properly washing and rinsing the mung beans, at-least 2-3 times, till the water runs sort of clear.
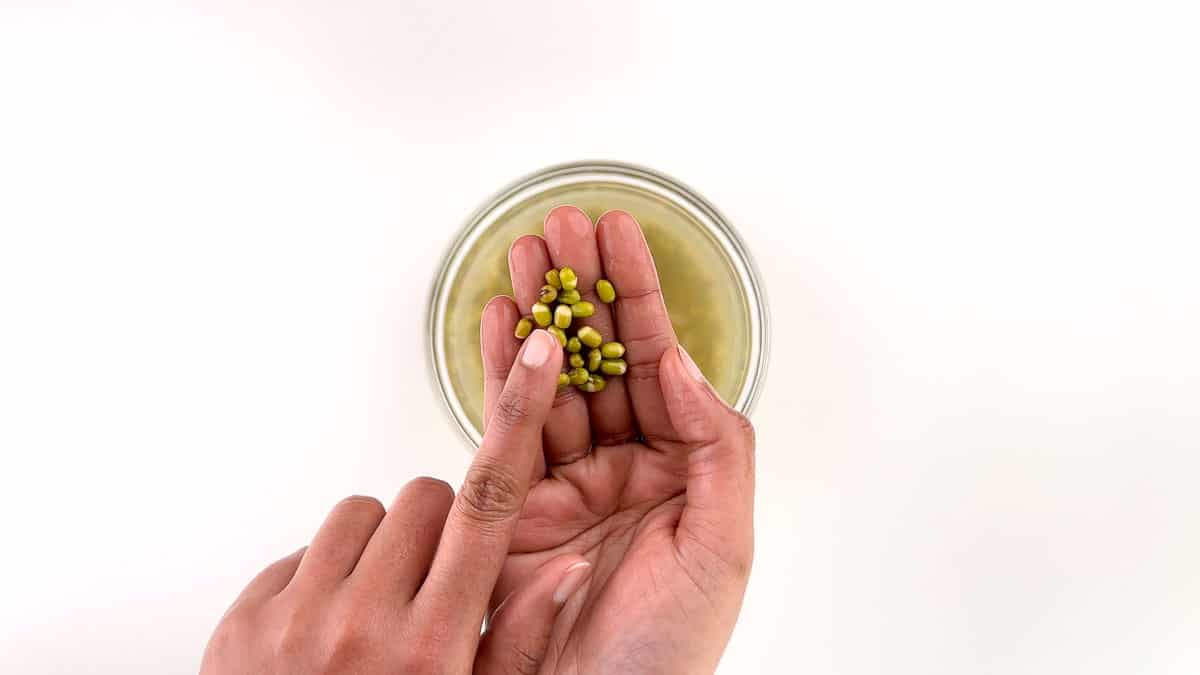
- After this, soak the mung beans in fresh water, till the outer shell breaks open.
- It's very important for the outer shell to crack open before sprouting, for the mung beans to sprout well.
? Pro tips to help crack the outer shell faster
- Wash, rinse, and soak the mung beans in hot water.
- Keep the soaked mung beans covered, and in a dark, warm place, while it's soaking.
Depending on the weather of the place you live in / season, you can cover it with a regular lid or a mesh lid.
I live in a cool dry place, so I usually cover with a regular lid, and place it inside my oven (turned off), to let it stay in a warm place (this is specially helpful in winters). But if you live in a hot & humid climate, then you can just keep it on the counter, and cover it with a mesh lid to have some ventilation (especially in summers), to avoid any mold growth. - In some cases, using filtered water to soak the beans instead of hard water is helpful. But this is not as important as the earlier two points.
⏰ If I soak mung beans in hot water, keep it covered, and let it sit in a dark warm place while soaking, it takes about 12 hours to break the outer shell. When I don't do that, it can take upto 24 hours to break the shell.
Sprouting Mung Beans
Mung beans require a warm and moist, yet ventilated and dark place to sprout. There are many ways to achieve this. I am sharing three methods, starting with the most traditional one, and ending with my personal go-to method.
1. Muslin Cloth Method for Sprouting Mung Beans
Traditionally, it was common practice to take the soaked and strained mung beans, and tightly wrap it in a muslin cloth, and keep it in a dark warm place for it to sprout, as this method helps the beans germinate faster and the sprouts to grow thicker.
And this method works really well. But I personally am too lazy to wash an additional cloth, when it is not absolutely required. So I rarely ever use this method these days. But in case you choose to go with this method, here are a few things to keep in mind.
Tips for sprouting mung beans by wrapping in muslin cloth
- Rinse and strain off all the excess water from the mung beans before wrapping it in a muslin cloth to sprout, because excess water can cause the beans to rot, and release a foul odor.
- Always use a fresh and clean muslin cloth, and it's ideal to keep a cloth aside specifically for sprouting, and clean & reuse it, to keep things as hygienic as possible.
- Moisten the cloth before you use it to wrap the mung beans. This way you will not need to sprinkle water every few hours to keep the beans moist. That being said, the cloth should be moist but not dripping wet, because like I mentioned earlier, excess water can cause beans to rot and release a foul odor.
- Ensure to wrap the mung beans pretty tight, as the pressure will help the beans sprout faster, and the sprouts will be thicker.
- Set it in a dark and warm place to sprout, away from any direct sunlight.
2. Sprouting Mung Beans in a Jar / Pot / Tray
You can easily sprout mung beans in a jar, pot, tray, or any container of your choice, so long as you keep it in a moist, yet ventilated, and warm dark environment.
This method is fairly easy, and was my go-to method before Instant Pot came into the picture. I used to strain off all the excess water from soaked beans, using a colander, and then cover the beans with a moist cloth, and let the beans sprout in the colander itself, just ensuring to keep the colander away from any direct sunlight.
If you need a small quantity of sprouts on a daily / regular basis, you can sprout small quantities of soaked & strained beans in a mason jar. You will just need to keep the lid slightly open for ventilation, and depending on the climate of the place you live, sprinkle a little water on the mung beans every few hours, if they dry out. And of-course, let it sit in a warm dark area to sprout.
Tips for sprouting mung beans in a jar / pot / tray
- Rinse and strain off all the excess water from the mung beans before setting it to sprout, as excess water can cause the beans to rot, and release a foul odor.
- No matter which container you go with, ensure you provide a moist, ventilated, warm & dark environment. For instance, if you are sprouting in a colander, the holes will provide required ventilation, but this also might dry out the beans, so it's ideal to cover it with a moist cloth. And when sprouting in a jar / container like that, ensure to keep it partially open for ventilation, and sprinkle water every few hours to keep it moist, if it starts to dry out. And of-course always set it in a warm dark place to sprout, away from bright lights or direct sunlight.
- You should get good sprouts in 12 hours. If you need even longer sprouts, then after 12 hours, rinse them, and repeat the process, and give it a few additional hours to sprout. Rinsing will reduce the chances of rotting and foul odor, and also re-moisten the beans.
3. Mung Bean Sprouts using Instant Pot
This is my go-to method these days, as I personally feel that using an Instant Pot is the easiest and quickest method to sprout mung beans. Especially in the kind of cold and dry climate I live in, and particularly during winters, it's the most fool proof method!
The basic idea is the same - to provide a moist, yet ventilated, and warm dark place for the mung beans to sprout. Just adapted to Instant Pot to sprout beans in an easy reliable manner.
Step by step method to sprout mung beans in Instant Pot
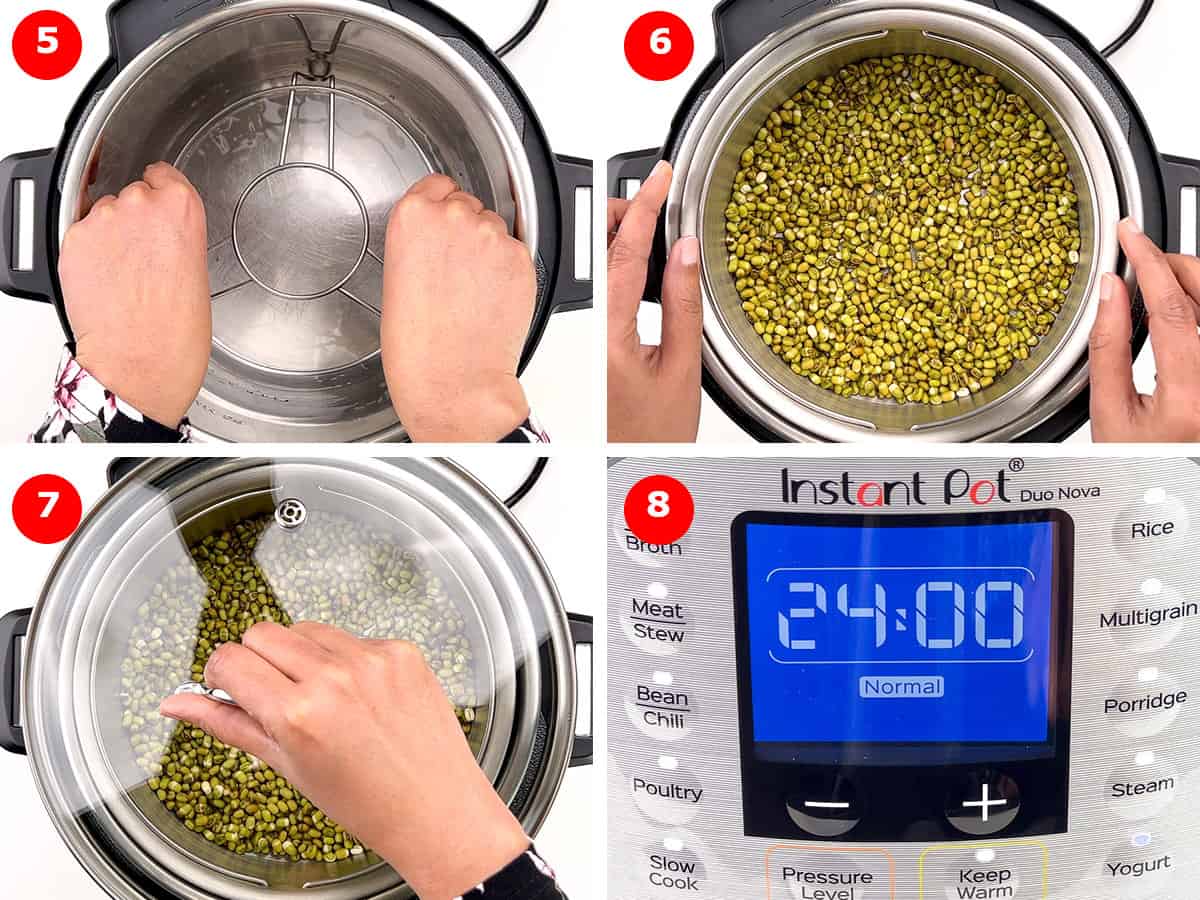
- To begin with, pour 1 cup water in the main steel pot of the Instant Pot.
This is what I prefer to do, but you can go with just ¼ - ½ cup water (that will be enough too), or even choose to not add any water.
The reason I add water is that when the Instant Pot mildly heats the water, the light steam from the water will give it a continual warm & moist environment.
Some prefer to not add any water, to avoid the mung beans sprouts from getting sticky. And this might partly depend on the quality of the beans. But I personally have never faced this issue, and so I always add water. - Place a tall trivet in the main pot of the Instant Pot.
I prefer and recommend a taller trivet, so as to be able to raise the mung beans from the base and the water, as much as possible. - Rinse and then strain off all the excess water from the soaked mung beans.
This is very important to ensure to not have any excess water to avoid any kind of rot or foul odor, and the sprouts getting sticky. - Transfer the beans to the Instant Pot steamer insert, or something that works like that.
The holes in the steamer insert will ensure proper ventilation, which is required for the mung beans to sprout well. - Place the steamer insert on top of the trivet, and cover the Instant Pot with a regular lid.
Ensure that the steamer insert fits well inside the main pot, and that you are still able to cover the Instant Pot with a lid. And there is no need to use the Instant Pot lid, a regular one will work. I personally prefer a glass lid, to be able to check on the sprouts. But the idea is only to give it a covered environment and seal in the heat. - Start Instant Pot on Yogurt Mode (Normal) for 24 hours.
Yogurt mode (normal) will provide the required amount of moderate heat to lightly heat the pot, and the water in the pot (if you have chosen to add), and create a warm moist environment required for sprouting. While the steamer insert will take care of the ventilation, and the lid will seal in the warmth.
Also, I set the Instant Pot for 24 hours, but it usually takes only 12 hours for the mung beans to sprout in the Instant Pot, and 18 hours if you want really long sprouts.
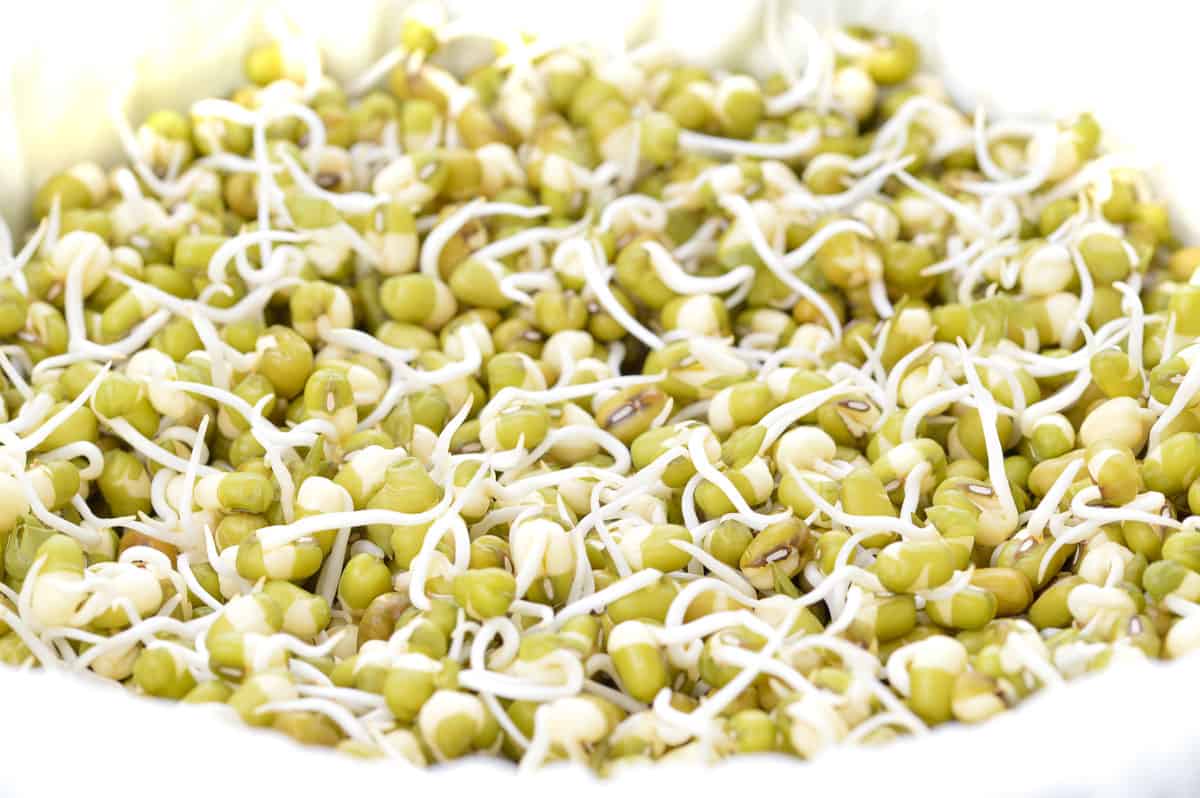
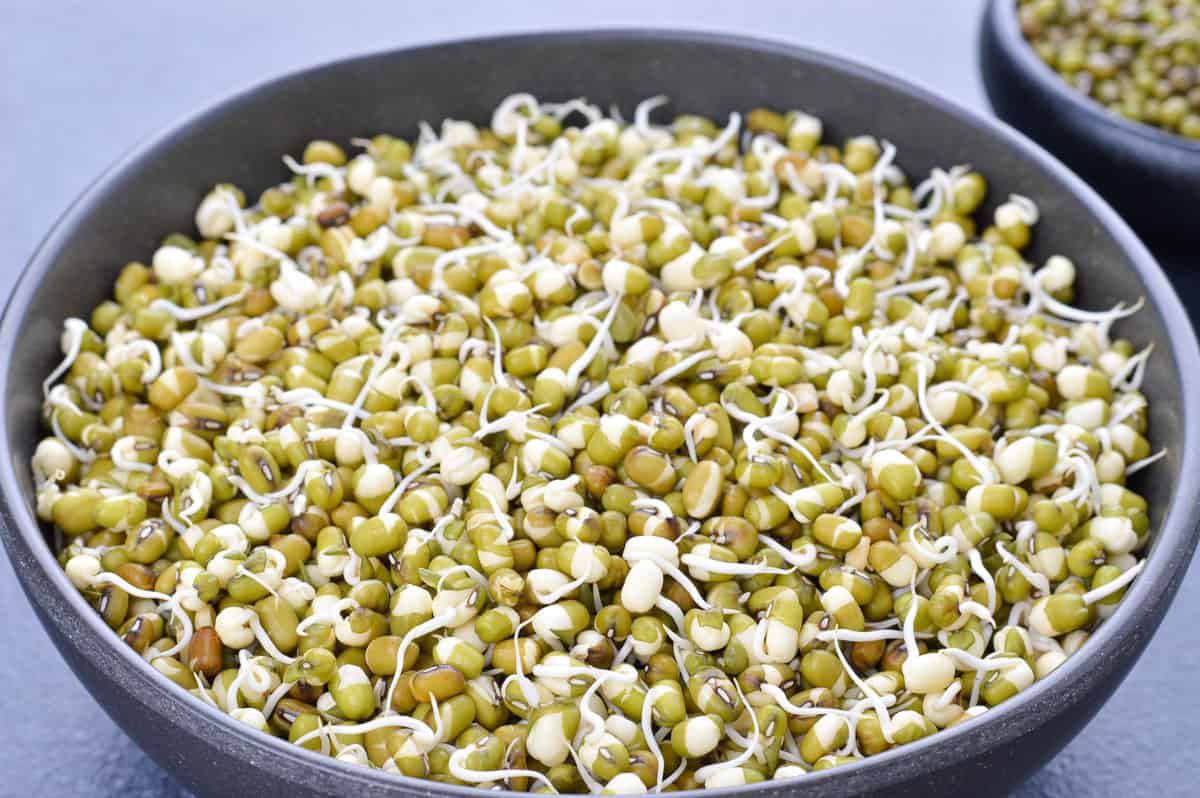
How Do You Know When Mung Bean Sprouts Are Ready
The mung bean sprouts are ready when the white sprout has grown to at least 1½ cm in length. Because at this point, the lectins in the bean are converted into digestible proteins for consumption. But of-course you can grow the sprouts even longer if you wish. I usually do.
Key Recipe Notes
- It's best to use fresher stock of mung beans, as much as possible. Because moong beans that were harvested a very long time back might not give the best sprouts.
- Organic mung beans can take longer time to soak and sprout, so account for that, while planning to sprout organic moong beans.
Storing Moong Sprouts
It's best to consume moong sprouts fresh. But if you need to store them, then transfer the sprouts to a sealed glass container, preferably lined with paper towel, and refrigerate.
It's best to use the sprouts within the first 1-2 days, but it will last for a total of 3-4 days in the fridge, if stored well.
Frequently Asked Questions
The most likely issue is that the mung beans were not soaked long enough. They need to be soaked till the outer shell breaks, before sprouting. If soaked correctly, and the beans are still not sprouting, then it's possible that the mung beans are of an older stock, and those might not sprout as well as the fresher mung beans do. Also organic mung beans take longer to soak and sprout, so need to account for that.
This is mostly due to exposure to bright light during the process of sprouting. Which is why it's important to let it sprout in a dark place.
If you want really thick mung bean sprouts, it's best to use the muslin cloth method (shared above). Tightly packing and wrapping the beans in the cloth, works like adding firm pressure, which enables growth of thicker bean sprouts.
Yes you can eat well sprouted fresh mung bean sprouts raw, so long as you rinse it well before consumption. But sometimes when the sprouting process has taken very long, there can be certain microorganisms on them, and so it's best to lightly roast, or steam the moong sprouts before consumption.
Mung Bean Sprouts (Moong Sprouts) Recipes..
⭐️ Spicy Kolhapuri Misal
⭐️ Moong Sprouts Salad
⭐️ Moong Sprouts Dosa
As always, I hope you found this recipe useful. If you did, please let me know your rating ⭐️ and feedback ? in the comments below, or simply rate the recipe right on the recipe card. I'd really appreciate it. ❤️
Mung Bean Sprouts (Moong Sprouts) | How to Sprout Mung Beans - with Instant Pot Option
Equipment
- Tall Trivet
- Steamer Insert
Ingredients
- ½ cup mung bean whole
- 1 cup water optional
Instructions
Soaking Mung Beans
- Properly wash and rinse the mung beans (preferably with hot water) at-least 2-3 times, till the water runs sort of clear.
- Soak the mung beans in fresh water (preferably hot), till the outer shell breaks open.
- Keep the mung beans covered in a dark, warm place, while it's soaking. This will help retain the heat from the water for longer. Depending on the weather of the place you live in / season, you can cover it with a regular lid or a mesh lid or keep it to sprout in a dark warm space like an oven (turned off) or just the counter. (see notes)
- When the outer shell cracks open, the mung beans are ready for sprouting. It usually takes about 12 hours for this, if I follow all the steps listed above, using hot water and keeping it covered in a warm dark place. Else it can take about 18-24 hours.
Sprouting Mung Beans
- Mung beans require a warm and moist, yet ventilated and dark place to sprout. There are many ways to achieve this. I am listing my go-to method to sprout mung beans using Instant Pot, along with two other alternative methods.
Sprouting Mung Beans in Instant Pot (my go-to method)
- Pour ½ - 1 cup water in the main steel pot of the Instant Pot. I usually add 1 cup of water, but adding any water at all is optional. The reason I add water is that when the Instant Pot mildly heats the water, the light steam from the water will give it a continual warm & moist environment. But you can choose to skip the water (see notes).
- Place a tall trivet in the main pot of the Instant Pot. I prefer and recommend a taller trivet instead of using the shorter one that comes with the Instant Pot, so as to be able to raise the mung beans from the base and the water, as much as possible.
- Rinse and strain off all the excess water from the soaked mung beans. This is very important to ensure to not have any excess water to avoid any kind of rot or foul odor.
- Transfer the beans to the Instant Pot steamer insert, or something that works like that. The holes in the steamer insert will ensure proper ventilation, which is required for the mung beans to sprout well.
- Place the steamer on top of the trivet, and cover the Instant Pot with a regular lid. No need to use the Instant Pot lid here. But covering it is important, as it also helps to seal in the heat (see notes).
- Start Instant Pot on Yogurt Mode Normal for 24 hours. Yogurt mode (normal) will provide the required amount of moderate heat to lightly heat the pot, and the water in the pot (if you have chosen to add), and create a warm moist environment required for sprouting.
- I set the Instant Pot for 24 hours, but it usually takes only 12 hours for the mung beans to sprout in the Instant Pot, and 18 hours if you want really long sprouts.
Traditional Method to Sprout Mung Beans (using muslin cloth)
- Rinse and strain off any excess water from the soaked mung beans, because excess water can cause the beans to rot, and release a foul odor.
- Moisten a muslin cloth, so that it is moist but not dripping wet. Some moisture will ensure the mung beans will not dry out, but like mentioned above, excess water can cause the beans to rot and release a foul odor.
- Tightly wrap the mung beans in the muslin cloth, and set it in a warm dark place, till it sprouts.
- This method usually gives thicker mung bean sprouts.
Sprouting Mung Beans in a Jar / Pot / Tray
- Rinse and strain off all the excess water from the mung beans before setting it to sprout, as excess water can cause the beans to rot, and release a foul odor.
- No matter which container you go with, ensure you provide a warm and moist, yet ventilated and dark environment.
- For instance, if you are sprouting in a colander, the holes will provide required ventilation, but this also might dry out the beans, so it's ideal to cover it with a moist cloth. And set it in a warm and dark place to sprout, away from harsh lights.
- When sprouting in a jar / container like that, ensure to keep the lid partially open for ventilation, and sprinkle water every few hours to keep it moist, if it starts to dry out. And ensure to keep these in a warm and dark place too, away from direct sunlight.
- This method is especially ideal and convenient if you want small quantities of sprouts on a daily or regular basis, then it's simple to sprout in small mason jars. Or even if you need a really large batch, then you can sprout in a large colander or tray.
Notes
Additional notes on soaking mung beans
- Hot water helps cut down the time it takes to break the shell of the mung beans.
- I live in a cool dry place, so I usually cover with a regular lid to keep it warm, and place it inside my oven (turned off), to let it stay in a warm place (this is specially helpful in winters). But if you live in a hot & humid climate, then you can just keep it on the counter & cover it with a mesh lid to have some ventilation (especially in summers), to avoid any mold growth.
- In some cases using filtered water to soak the beans instead of hard water is helpful.
Additional notes on sprouting in Instant Pot
- I prefer to add a cup of water in the main pot of the Instant Pot, but you can just go with just ¼ - ½ cup water (that will be enough too), or even choose to not add any water. The reason I add water is that when the Instant Pot mildly heats the water, the light steam from the water will give it a continual warm & moist environment. Some prefer to not add any water, to avoid the mung beans sprouts from getting sticky. And this might partly depend on the quality of the beans. But I personally have never faced this issue, and so I always add water.
- Ensure that the steamer insert (or whatever you are using instead) fits well inside the main pot, and that you are still able to cover the Instant Pot with a lid. Because it's important to keep this in a covered environment to seal in the heat. Though there is no need to use the Instant Pot lid, a regular one will work. I personally prefer a glass lid, to be able to check on the sprouts.
Key Recipe Notes
- It's best to use fresher stock of mung beans, as much as possible. Because moong beans that were harvested a very long time back might not give the best sprouts.
- Organic mung beans can take longer time to soak and sprout, so account for that, while planning to sprout organic moong beans.
Notes on Storing Mung Bean Sprouts
- It's best to consume moong sprouts fresh. But if you need to store them, then transfer the sprouts to a sealed glass container, preferably lined with paper towel, and refrigerate.
- It's best to use the sprouts within the first 1-2 days, but it will last for a total of 3-4 days in the fridge, if stored well.
Nutrition
Video Recipe
If you'd like FREE recipes and meal prep ideas delivered directly to your email inbox every Friday in one short email, then subscribe to the Foodie Friday list HERE, and never run out of ideas on what to cook over the weekend or prep for the week ahead. 🙂


Leave a Reply