
Idli Batter recipe - a detailed guide with step by step instructions & photos - that shares how to make idli batter at home with idli rava, the exact measurements and ratio of ingredients, along with tips on grinding the batter (grinder vs blender), and how to ferment idli batter quickly - to get delicious soft & fluffy homemade idlis.

I have wanted to share this idli batter recipe for the longest time. But because there are many ways to make idli batter, I wanted to write a more comprehensive post, sharing the different ways to make it, and also share detailed step by step instructions, photos, and even a recipe video. So that you can make it right the first time, and every single time.
But compiling all of this meant it took some time, more time than I initially planned. Still, I am pretty happy with how it turned out, so totally worth the time and effort. I hope this post answers all your questions about making idli batter to get soft & fluffy idlis. If you have any questions that I haven't covered, do leave me a comment, and I'll get back to you.
That being said, there is one thing I want to clarify. I usually make idli batter with idli rava, and not rice, so that is what I have shared, and covered the different methods of grinding and fermenting the batter. But of-course you can always make it from scratch using rice, instead of rice rava or idli rava. I make idli batter using idli rava for both the convenience and taste.
Jump to:
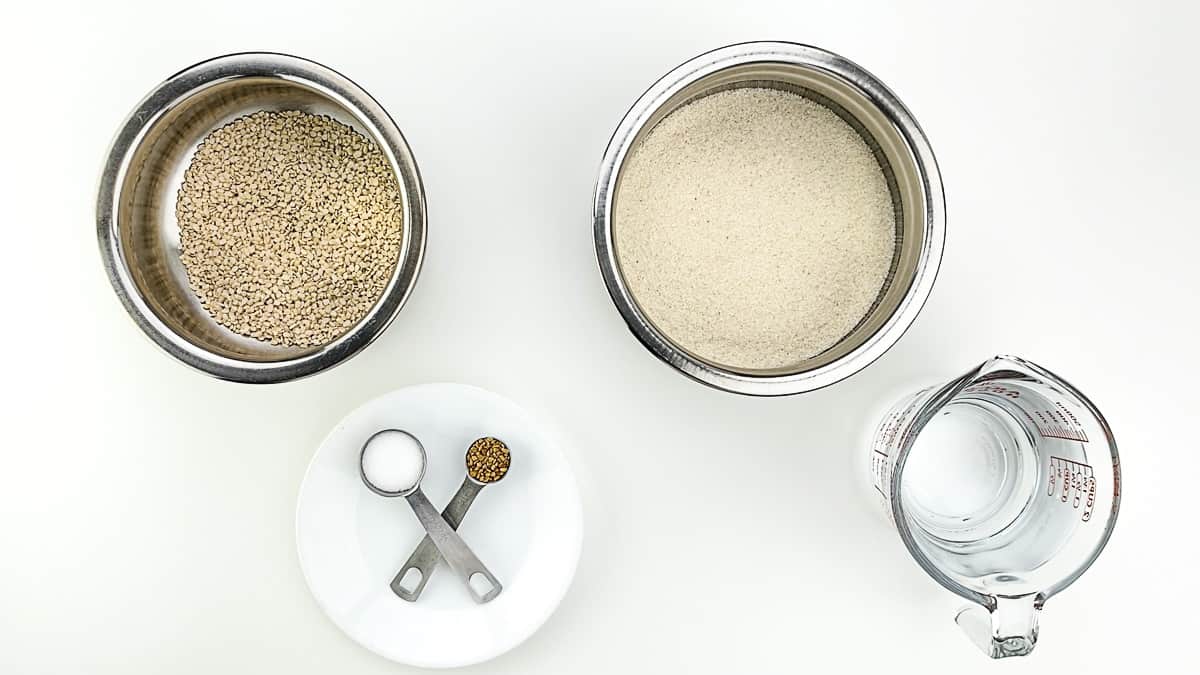
Ingredients to Make Idli Batter
Ingredient notes
Urad dal - Use regular split urad dal that is white-ish in color.
Idli rava - Use any brand of idli rava you prefer. But note that idli rava is different from regular rava. It is made from rice and is not same as semolina that is derived from wheat.
Kind of salt - Do not use regular table salt that has both iodine and anti caking agents that hinder the process of fermentation. Always use non iodized sea salt, rock salt, or even Himalayan pink salt.
Water - Ensure to use very cold water while grinding the idli batter, even in the grinder, but this is especially critical in the blender. Because in blender there are higher chances of batter heating up while grinding, which will hinder proper fermentation, and result in denser, flatter idlis. In-fact in a blender, it's usually best to even add a few ice cubes while grinding the urad dal.
Fenugreek (methi seeds) - Adding fenugreek seeds/methi is optional, and can be skipped if you live in a warm and humid climate where fermentation is easy. But I always add it, even in summer here.
Ratio of Urad Dal to Idli Rava
Over the years, this is something I have experimented with, and have now settled on my current ratio of urad dal to idli rava, because it yields consistent results to make perfect idli batter every single time.
For 1 cup urad dal, I add 1 teaspoon fenugreek / methi seeds while soaking, and I use 2.25 cup idli rava to make batter.
How to Make Idli Batter at Home
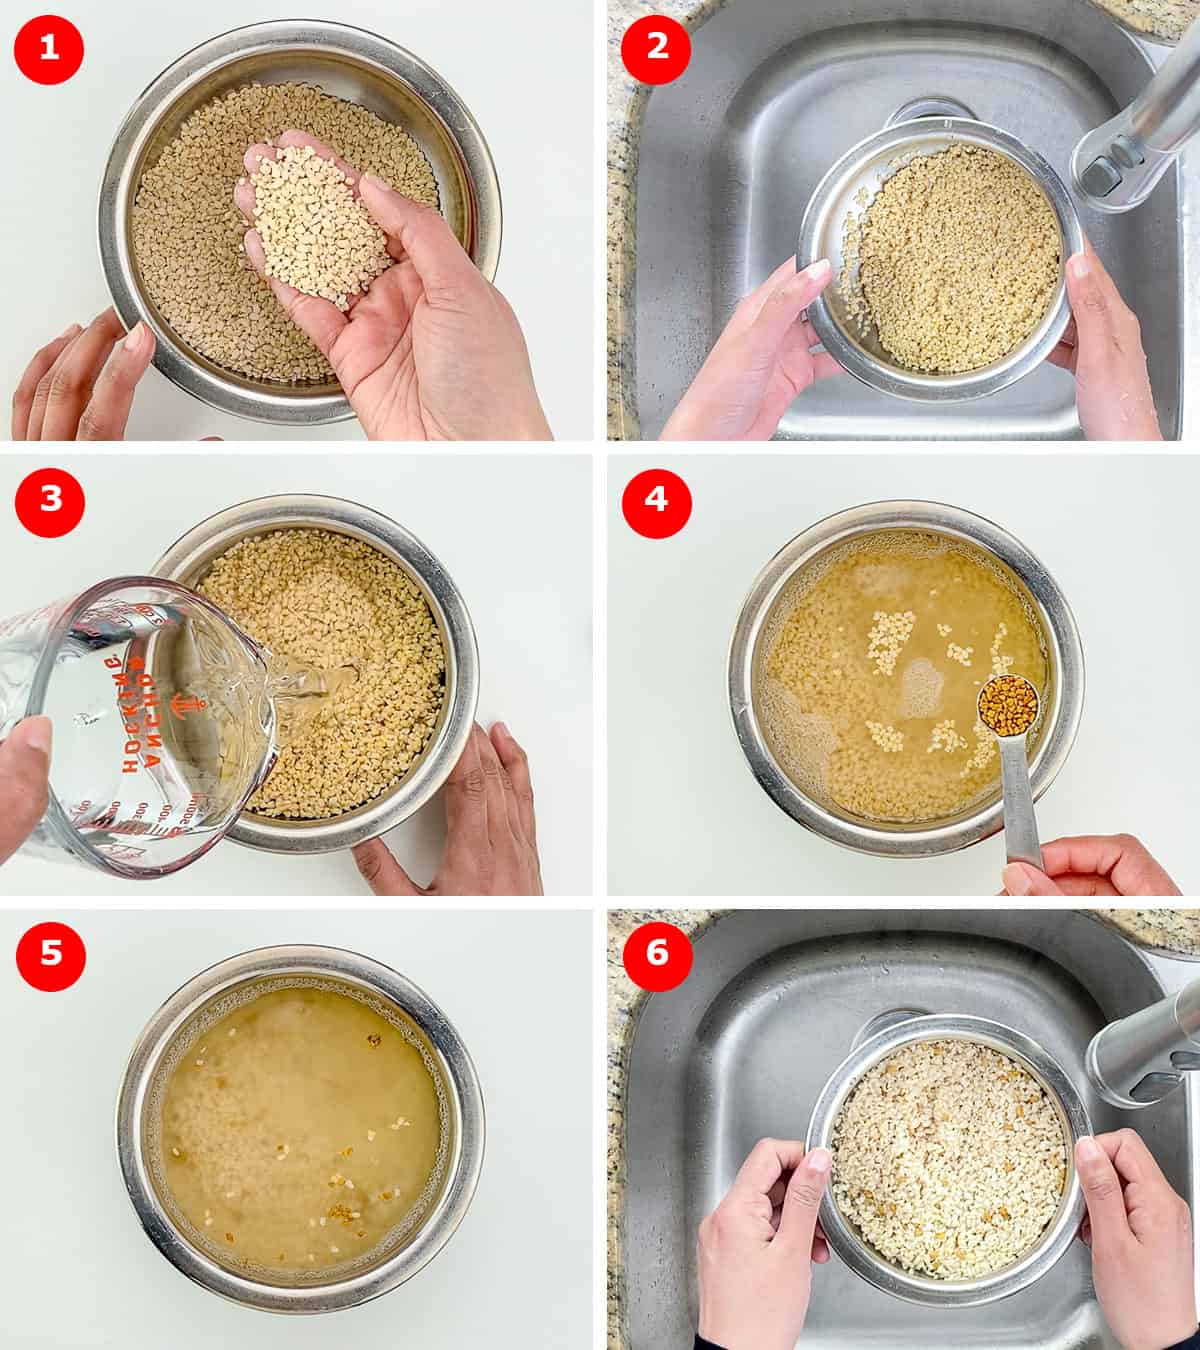
➡️ Washing & Soaking Urad Dal
- Wash and rinse urad dal a few times, until the water is not so cloudy anymore, and then strain the water.
- Add fenugreek seeds / methi to washed & rinsed urad dal, and soak it in lots of fresh water (for 1 cup urad dal, use at-least 3 times the water).
- Let it soak for a minimum of 6-8 hours, but ideal to leave it to soak for 8-10 hours.
- When done, wash & rinse the urad dal once more, and drain all the water.
- The dal is now ready for grinding.
➡️ Grinding Urad Dal (Grinder vs Blender)
Here I have shared two methods of grinding urad dal for idli batter. You can use either of the two based on your preference.
Many people prefer the grinder over the blender for grinding the idli batter, because in blender the batter can heat up while grinding, and that leads to batter not fermenting well, and denser idlis.
But there are ways you can prevent the batter from heating up in the blender (shared below), and if you follow that, you can easily grind idli batter in the blender as well. And it will be done much quicker, and blender is generally easier to clean compared to the grinder.
Of-course nothing compares to the fluffy and light batter ground in a stone / wet grinder. So it's a tradeoff between time, effort and result.
That being said, ever since I figured out how to keep the batter cool in the blender, more often than not, that's what I use, because it's super convenient. And I use the grinder when making idlis for special occasions.
Though if you want an absolutely fool-proof method to make idli batter, go with the grinder.
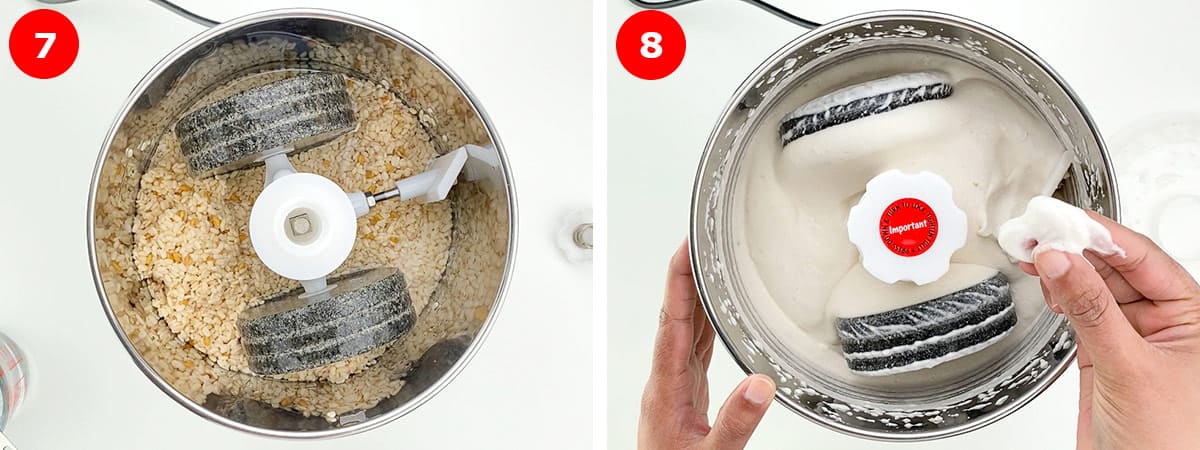
Grinding Urad Dal (using stone grinder)
- Wet the grinder with a little water, and then add in the soaked urad dal and methi seeds, along with fresh COLD water to grind the dal.
- Ensure to use really cold water. This is especially important when grinding the dal using a blender, but best to use cold water even for grinder, because for soft and fluffy idlis, it's really important that the batter doesn't get warm during grinding. You can even add the water in a few parts, to ensure the batter stays cold. (see tips below - #1)
- Grind till you get smooth, soft & fluffy batter. This can take 15-20 minutes depending on your grinder.
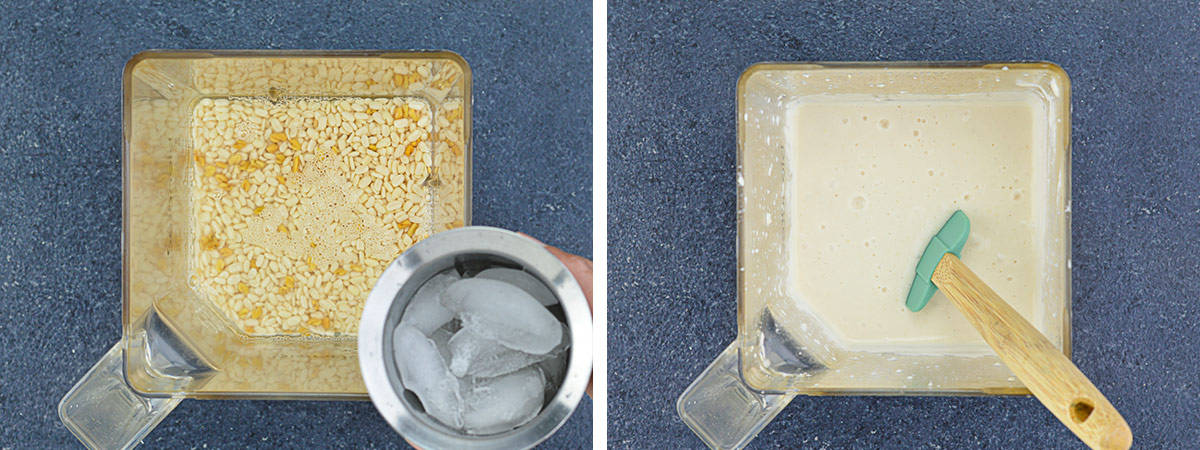
Grinding Urad Dal (in blender)
- In a blender, add the soaked urad dal and methi seeds, along with water to grind the dal, and blend till smooth. This should take only a few minutes.
- But if using a blender to grind soaked urad dal, it's critical to use really cold refrigerated water. Even better if you can use a few ice cubes. Because while blender grinds the dal within minutes, it also heats it up quickly. And if the batter heats during grinding, then you are more likely to get denser and flatter idlis. Here it is especially important to not add all the water for blending at once, and add it in parts, to help keep the batter cool. (see tips below - #2)
- This batter will be more liquid-y as compared to the one you get in the grinder, but the end result will be just as good, if you follow all the steps above.
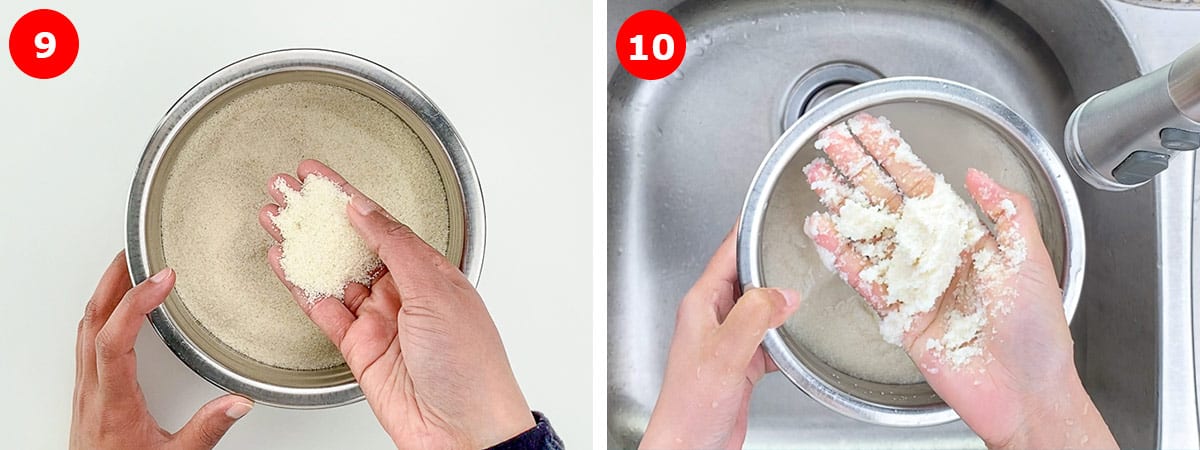
➡️ Idli Batter with Idli Rava
- Properly wash & rinse idli rava till the water is not so cloudy anymore, then drain out all the excess water.
- Add idli rava to urad dal batter (ensuring to squeeze out all the excess water from idli rava), along with salt, and mix well. Here it's best to even hand mix the batter for 1-2 minutes, to help with the fermentation.
- When done, the consistency of the batter will be easy drop, not pour. Batter ground using the blender is usually more liquid-y, but even that shouldn't be liquid-y to the point that it flows freely.
- The batter is now ready for fermentation.
➡️ Fermenting Idli Batter (2 Ways)
Quick Fermentation in Instant Pot
- When using Instant Pot to ferment idli batter, add the ground urad dal directly in the inner pot of the Instant Pot, and add idli rava (after squeezing out excess water), and salt to it.
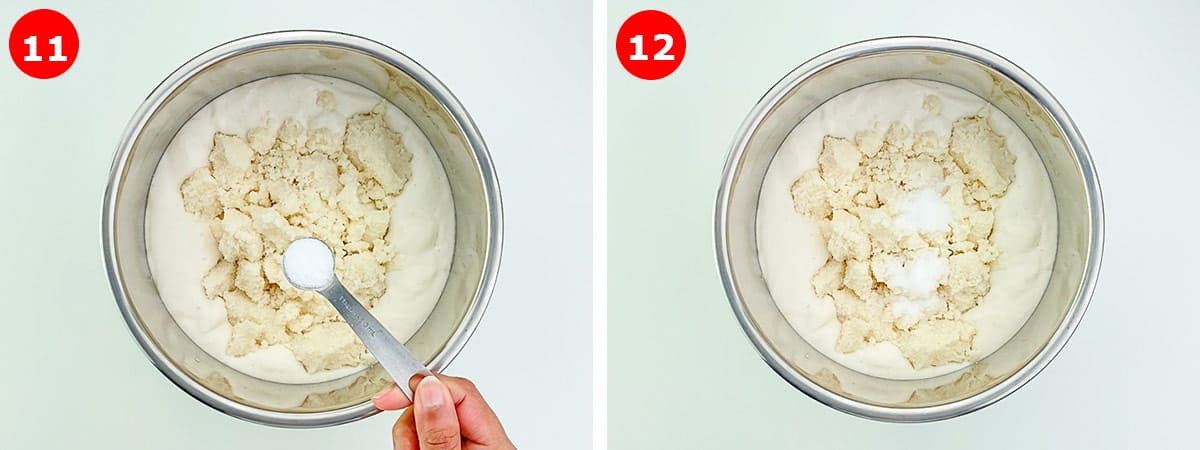
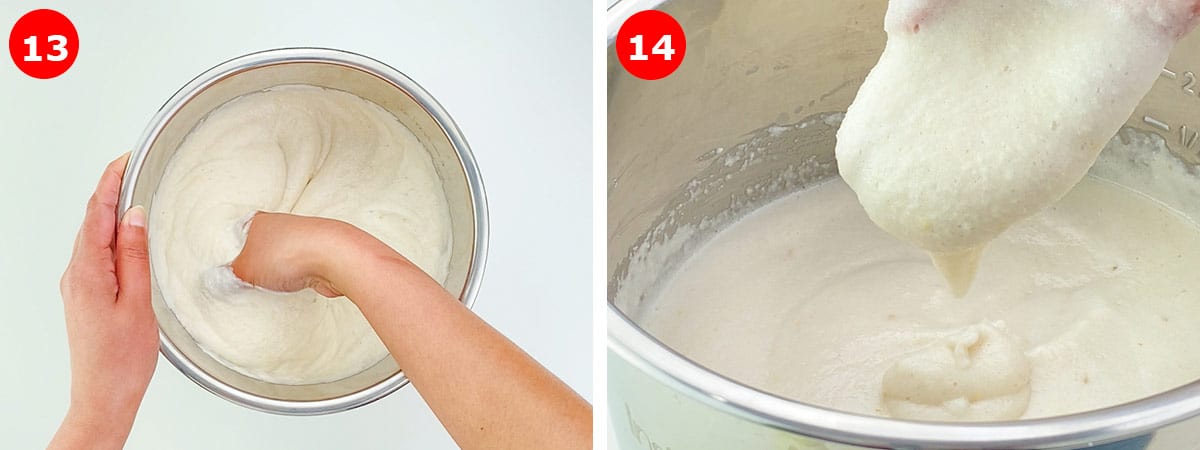
- Give everything a quick mix, and then hand mix the batter for a couple of minutes.
- The consistency of the idli batter will be easy drop, not easily flowing or runny.
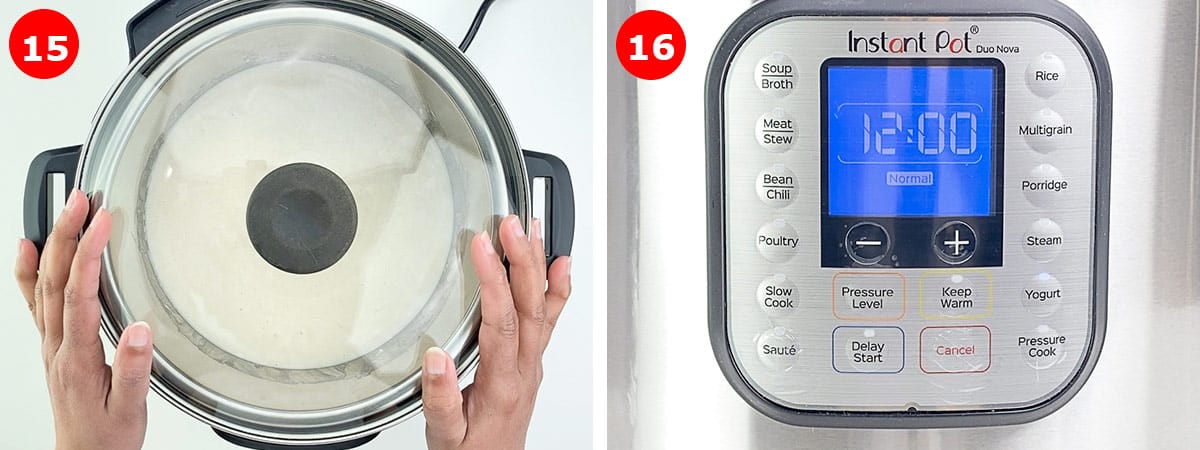
- Set the Instant Pot in yogurt mode (normal) for 12 hours. Cover with a regular lid, not the Instant Pot lid. It's best if the lid is made of glass and see-through.
- It usually takes 10-12 hours for the batter to ferment in Instant Pot, so do check once at the 10 hour mark. When the batter has fermented well, turn off the Instant Pot. (note if you are looking for a way to ferment idli batter quickly, then this is the way to go, especially if you live in a cooler climate, where fermentation can take 18-24 hours, and sometimes still not ferment well after all that time)
Regular Fermentation in Oven
- When you live in a warmer, more humid climate, you can easily ferment the batter the traditional way, by mixing urad dal batter, idli rava, and salt in a large pot, and setting it on the counter overnight or for 10-12 hours.
- Or if you are living in slightly colder climate, you can keep it in a warm place, like inside the oven with the oven turned off, but the oven light turned on. You can also preheat the oven to 200 deg F (90 deg C), then turn it off, and after 5 minutes, place the batter in the slightly heated oven. I did this for many years before the Instant Pot.
- Also in this case, hand mixing is not critical, but still a good practice to always do. Especially during the winter months, to give the batter the best shot for fermentation.
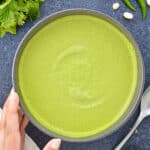
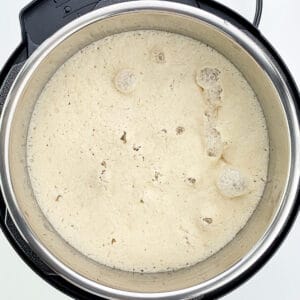
➡️ Ready to use, well fermented idli batter
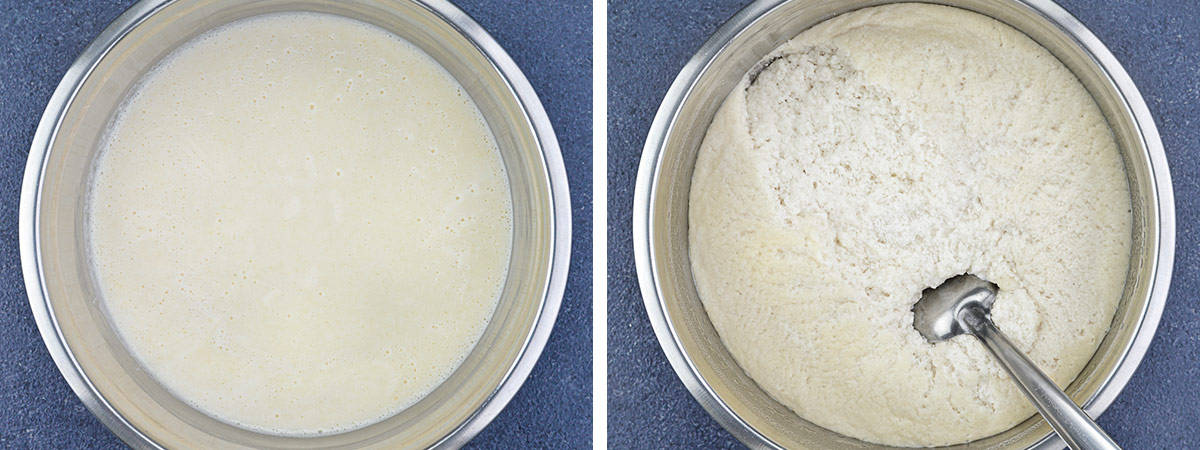
- A batter that has fermented well will rise a lot, almost doubling in volume, and turn light, airy, and bubbly.
- When the batter is ready, give it a gentle mix, and then it's ready to use.
- The consistency of the batter will be easy drop, not pour, i.e. not too thick, but not too liquid-y either.
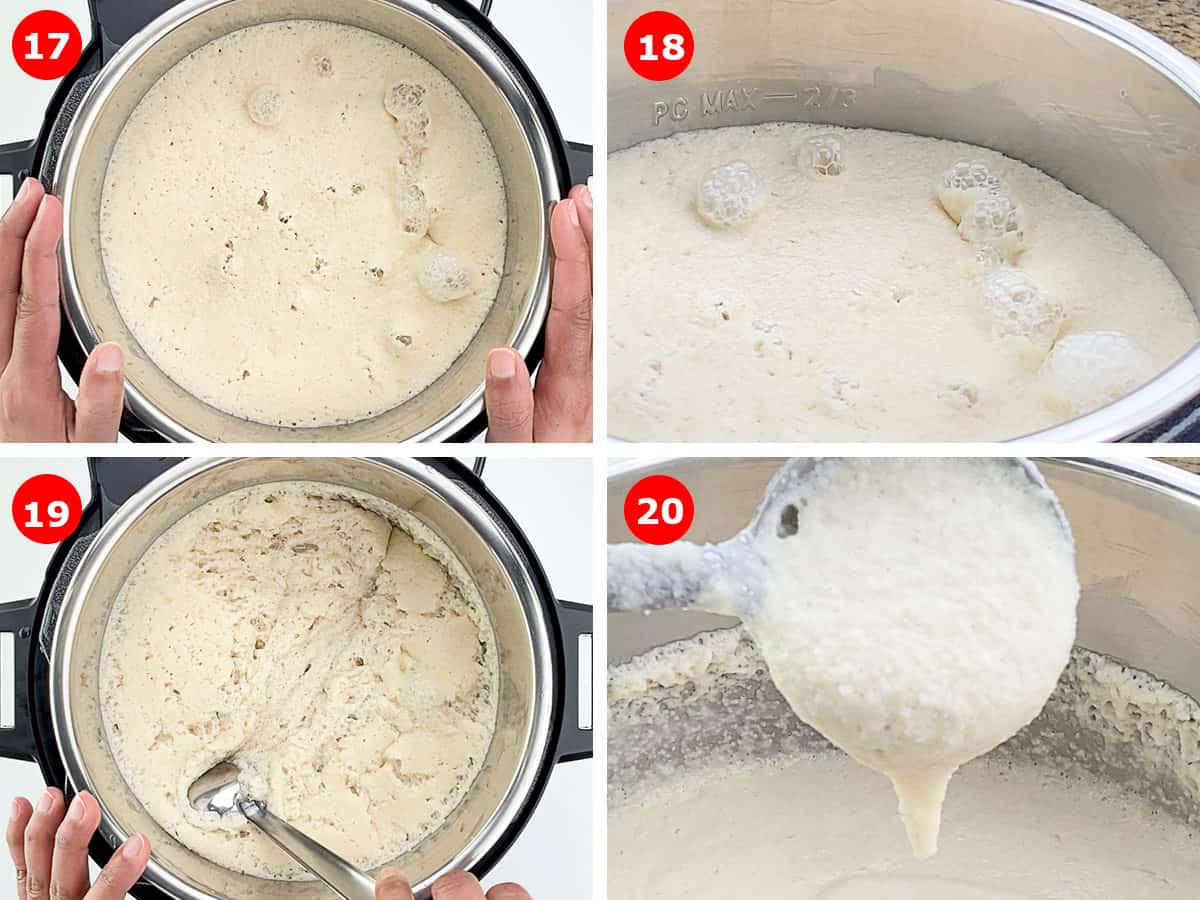
Pro tip: Do not over-mix the fermented batter, because with excess aeration in the batter, after steaming - the idlis will rise and then collapse quickly too. Just give the fermented batter a proper but gentle mix one time.
Pro Tips
- Adding water a little at a time in grinder - I personally find it best to not add all the water before starting to grind. For instance, if I have to add 2 cups of water to grind the dal, then I add ½ cup water to wet the grinder, then 1 cup with the soaked dal, grind for 5 minutes, and then add the final ½ cup at this point. Since I use really cold water, adding this last ½ cup also helps me keep the batter cold. This is optional when you are using a grinder, but critical when using the blender. Because the batter always heats up in a blender. That being said, I mostly add the water in parts in a grinder to get a chance to also scrape the sides that time, to ensure everything mixes well.
- Adding water a little at a time in blender - When using a blender, I always add water in parts to help keep the batter cool. If I am using 2 cups of water to blend the batter, then I add 1 cup with the dal, and ½ cup when the dal has blended for 30-60 seconds, and the other ½ cup when the dal is almost smooth. You can also choose to add a few ice cubes instead of water.
- Adding salt - If you are living in a warmer climate, you can add salt after fermentation. But in a cooler climate, it's always best to add salt before fermentation. Either way, always use non-iodized rock salt or sea salt.
If the batter doesn't ferment - then first just wait for a few more hours for it to rise and ferment. But if the batter has not risen or fermented after 18-24 hours (traditional method) & 12-14 hours (Instant Pot), then just give up on making idlis with this batch, and use batter for dosas instead. And try again after implementing all the tips shared in the recipe.
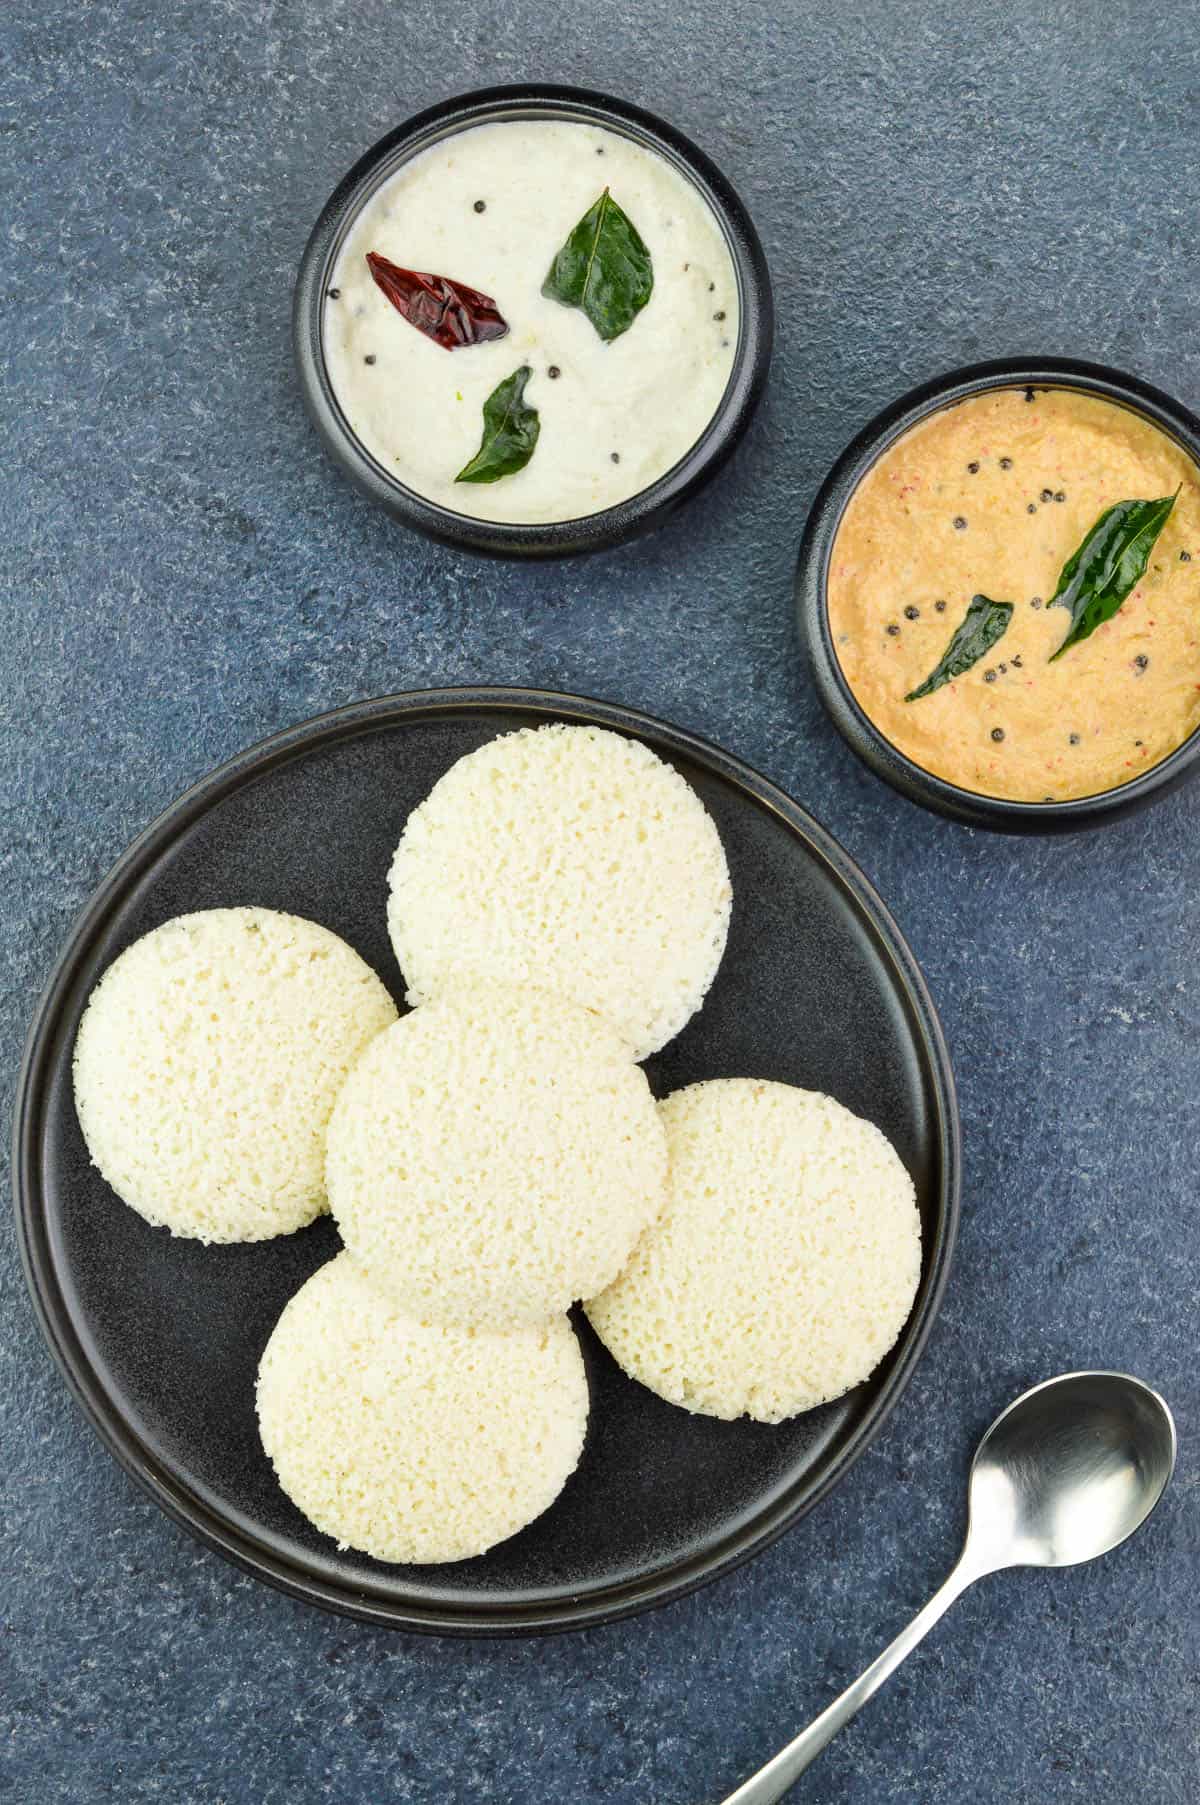
Soft, Fluffy Steamed Idlis
How to Properly Store Idli Batter
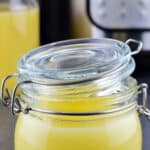
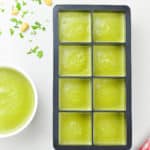
Storing before fermenting - You can store the ground urad batter in glass or ceramic containers and refrigerate for 2-3 days. Avoid storing in plastic and steel containers. It might spoil the batter or make it sour. It's also best to store the batter in smaller batches, in different containers, and ferment separately. Unless you plan to ferment the entire thing together, then you can store it all in one big container.
Storing after fermentation - You can also store and refrigerate the batter after fermentation, but this is tricky, as you have to store without disturbing the batter too much. Also the idlis don't turn out very fluffy like they do with fresh batter. However you can use this batter for making uttapams and appams.
Frequently Asked Questions
If your idli batter has not risen or fermented after 18-24 hours (traditional method) & 12-14 hours (Instant Pot), then just give up on making idlis with this batch, and use batter for dosas instead. And try again after implementing all the tips shared in the recipe.
The best way to avoid over-fermentation and idli batter turning sour is to plan well and pay attention to the time it takes for the batter to ferment, and check on it periodically, especially towards the end.
Also, if you are not using the entire batter after fermentation, then refrigerate the rest immediately. This will also help in the batter not turning sour.
At times the top layer of the batter turns yellow. This usually doesn't happen when the idli batter is kept to ferment on the counter top or even in the Instant Pot. This is more likely to happen, when the batter is kept in the oven with the oven light on (for me, anyway).
Though it doesn't necessarily mean that the idli batter has gone bad. More often than not you can just mix everything together after the batter has fermented, and use it as you would normally do. If you want to, you can even scrape off the top layer, and discard it. But that is usually not required. As many a times this is merely because of the kind/quality of urad dal.
More often than not, this happens when the batter has heated up during grinding. Like I mentioned above, use cold water, and even some ice cubes while grinding the urad dal. This is especially important if you are using a blender to grind the dal.
Sometimes even if you have done everything right, and the batter has fermented well, the idlis can collapse after rising. This usually happens, if you have over-mixed the batter after fermentation, because with excess aeration in the batter, after steaming - the idlis might rise and then collapse quickly too. Just give the fermented batter a proper but gentle mix one time.
Video Recipe
Like I mentioned in the post, there are a few different ways to make idli batter, in terms of choosing how to grind it (grinder vs blender), and how to ferment it (traditional way vs instant pot method). These choices depend on the few factors mentioned above in this post.
That being said, in the video recipe shared below (in the recipe card), I am sharing just one way, which is my go-to method for making idli batter that gives me well fermented batter and perfectly soft & fluffy idlis every single time. However, you can choose to go with alternative methods mentioned in the post, if you prefer those.
Leftover Idli Batter Recipes
You can use idli batter as a base to make a wide variety of dishes and variations like different kinds of dosas, appams, and uttapams.
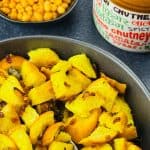
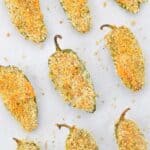
If you have leftover idlis, then you can make Idli Fry (a crispy + yummy snack using leftover idlis).
Love South Indian Recipes? Try these next..
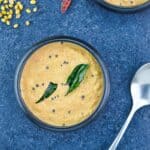
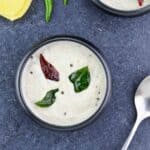
⭐️ Authentic South Indian Style Classic White Chutney
⭐️ Red Coconut Chutney (with red chillies & garlic)
⭐️ Mangalorean Style Prawns Masala
⭐️ Crumbly Mysore Pak (with tips & timestamps)
As always, I hope you found this recipe useful. If you did, please let me know your rating ⭐️ and feedback ? in the comments below, or simply rate the recipe right on the recipe card. I'd really appreciate it. ❤️
Idli Batter Recipe
Equipment
- Blender / Mixer
Ingredients
- 1 cup urad dal
- 1 teaspoon fenugreek seeds (methi)
- 2 cup cold water for grinding
- 2¼ cup idli rava
- 2 teaspoon non iodized salt sea salt or rock salt
Instructions
Washing & Soaking Urad Dal
- Wash and rinse urad dal a few times, until the water is not so cloudy anymore, and then strain the water.
- Add fenugreek seeds / methi to washed & rinsed urad dal, and soak it in lots of fresh water (for 1 cup urad dal, use at-least 3 times the water).
- Let it soak for a minimum of 6-8 hours, but ideal to leave it to soak for 8-10 hours.
- When done, wash & rinse the urad dal once more, and drain all the water.
- The dal is now ready for grinding.
Method 1: Grinding Urad Dal (using stone grinder)
- Wet the grinder with a little water, and then add in the soaked urad dal and methi seeds, along with fresh COLD water to grind the dal.
- Ensure to use really cold water. This is especially important when grinding the dal using a blender, but best to use cold water even for grinder, because for soft and fluffy idlis, it's really important that the batter doesn't get warm during grinding. You can even add the water in a few parts, to ensure the batter stays cold. (see note #3)
- Grind till you get smooth, soft & fluffy batter. This can take 15-20 minutes depending on your grinder.
Method 2: Grinding Urad Dal (in blender)
- In a blender, add the soaked urad dal and methi seeds, along with water to grind the dal, and blend till smooth. This should take only a few minutes.
- But if using a blender to grind soaked urad dal, it's critical to use really cold refrigerated water. Even better if you can use a few ice cubes. Because while blender grinds the dal within minutes, it also heats it up quickly. And if the batter heats during grinding, then you are more likely to get denser and flatter idlis. Here it is especially important to not add all the water for blending at once, and add it in parts, to help keep the batter cool. (see note #4)
- This batter will be more liquid-y as compared to the one you get in the grinder, but the end result will be just as good, if you follow all the steps above.
Idli Batter with Idli Rava
- Properly wash & rinse idli rava till the water is not so cloudy anymore, then drain out all the excess water.
- Add idli rava to urad dal batter (ensuring to squeeze out all the excess water from idli rava), along with salt, and mix well. Here it's best to even hand mix the batter for 1-2 minutes, to help with the fermentation.
- When done, the consistency of the batter will be easy drop, not pour. Batter ground using the blender is usually more liquid-y, but even that shouldn't be liquid-y to the point that it flows freely.
- The batter is now ready for fermentation.
Option 1: Quick Fermentation (using Instant Pot)
- When using Instant Pot to ferment idli batter, add the ground urad dal directly in the inner pot of the Instant Pot, and add idli rava, and salt to it. Give everything a quick mix, and then hand mix the batter for a couple of minutes.
- Set the Instant Pot in yogurt mode (normal) for 12 hours. Cover with a regular lid, not the Instant Pot lid. It's best if the lid is made of glass and see-through.
- It usually takes 10-12 hours for the batter to ferment in Instant Pot, so do check once at the 10 hour mark. When the batter has fermented well, turn off the Instant Pot. (note this is the quicker method in cooler climate, where fermentation can take 18-24 hours, and sometimes still not ferment well after all that time)
Option 2: Regular Fermentation (the traditional way)
- When you live in a warmer, more humid climate, you can easily ferment the batter the traditional way, by mixing urad dal batter, idli rava, and salt in a large pot, and setting it on the counter overnight or for 10-12 hours.
- Or if you are living in slightly colder climate, you can keep it in a warm place, like inside the oven with the oven turned off, but the oven light turned on. You can also preheat the oven to 200 deg F (90 deg C), then turn it off, and after 5 minutes, place the batter in the slightly heated oven. I did this for many years before the Instant Pot.
- Also in this case, hand mixing is not critical, but still a good practice to always do. Especially during the winter months, to give the batter the best shot for fermentation.
Ready to use, well fermented idli batter
- A batter that has fermented well will rise a lot, almost doubling in volume, and turn light, airy, and bubbly.
- When the batter is ready, give it a gentle mix, and then it's ready to use.
- The consistency of the batter will be easy drop, not pour, i.e. not too thick, but not too liquid-y either.
- Pro tip: Do not over-mix this fermented batter, because with excess aeration in the batter, after steaming - the idlis will rise and then collapse quickly too. Just give the fermented batter a proper but gentle mix one time.
Notes
- Kind of salt - Do not use regular table salt that has both iodine and anti caking agents that hinder the process of fermentation. Always use non iodized sea salt, rock salt, or even Himalayan pink salt. If you are living in a warmer climate, you can add salt after fermentation. But in a cooler climate, always best to add salt before fermentation.
- Fenugreek (methi seeds) - Adding methi or fenugreek seeds can be skipped if you live in a warm and humid climate where fermentation is easy.
- Adding water a little at a time in grinder - I personally find it best to not add all the water before starting to grind. For instance, if I have to add 2 cups of water to grind the dal, then I add ½ cup water to wet the grinder, then 1 cup with the soaked dal, grind for 5 minutes, and then add the final ½ cup at this point. Since I use really cold water, adding this last ½ cup also helps me keep the batter cold. This is optional when you are using a grinder, but critical when using the blender. Because the batter always heats up in a blender. That being said, I mostly add the water in parts in a grinder to get a chance to also scrape the sides that time, to ensure everything mixes well.
- Adding water a little at a time in blender - When using a blender, I always add water in parts to help keep the batter cool. If I am using 2 cups of water to blend the batter, then I add 1 cup with the dal, and ½ cup when the dal has blended for 30-60 seconds, and the other ½ cup when the dal is almost smooth. You can also choose to add a few ice cubes instead of water.
- If the batter doesn't ferment - then first just wait for a few more hours for it to rise and ferment. But if the batter has not risen or fermented after 18-24 hours (traditional way) or 12-14 hours (in Instant Pot), then just give up on making idlis with this batch, and use batter for dosas instead. And try again after implementing all the tips shared in the recipe.
- Storing before fermenting - You can store the ground urad batter in glass or ceramic containers and refrigerate for 2-3 days. Avoid storing in plastic and steel containers. It might spoil the batter or make it sour. It's also best to store the batter in smaller batches, in different containers, and ferment separately. Unless you plan to ferment the entire thing together, then you can store it all in one big container.
- Storing after fermentation - You can also store and refrigerate the batter after fermentation, but this is tricky, as you have to store without disturbing the batter too much. Also the idlis don't turn out very fluffy like they do with fresh batter. However you can use this batter for making uttapams and appams.
Nutrition
Video Recipe
If you'd like FREE recipes and meal prep ideas delivered directly to your email inbox every Friday in one short email, then subscribe to the Foodie Friday list HERE, and never run out of ideas on what to cook over the weekend or prep for the week ahead. 🙂
aarashi says
thanks, you're a good writer.
and this was very informative post. I like that you're specific with your methods.
The Love of Spice says
thank you. glad it helped!
Maria says
Lovely and easy recipe!! I use whole Urad dal. Will it be the same proportion?
The Love of Spice says
Hi Maria, I've never used whole urad. As we have always traditionally used split urad dal.
Seema mehta says
I want to start idlibatter business.i am staying in haryana hisar,we have winter,howto ferment the batter in more quantity.
Rupanjali says
Really helpful for me. Thanks
The Love of Spice says
Glad it helped Rupanjali. Thanks for letting me know. 🙂
Priya says
Wonderful and helpful article. Appreciate your efforts in putting the process and tips together.
The Love of Spice says
Thank you so much. Glad you found it useful.
Ramya Abhinand says
Such a brilliant and well written Post Shantala. As a south Indian, I understand the nuances of getting the batter right for those fluffy and soft Idli. I too do it in a stone grinder and get the best results. Fermenting gets a bit of an issue in winters, but I try to keep it in the sun as and when possible. Havent tried the oven light on method or the instant pot. ( I have a preethi instant pot).
I usually make a large batch so that it lasts for a few days. If it gets too sour towards the end, make it into little appes in the appe pan:)