


Instant Pot Water Test is the first thing most people will recommend you do to get started with your Instant Pot.
And if you have wondered what exactly it is, and why people recommend you to start with it, and how exactly to do this water test, then you’ve landed at the right place.
As in this post, I’ll walk you through the whys and hows of the Instant Pot Water Test. And also troubleshoot Water Test fails.
What is the Instant Pot Water Test?
The Instant Pot Water Test essentially involves you boiling water or rather pressure cooking it in your Instant Pot.
And I know it sounds silly. I mean, you’d think why should you even bother with boiling water in your Instant Pot? You have probably boiled water a thousand times before. And I totally get it.
But here’s the thing, while you might’ve lost count of the number of times you’ve boiled water, you’ve most likely never used an Instant Pot before.
So think of this water test as you taking your Instant Pot on a test run (of boiling water) before the main show (the actual Instant Pot recipes!).
Though there is more to it than that, as I have elaborated below.
Why Should You Do It?
There are 2 primary and equally important reasons for doing the Instant Pot Water Test.
- It’s a good way to ensure your Instant Pot is working like it is expected to.
- It’s the best way to familiarize yourself with your Instant Pot. You’ll get to know the basic components of your Instant Pot, and more importantly, you’ll get a baseline understanding of how an Instant Pot pressure cooking cycle works.
Is It Absolutely Necessary To Do The Water Test?
For the reasons mentioned above, it’s ideal to do the water test. But is it absolutely necessary to do this test? No.
I mean your Instant Pot will not work any more or less efficiently if you do or don’t do the water test.
A water test is mostly done to ensure your Instant Pot is working correctly. And more importantly to familiarize yourself with this new electric pressure cooker of yours.
If you skip the water test, your odds of messing up your first recipe or freaking out about the steam and sound signals of Instant Pot while cooking are higher. Especially if you have never used a pressure cooker before, electric or otherwise.
Which is why, it’s highly recommended you do this water test before you start Instant Pot cooking.
If you haven’t already, check out this post before you start using your Instant Pot - it’s Instant Pot Basics for Beginners - which introduces the basic components and functions of the Instant Pot.
How To Do The Instant Pot Water Test
Once you are ready to start your Instant Pot, here are the steps you need to follow to do the water test -
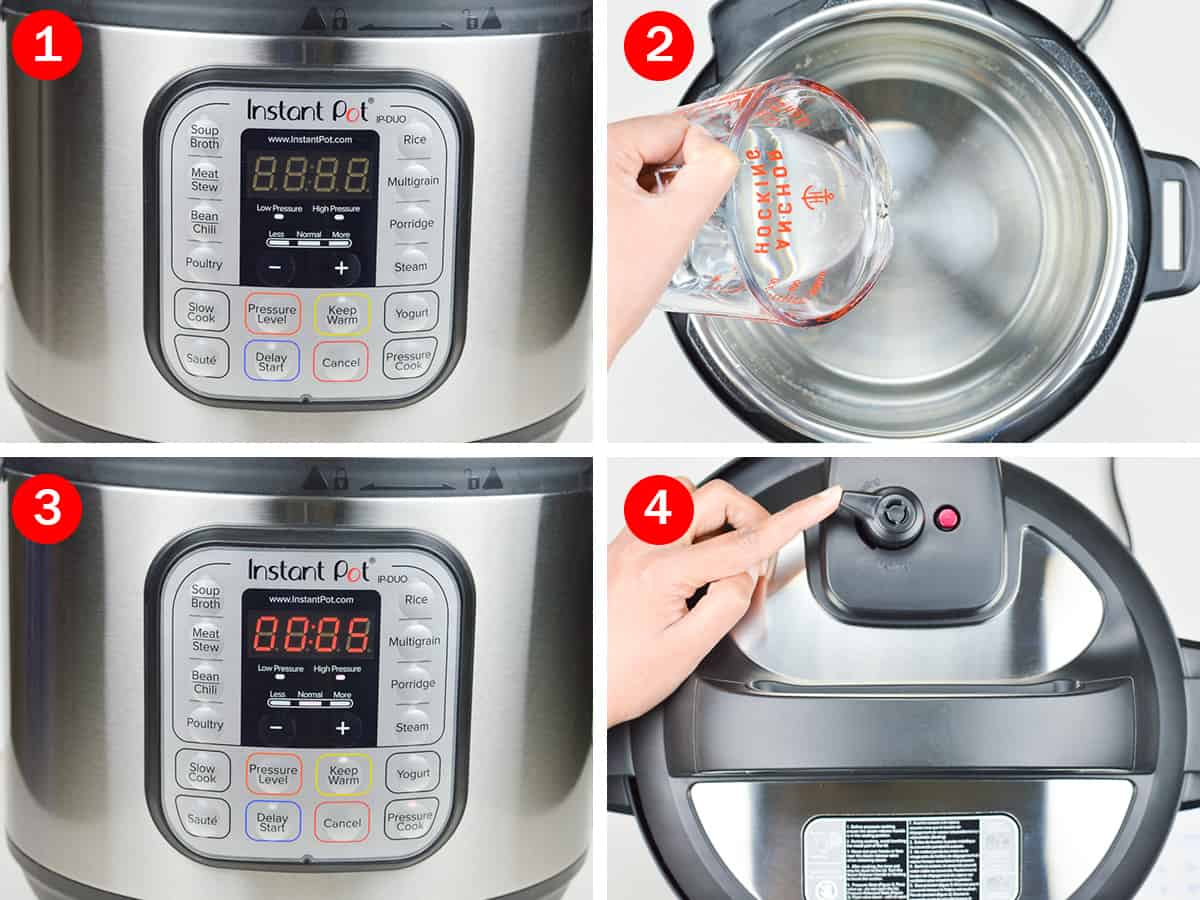
- Plug in the Instant Pot to a power outlet.
- Place the Inner (Steel) Pot in the Instant Pot Base Unit.
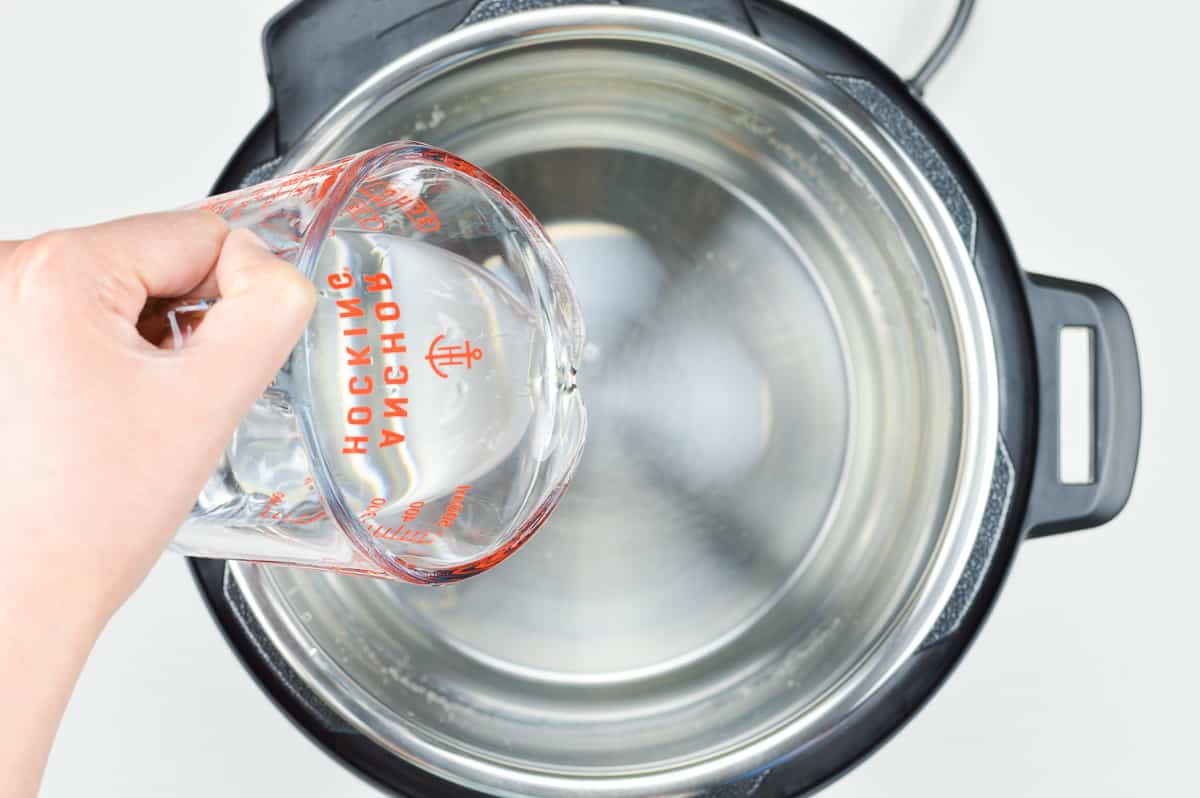
- Pour 3 cups of water in the Inner Pot.
- Close the lid, after ensuring that the sealing ring is secured in place. A chime will indicate that the lid has been closed.
- Position the steam release valve to point to sealing.
- Press the pressure cook button, and adjust the time on the display to 5 minutes (by pressing the +/- buttons).
- In about 5-10 seconds, the Instant Pot will beep, and the display will read ‘ON’.
- Depending on your Instant Pot size and model, it will take about 5-10 minutes for pressure to build in the Instant Pot.
- As soon as the Instant Pot is pressurized, the float valve will come up, and the timer will start counting down the 5 minutes of the pressure cooking cycle.
- Once the pressure cooking cycle is complete, the Instant Pot will beep, indicating the end of the cooking cycle, and go into ‘keep warm’ mode.
- At this point, you can press cancel. And choose one of the two methods of releasing pressure from the Instant Pot - quick pressure release or natural pressure release.
- You can do a quick pressure release right away by moving the steam release valve to venting, or wait for some time to do a quick / forced pressure release. You can also choose to wait for the natural pressure release, which can take some time, depending on the quantity of liquid in the pot. I have explained these two modes of releasing pressure in detail in this Instant Pot 101 post.
- Once the Instant Pot is depressurized, the Instant Pot Water Test is complete. And you can start making all those Instant Pot recipes you’ve been wanting to try out. 🙂
Note:
For the water test, it doesn’t matter how you choose to release the pressure. However, when you are trying out Instant Pot recipes, then you’ll see that specific recipes will call for one of the two pressure release methods.
More often than not, most recipes will call for timed pressure release. So it’s great to get familiar with it during this water test.
One other thing to note here - the time it takes for your Instant Pot to release pressure naturally can vary depending on the model and the size of your Instant Pot, and even the dish you are cooking in it.
However, one thing holds good across all Instant Pots - your Instant Pot will cool faster if the keep warm mode is turned off. So just hit cancel once the cooking cycle is done. Unless the recipe specifically advises against it.
What To Expect + Things To Note During The Water Test
Here are a few things you might notice during the water test, especially if you are watching closely, which you probably will be, as this is the first test run of your brand new Instant Pot.
I know I personally have never ever monitored boiling water so closely before, and I couldn’t even see this water!! 😀
- Right around the time the pressure starts to build in the pot, your Instant Pot will begin to hiss and release steam. This is normal. Within a few minutes, the float valve will come up, and the timer will start counting down, and then there will be no more sounds or steam coming out.
- Speaking of the float valve & the timer - it might so happen that the float valve has come up, but the timer has not started. This again, is normal. It might take a couple of minutes for the timer to start counting down after the float valve comes up.
- Like I mentioned above, once the pressure cooking cycle is complete, your Instant Pot will go into ‘keep warm’ mode. Unless you press cancel.
For the water test, I’d say hit cancel, and try for a timed pressure release after say 5 minutes. But again, you could wait for natural pressure release, if that’s what you’d prefer. It doesn’t matter what you do in this case. It’s only about getting familiar with the workings of your Instant Pot.
How To Troubleshoot Instant Pot Water Test Fails
It’s rare, but there are times when the Instant Pot Water Test fails. Usually one of these two things happen -
- You see steam coming out from the sides.
- Your timer doesn’t start at all.
And when either of these things happen, you can always call the Instant Pot customer service to help.
But here are a couple of things you might want to check to troubleshoot this yourself, before you decide to call the customer service.
Frequently Asked Questions / Concerns
Hit the cancel button, ensure the float valve is down, and open the lid of the Instant Pot.
Then check if the sealing ring is securely in place. Usually if steam is escaping from the sides, it’s because the sealing ring is not properly placed. Fix it, and try again.
In this case, check the position of the steam release valve. Is it pointing towards sealing or venting? If the steam release valve is pointing towards venting, then the pot will not get pressurized, and the timer won’t start.
So position the steam release valve to sealing, and try again.
I hope this post has been helpful to you, and has given you the confidence to get started with your Instant Pot, by conducting a water test first.
If you haven’t already, check out this Instant Pot 101 for Beginners Post. It will help you get familiar with the components and functions of your Instant Pot. And answer many questions you might have about Instant Pot Basics.
If you have any further questions, drop me a comment. And I’d be happy to help you out.
Popular Instant Pot Recipes:
Perfect Instant Pot Hard Boiled Eggs - Every Single Time
Instant Pot Chicken Biryani / One Pot Biryani Recipe
Instant Pot Bhuna Masala / Indian Curry Sauce Base


Damyanti says
A good follow up post to your previous one! I am seriously considering looking into it getting one for myself.
Shantala's Kitchen says
You should. The Instant Pot will make cooking simple and hassle free, while keeping food delicious. 🙂