


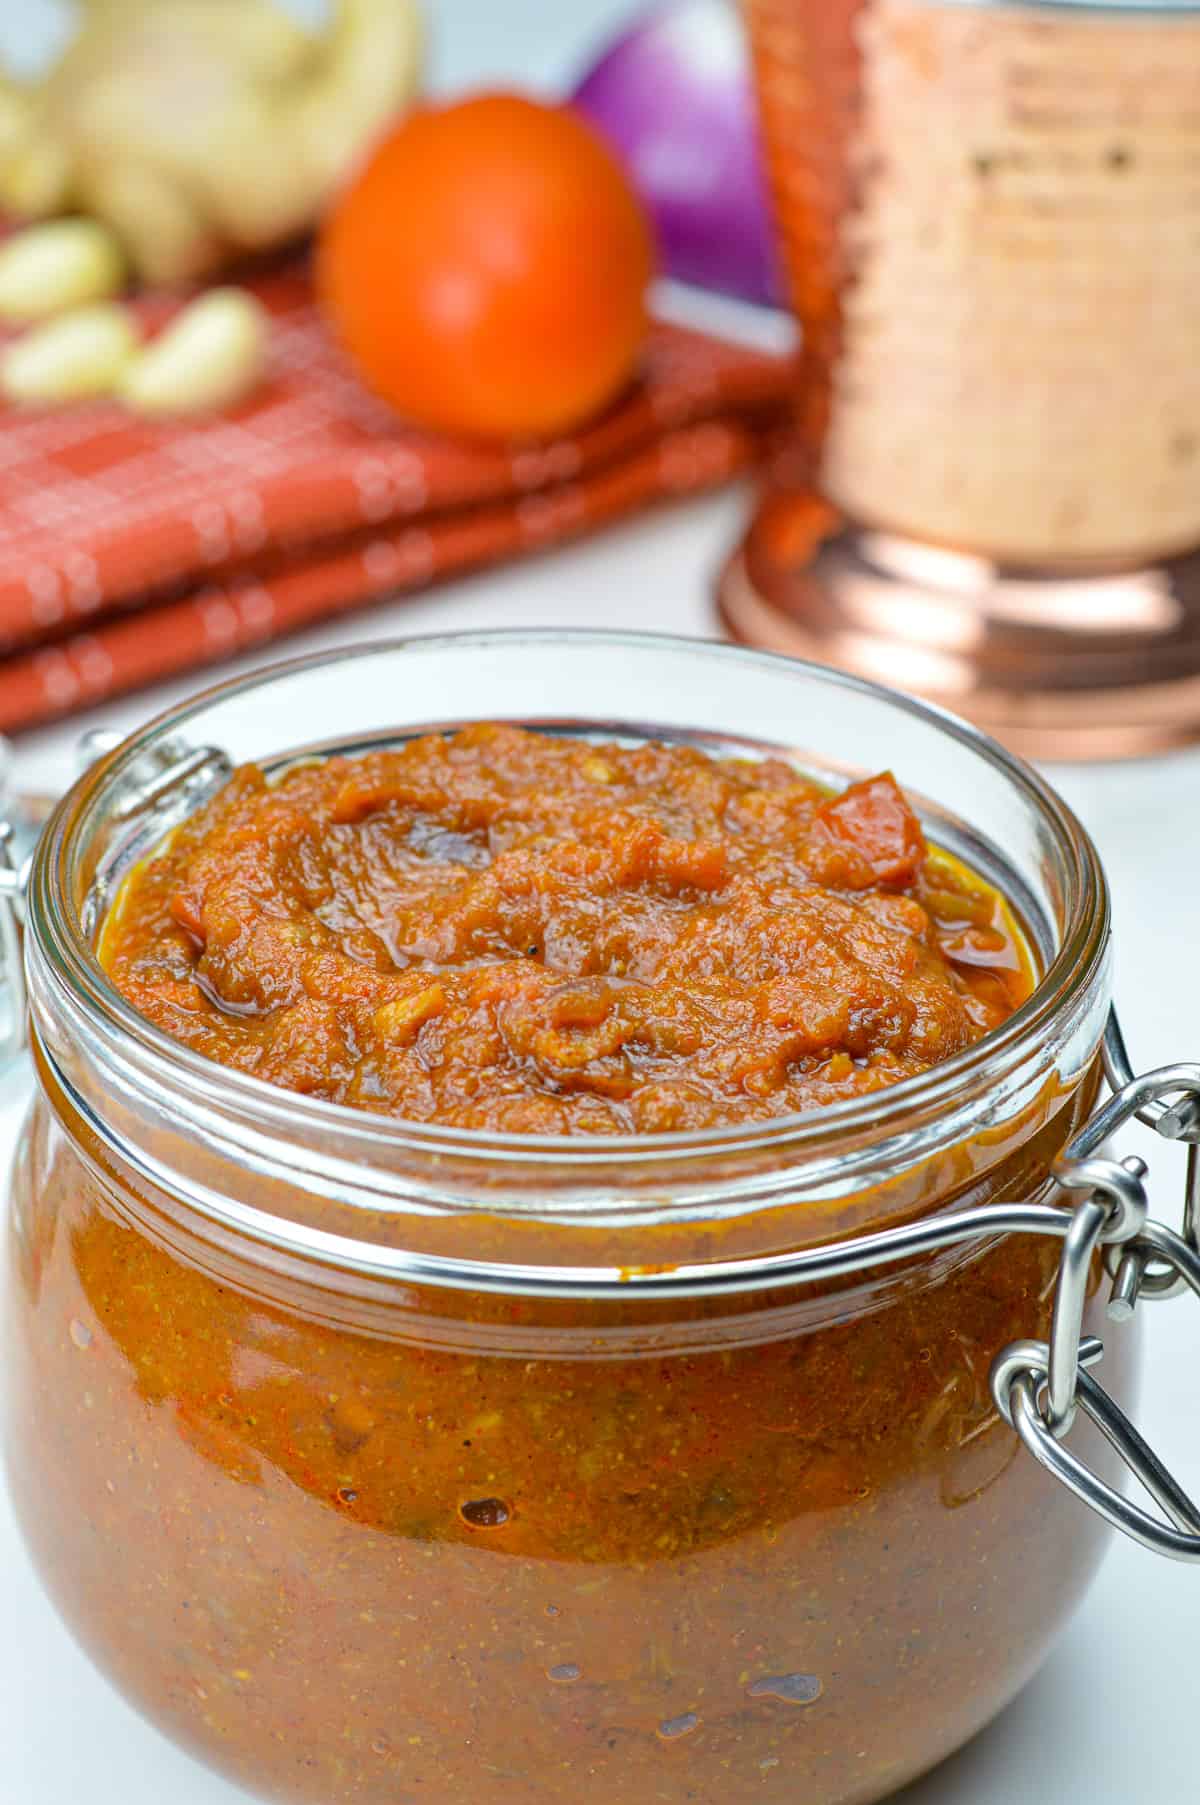
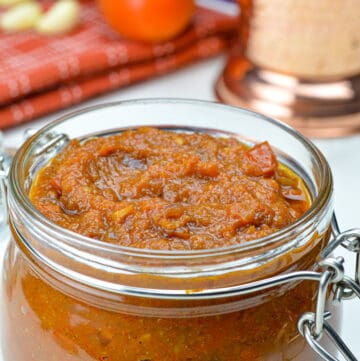
Bhuna Masala a.k.a. Indian Curry Sauce Base, made out of onions, tomatoes, ginger, garlic, and a few basic Indian spice powders is the mother of all Indian curry sauce bases. Mostly because of the endless variety of dishes you can make with it.
But you know what’s my favorite part of always having Bhuna Masala on hand? Not having to constantly be chopping and roasting onions and tomatoes every single day, especially on weekdays!
What is Bhuna Masala / Indian Curry Sauce Base?
Bhuna means roasted in Hindi, so Bhuna Masala basically means roasted spice blend.
It’s an Indian Curry Sauce Base that is made by chopping and roasting onions, tomatoes, ginger, garlic, with Indian spices like garam masala powder, coriander powder, cumin powder, red chilli powder, and of-course salt.
Essentially the onion tomato masala blend that forms the base of most Indian curries.
Why Should You Make It In Bulk
If you have been cooking Indian dishes for any length of time, you may know the sheer amount of onions and tomatoes that go in most Indian recipes.
And how a lot of time is taken to do the same repetitive tasks of chopping and roasting onions and tomatoes.
Which to be honest is a terrible waste of time, especially on a day to day basis. It’s the reason why it’s best to do these tasks in bulk.
And Bhuna Masala is the perfect candidate to make in bulk. Because not only does it save your time on a day to day basis, this curry sauce base also stores and freezes really well. So you save time, with no compromise on the taste front. Win-win!
Having Bhuna Masala on hand will help you make a wide variety of Indian curries in just 30 minutes, with minimal active cooking time.
And what’s not to love about an easy dump & go style of delicious Indian curry, that tastes like a lot of time & effort has gone into it?
Actually, what’s not to love about an easy dump & go style of delicious Indian curry? Period.
Ingredients to Make Bhuna Masala
Onions - You can use any kind of onion you prefer, but Indian red onions are best for making Bhuna Masala.
Tomatoes - Here again, you can use any kind you prefer. However, roma & plum tomatoes are best suited because they have a good balance of sweetness, sourness, and acidity.
Ginger - Regular grocery store ginger, culinary ginger, or Chinese ginger, anything will work.
Garlic - Hard-neck garlic or soft-neck garlic, either will work. Though know that soft-neck garlic, while easily available in super markets, has a milder flavor, as opposed to hard-neck garlic that has a more potent flavor profile.
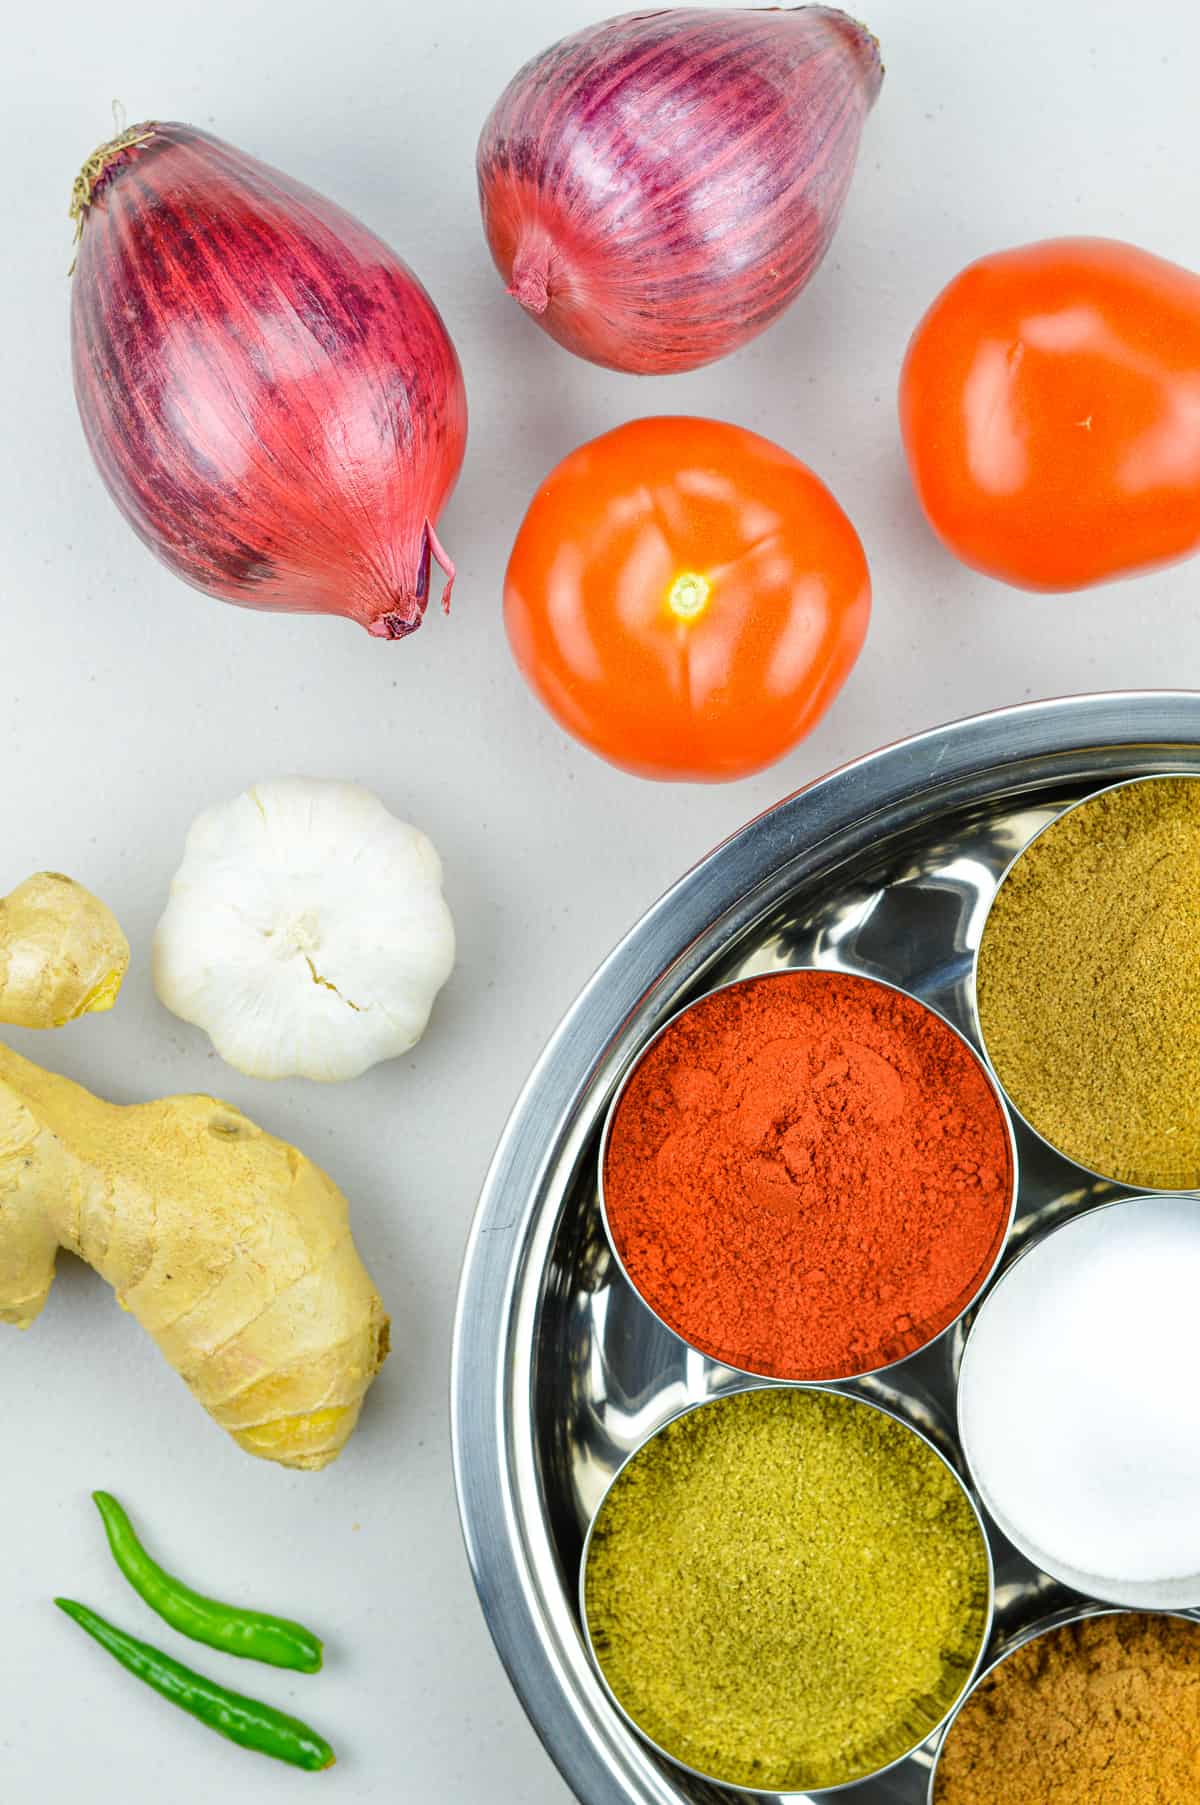
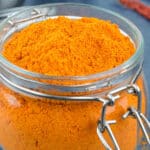
Indian Spice Powders - Garam Masala Powder, Coriander Powder, Cumin Powder, Red Chilli Powder. Though you can replace Red Chilli Powder with Kashmiri Chilli Powder. I do.
Salt - Regular iodized table salt.
Green Chillies - This is optional, and I prefer not to add it. Mostly because my son has a lower spice tolerance. And if needed, I can always add fresh green chillies or chilli paste while making the curry.
How to Make this Basic Indian Curry Sauce in Instant Pot
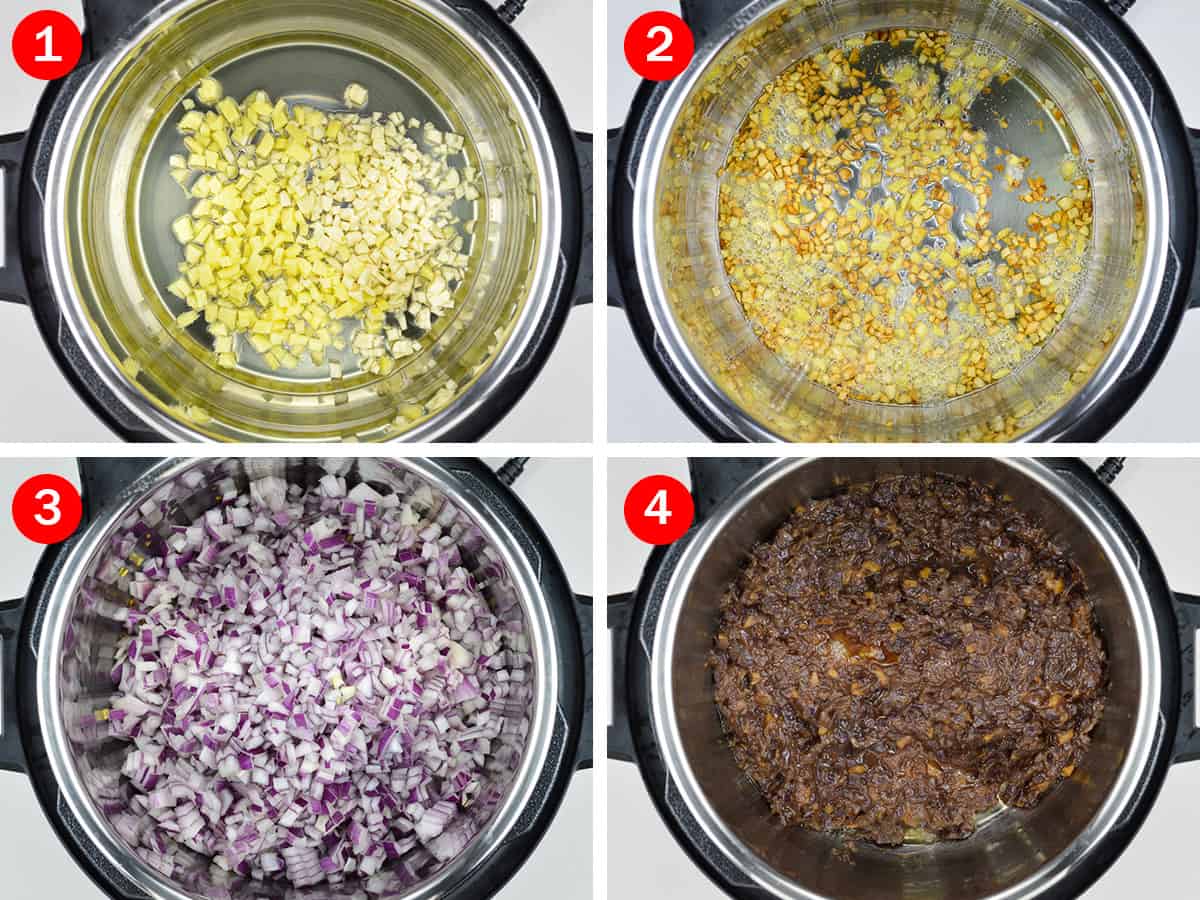
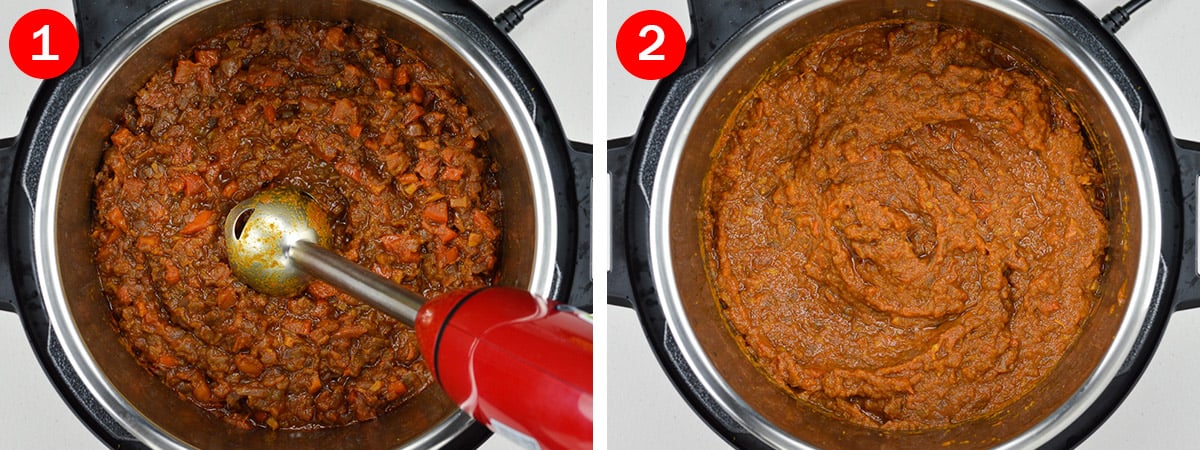
Start the Instant Pot in Saute Mode - normal, and first add in the oil in the inner pot. And let the oil heat up for a couple of minutes before you add the ginger and garlic.
Once the oil has warmed a little, add in the chopped ginger and garlic. Mix well and saute for 2-3 minutes, till the ginger and garlic start turning light reddish in color.
Then add in the chopped onion along with the salt. Mix well, and saute till the onions turn light (or deeper) golden brown in color (based on your preference).
I usually aim for really well roasted onions. It takes me about 30 minutes on saute mode - high.
Which is why, I’d say that at this point, it’s best to switch the saute mode from normal to high for browning onions faster. Just ensure to keep moving the onions around, so that they don’t stick to the bottom and burn.
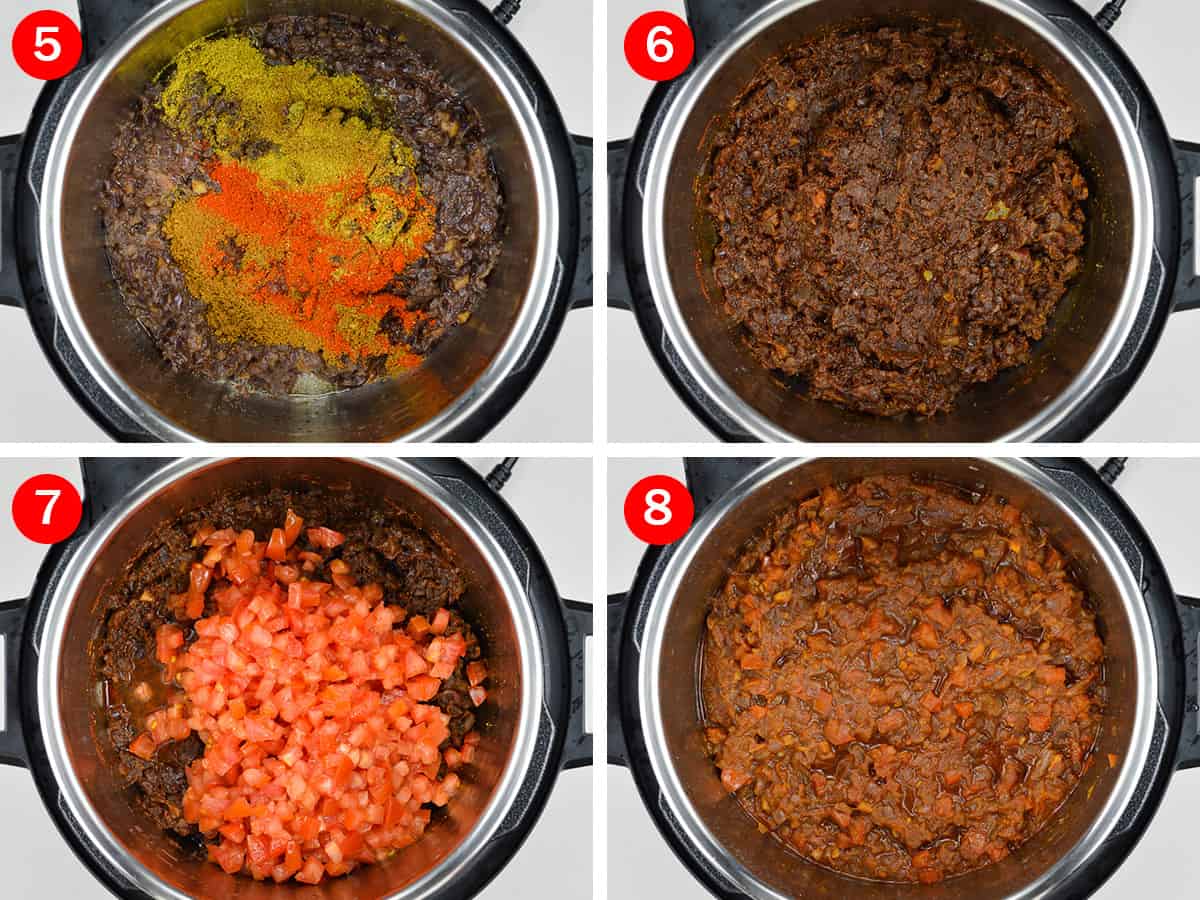
Once the onions are done, add in the masala powders - chilli powder, garam masala powder, coriander powder, cumin powder, and mix well. Saute for 1-2 minutes, till the masalas get lightly cooked.
If required, you can also add a splash of water in the pot, so that the masalas don’t stick to the bottom & burn.
Finally, add in the chopped tomatoes, and saute for a couple of minutes, before turning off the saute mode.
At this point, depending on how watery your tomatoes are, you might need to add ½ cup of water.
Then close the Instant Pot lid, after ensuring the sealing ring is securely in place, and position the steam release knob to sealing.
Pressure cook for 2 minutes on high pressure, and then once the cooking cycle is complete, wait for the pressure to release naturally.
Bhuna Masala / Curry Sauce Base on the Stove-top
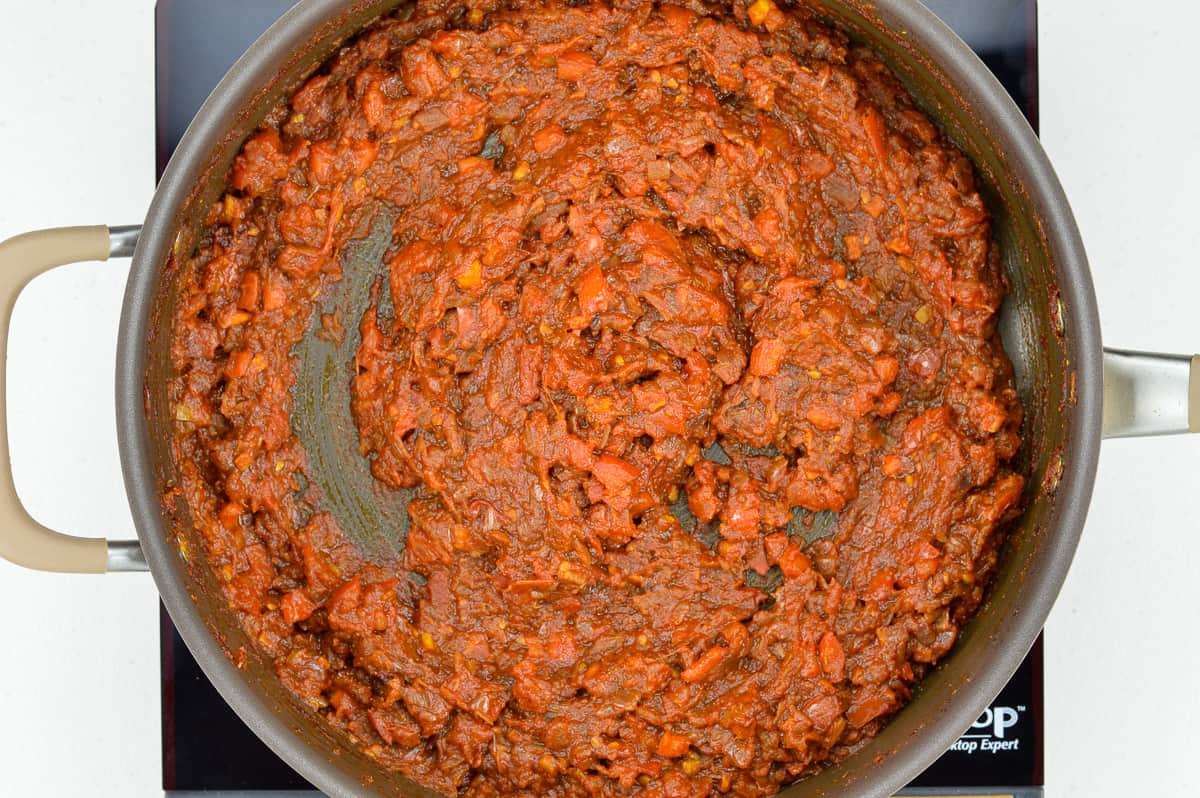
For making Bhuna Masala on the stove-top, you can follow the same method as listed above, with one exception. Instead of pressure cooking the tomatoes, you need to saute it on medium heat for 10-15 minutes, till it gets cooked well, and turns soft and mushy.
Once the oil starts leaving from the sides, Bhuna Masala is done.
Notes:
- You can adjust the ratio of onion and tomato based on your preferences, and the amount of sourness you want in your curry base.
- I always use a little less than half quantity of tomatoes to onion. ¾ cup of tomatoes for every 2 cups of onions. You can do 1:1. Or even use a little more tomatoes than onions. Based on your preference and the sourness of tomatoes.
- If you are going for an onion tomato ratio of 1:1, or even using more tomatoes than onions, then it’s best to saute and cook down the tomatoes for a couple of minutes before pressure cooking it. And add 1-2 minutes to the pressure cooking time.
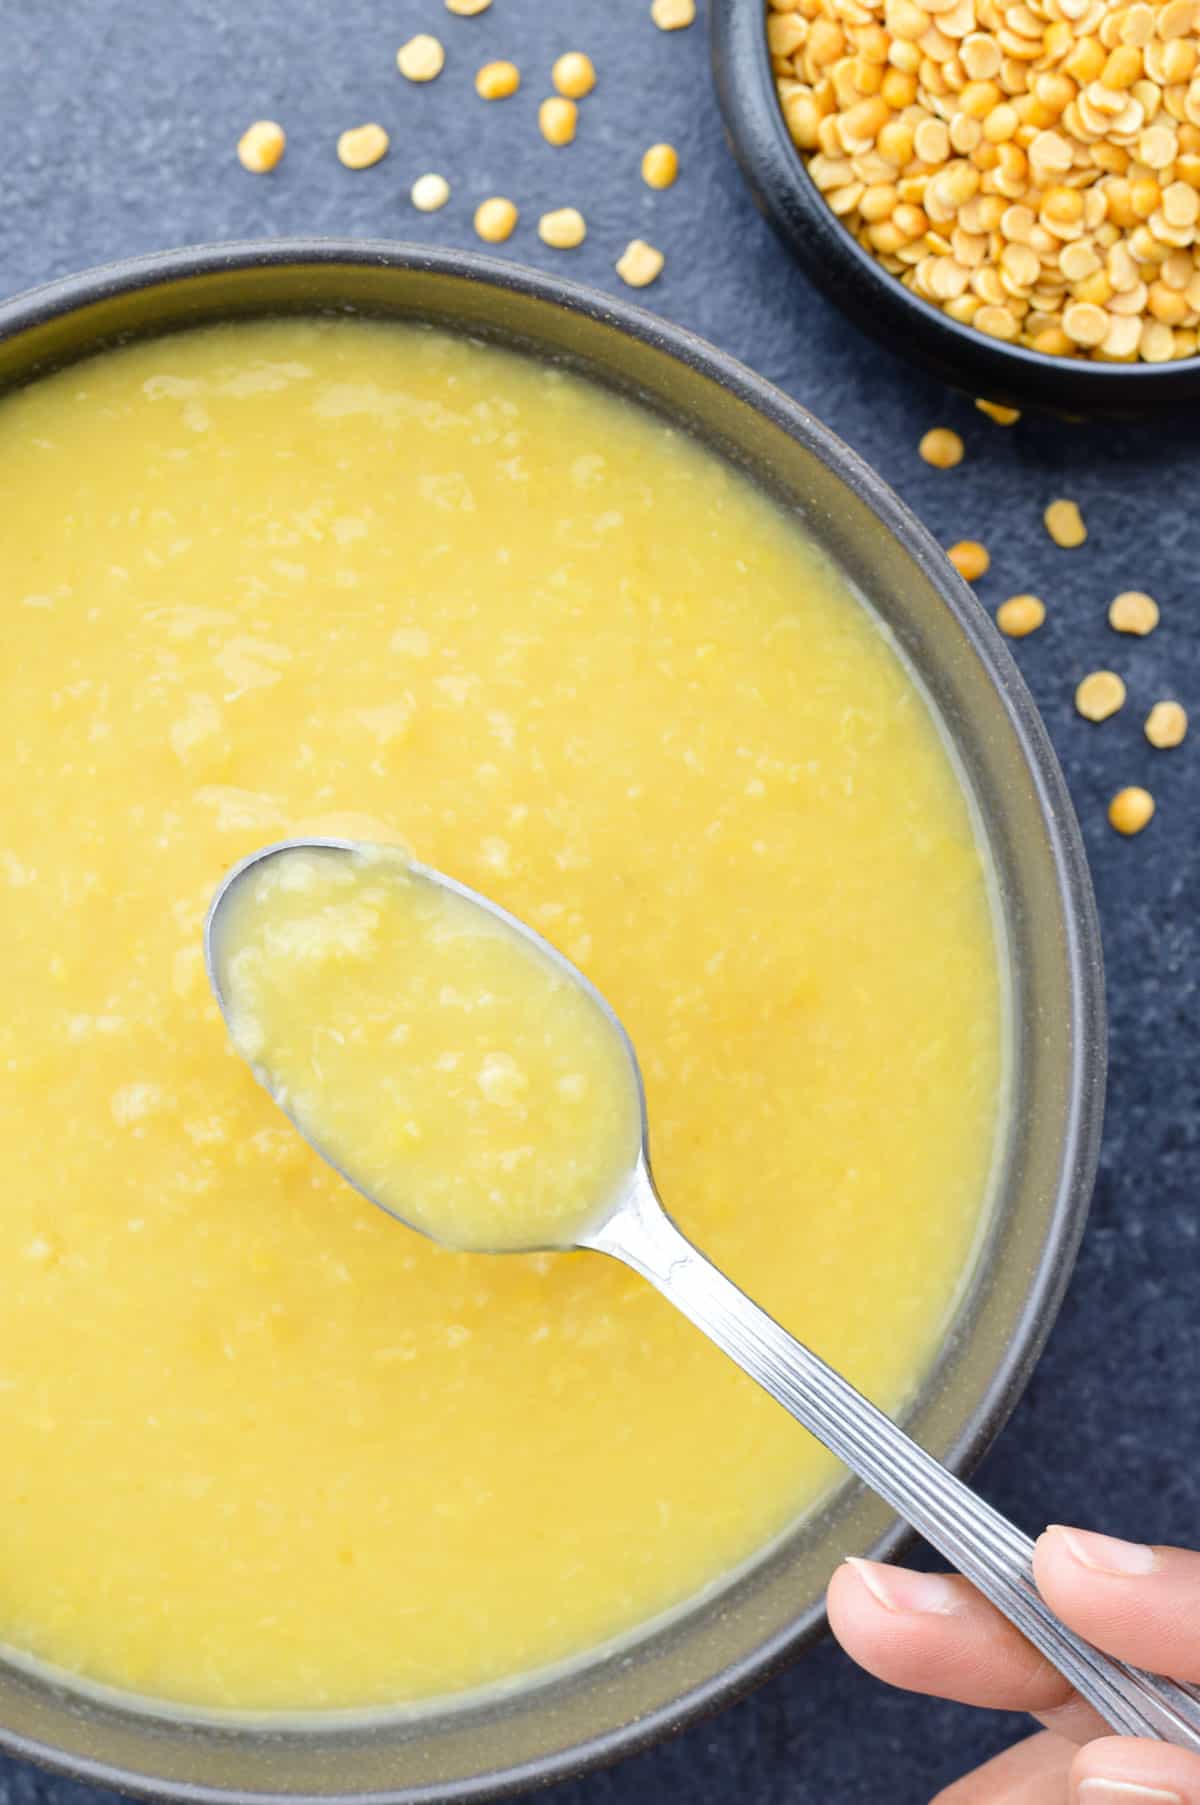
- You can either store this masala base as is, or grind it into a fine paste before storing it, based on whether you prefer texture in your curries or a smoother curry base.
I usually use a hand blender to get a semi coarse paste, because that’s the kind of texture I prefer.
Bhuna Masala Pro Tips
- Switching the Instant Pot saute mode to high will help brown onions faster. If you are using the stove-top, choose a flat, wide bottomed pan to speed up the roasting of the onions.
- Adding salt while sauteing onions speeds up the process of browning onions.
- Use an onion / vegetable chopper like this one to chop onions and tomatoes in minutes.
How to Store this Masala Base
Bhuna Masala stores well for a week to ten days in the refrigerator. If you are planning to use it within that time frame, then just store it in the refrigerator, in an air-tight glass jar.
Else you can freeze it, using one of the two ways listed below.
Freezing the Masala Base
If you made a big batch of bhuna masala, and want to store it for longer, then it’s best to freeze the masala.
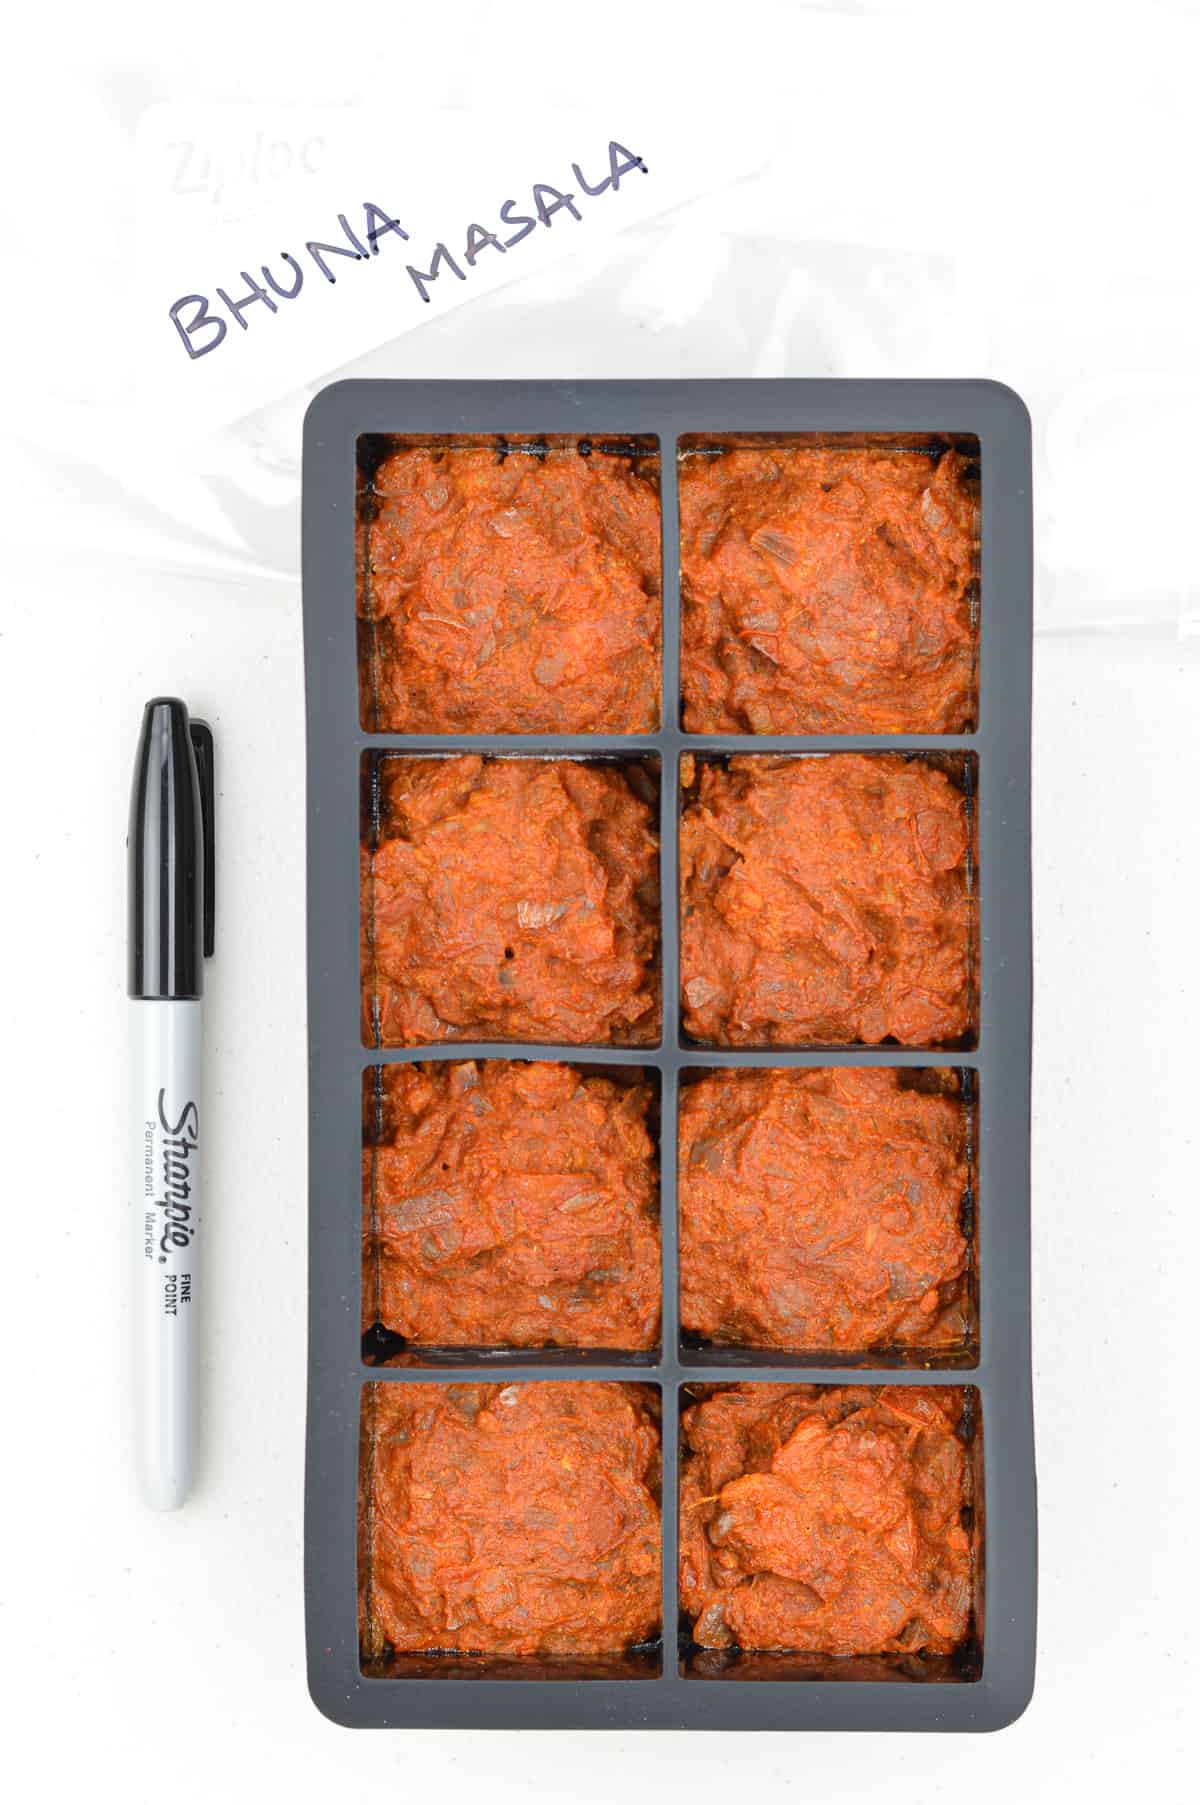
You can either freeze it in a glass storage container or in ice-cube trays.
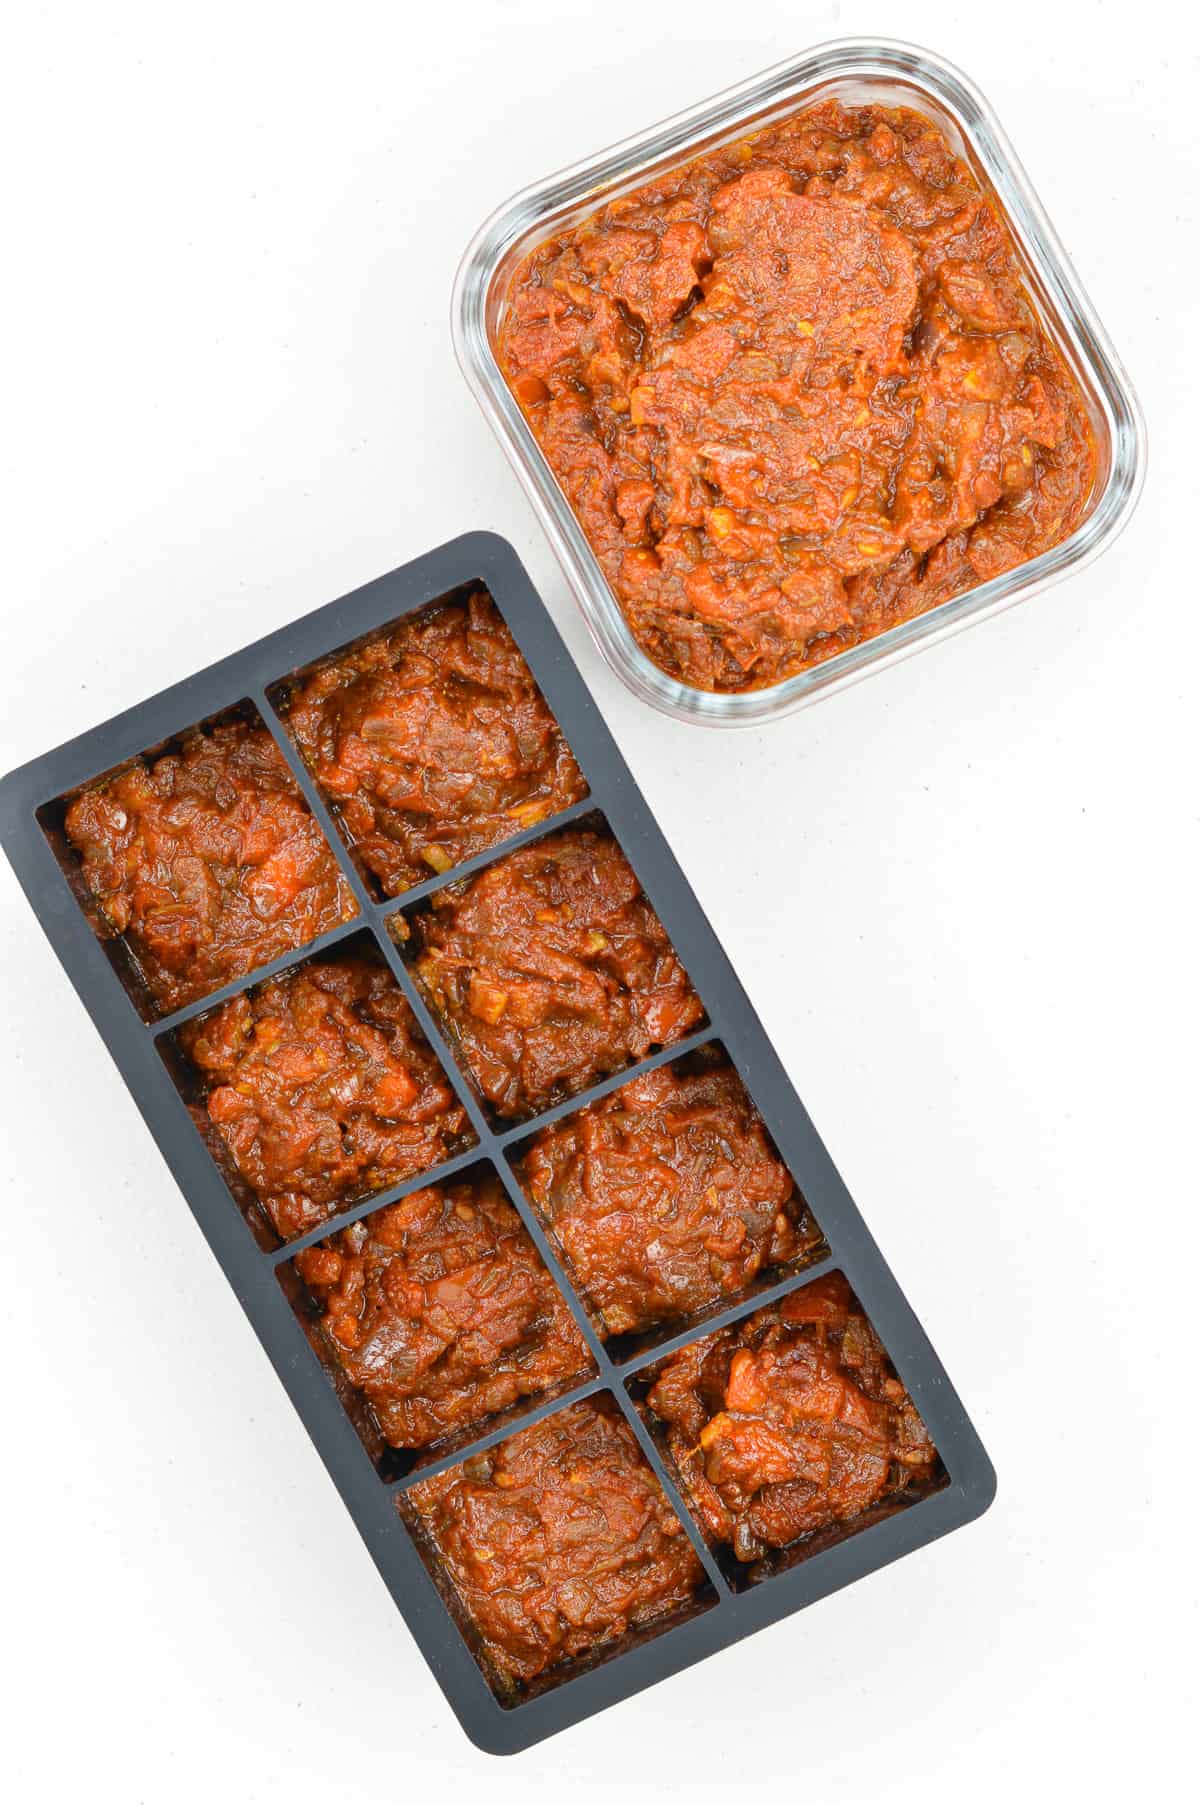
If you use ice-cube trays, and freeze the masala in cubes, transfer these cubes into a freezer safe ziplock bag, once they have frozen solid. And ensure to remove all the air out of the bag, before sealing it, and storing it in the refrigerator.
Also, if you are portioning out the masala to store in ice cube trays, try to store in ¼ cup portions.
It will make it easier to measure out exactly how much bhuna masala base you need, when you need to use these masala cubes for making curries.
Thawing the Masala Base
If you freeze the masala in cubes, you can take out as many cubes as you need, and directly thaw them in the Instant Pot or on the stove-top, right before making the curry.
But if you freeze the masala in the bigger containers, then it’s best to transfer the container from the freezer to the fridge a couple of days before you need to use it.
Alternatively, you can thaw out the container on your kitchen counter-top.
Either way, once you thaw out more masala than you need at one go, just ensure to refrigerate the rest of the masala, and use it within the next 7 days. Do not refreeze the thawed out masala.
How to Use this Curry Sauce Base in Recipes
- Thaw the amount of bhuna masala base you need. If you have frozen it in cubes, then take as many masala cubes you need, and directly warm in the Instant Pot or the stove-top.
- Add the main ingredient of your curry. And any additional spices, and water, if required.
- Mix well, and cook like you would normally cook. Garnish and serve.
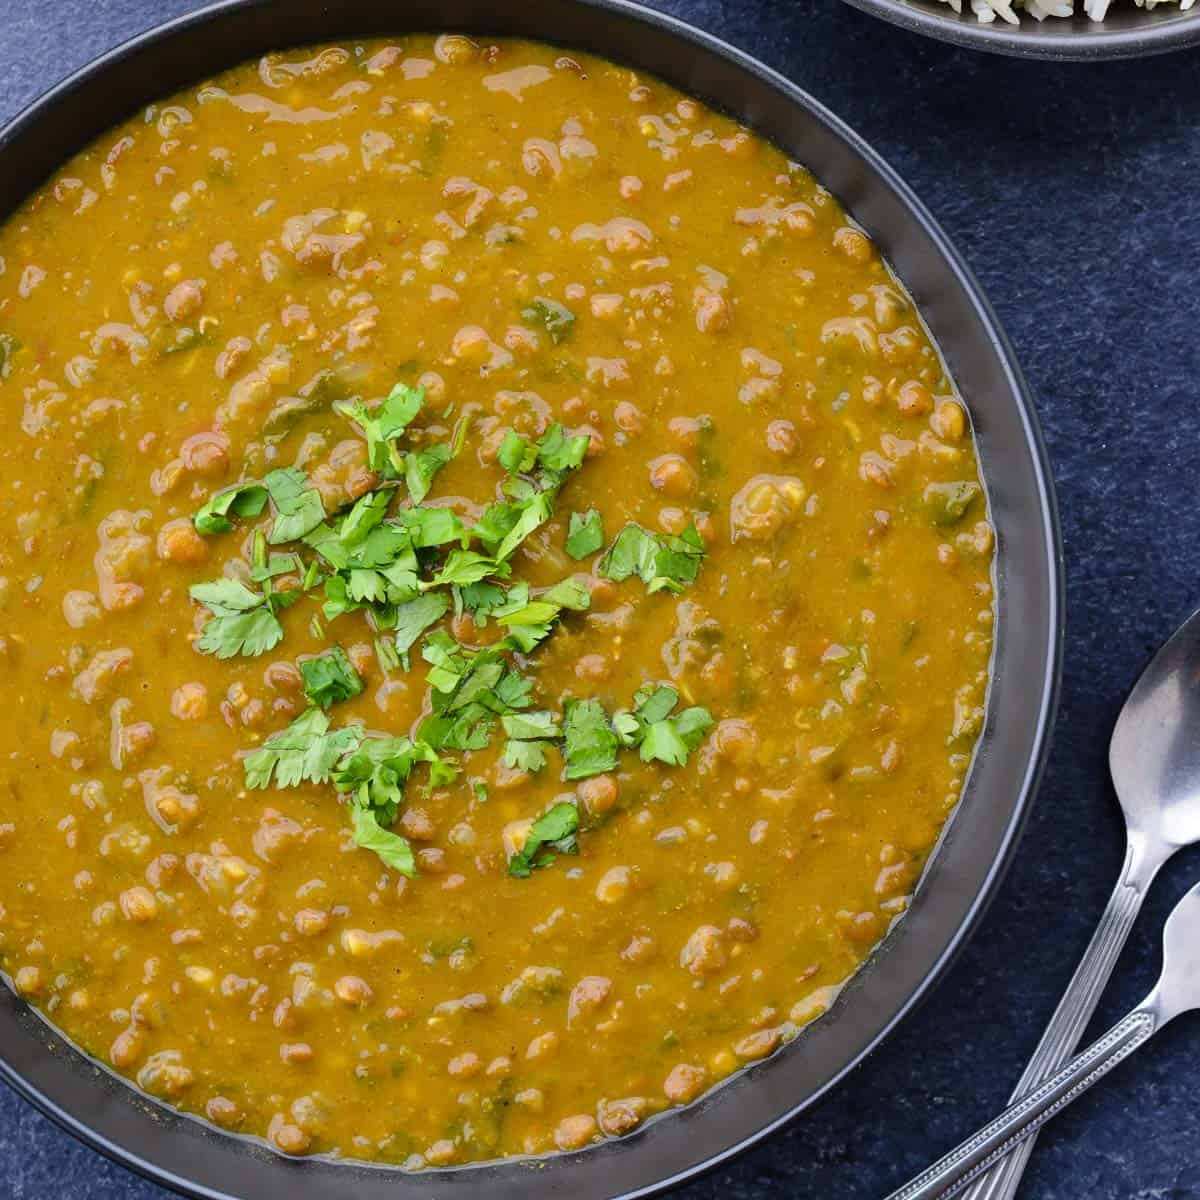
Last week, I cooked Rajma Masala by using this Bhuna Masala, and all I had to do was add the bhuna masala, rajma masala powder, pre-soaked rajma beans, and water in my Instant Pot, and pressure cook in the Bean / Chilli Mode for 30 minutes. And let the Instant Pot release pressure naturally.
Total cooking time - 50 minutes. Active cooking time - 5 minutes. End result - a dump and go style meal, that is homey, hearty, and delicious a.k.a. weeknight dinner goals!
Of-course Rajma Masala is only one example, you can make an endless variety of dishes using Bhuna Masala as the base.
And I used my Instant Pot, but even if you cook the curry on stove-top, the active cooking time will still be minimal. Especially considering that there is no need to chop & roast onions, tomatoes, ginger & garlic. That right there is a big time saver.
Recipes Using this Curry Sauce Base / Bhuna Masala
You can make a wide variety of dishes using this Bhuna Masala as the base. I’m only listing out a few examples here -
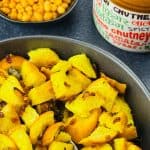
- Chole Masala
- Rajma Masala
- Chicken Curry
- Egg Curry
- Indian Shakshuka
As always, I hope you found this recipe useful. If you did, please let me know your rating ⭐️ and feedback ? in the comments below, or simply rate the recipe right on the recipe card. I'd really appreciate it. ❤️
Bhuna Masala - Indian Curry Sauce Base
Equipment
Ingredients
- 6 tablespoon oil
- 4 tablespoon chopped ginger
- 4 tablespoon chopped garlic
- 8 cup chopped onions
- 3 cup chopped tomatoes
- 4 teaspoon salt
- 4 teaspoon kashmiri chilli powder
- 4 teaspoon garam masala powder
- 4 teaspoon coriander powder
- 2 teaspoon cumin powder
Instructions
Instant Pot Method
- Start the Instant Pot in the Saute Mode - normal, and pour the oil in the inner pot, and let it heat up for a couple of minutes.
- Once the oil has warmed a little, add the chopped ginger and garlic together. Mix well and saute for 2-3 minutes, till the ginger and garlic start turning light reddish in color.
- Then add in the chopped onion along with the salt. Mix well, and saute till the onions turn light (or deeper) golden brown in color (based on your preference). I usually aim for really well roasted onions.
- At this point, you can switch the saute mode from normal to high for browning onions faster. Just ensure to keep moving the onions around, so that they don’t stick to the bottom and burn.
- Once the onions are done, add in the spice powders, mix well, and saute for 1-2 minutes, till the masalas get lightly cooked. Add a splash of water, if required, so that the masalas don’t stick to the bottom & burn.
- Finally, add in the chopped tomatoes, and saute for a couple of minutes, before turning off the saute mode.
- At this point, depending on how watery your tomatoes are, you might need to add ½ cup of water.
- Then close the Instant Pot lid, after ensuring the sealing ring is securely in place, and position the steam release knob to sealing.
- Pressure cook for 2 minutes on high pressure, and then once the cooking cycle is complete, let the pressure release naturally.
Stove-top Method
- You can follow the same method as listed above, with one exception. Instead of pressure cooking the tomatoes, you need to saute it on medium heat for 10-15 minutes, till it gets cooked well, and turns soft and mushy.
- Bhuna Masala is ready when the oil starts leaving the sides.
Substitutions:
- If you want a spicier base, you can use red chilli powder instead of kashmiri chilli powder.
- Alternatively, you can add chopped green chillies. Which if you choose to add, add them right along with ginger & garlic.
Notes
- Adjust the ratio of onion vs tomato based on your preferences, and the amount of sourness you want in your curry base. I always use a little less than half quantity of tomatoes to onion. You can do 1:1. Or even use a little more tomatoes than onions. Based on your preference and the sourness of tomatoes.
- If you are going for an onion tomato ratio of 1:1 or even using more tomatoes than onions, then it’s best to saute and cook down the tomatoes for a couple of minutes before pressure cooking it. And add 1-2 minutes to the pressure cooking time.
- You can either store this masala base as is, or grind it into a fine paste before storing it, based on whether you prefer texture in your curries or a smoother curry base. I usually use a hand blender to get a semi coarse paste with some texture.
- Switching the Instant Pot saute mode to high will help brown onions faster. If you are using the stove-top, choose a flat, wide-bottomed pan to speed up the roasting of the onions.
- Adding salt while sauteing onions speeds up the process of browning onions.
- Use an onion / vegetable chopper like this one to chop onions and tomatoes in minutes.
- Bhuna Masala stores well for 7-10 days in the refrigerator. Store in an air-tight glass container.
- Bigger batches can be frozen in glass storage containers or ice cube trays. If you’re using ice cube trays, then ensure to transfer the frozen masala cubes, into a zip-lock bag. And remove all the excess air out of the zip-lock bag, before sealing it, and storing it in the freezer.
- Also, if you are portioning out the masala to store in ice cube trays, try to store in ¼ cup portions. It will be easier to measure out the exact quantity of cubes you need while making the curry.
- If you have frozen the masala in cubes, just take out as many as you need, and directly warm them in the Instant Pot or the stove-top.
- If you have frozen the masala in a bigger glass storage container, you can either thaw out the container in the refrigerator or the kitchen counter-top.
- If you have thawed out more masala base than you need, you can refrigerate the rest, and use up within a week. Do not refreeze thawed masala base.
Please note: The nutrition values are best estimates provided as a courtesy. The exact values can vary depending on the exact ingredients or brands used. If you rely on them for your specific diet and/or health issues, please consult a registered dietician or nutritionist.
Nutrition
If you'd like FREE recipes and meal prep ideas delivered directly to your email inbox every Friday in one short email, then subscribe to the Foodie Friday list HERE, and never run out of ideas on what to cook over the weekend or prep for the week ahead. 🙂
Catherine Carey says
I love a good Bhuna and this recipe did not disappoint.
I added some leftover cooked lamb to the sauce and it was delicious.
5 stars all round for this very tasty Bhuna.
The Love of Spice says
Thank you so much. So glad you liked it.
Seevakumaran Thiagarajah says
Excellent recipe
.great insight.Thank you.
Spencer Walford says
I have used this recipe twice once for once for a chicken curry and once for a vegetable the results have been great, but I can improve.
The Love of Spice says
That's awesome! Thanks for letting me know!
Vinitha says
You are very organized, Shantala. And what a detailed explanation have you given here! The ice cube storage makes a lot of sense as it makes the thawing and further preparation extremely easy. I used to use that method to store mt little one's grind food when he started eating solids. Lifesaver!
Shilpa Gupte says
How I love your planning and storing of all the masala you make. I loved the way you stored the chilli paste in the ice cube tray, and now this, too.
I too made the chilli paste, but stored it in a Tupperware box in the freezer and it feels so good to not have to chop them each time I need them. I will try and follow this recipe, too. True, making bhuna masala each time you are making something can be a painful task!
Shantala's Kitchen says
Yeah it's definitely painful, especially on a daily basis, it's such a time-suck! But bulk processing and storing makes weekday life much easier.
Thank you so much for rating, Shilpa!
Natasha says
Fabulous pro-tips, Shantala.
Makes so much sense to freeze and keep it aside. Else it becomes such a time consuming task.
I like how you've fried the onions a lot more darker than I do. And then steamed the masala in the end. Interesting tip indeed.
Very pleasing pictures.
Thanks a lot for this!
Shantala's Kitchen says
So glad you found this helpful, Natasha. And you are very welcome. 🙂
Geethica says
Shantala, this gravy recipe is actually very handy. I know it is a waste of time to daily saute the same veggies for every other Indian dish.
Eager to try this and store it as you said.
Shantala's Kitchen says
So glad you liked it, Geethica. Thank you so much for rating. 🙂
Rajlakshmi says
If only I could make my family appreciate frozen paste. I can imaginr how easy life can be with this paste ready in advance. We have to make it four times every day. It's so repetitive and time consuming. The only paste we have in handy is ginger garlic that we make over weekends. This looks awesome too. Great recipe.
Shantala's Kitchen says
Thank you so much, Raj. And yeah, homemade frozen paste is a lifesaver!
Damyanti says
Another very time saving recipe! Thanks for sharing.
Shantala's Kitchen says
You are very welcome. 🙂
Thank you so much for rating!