


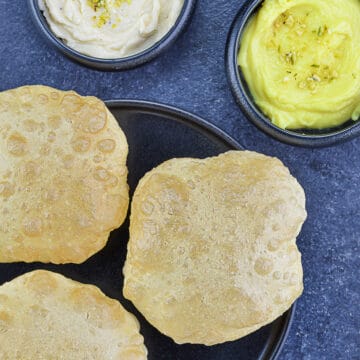
This puri recipe shows how to make puris that are crispy, yet soft, fluffy and puffed - shared with step by step images, a recipe video, and pro tips to make perfect puffed puris.
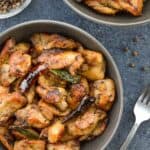
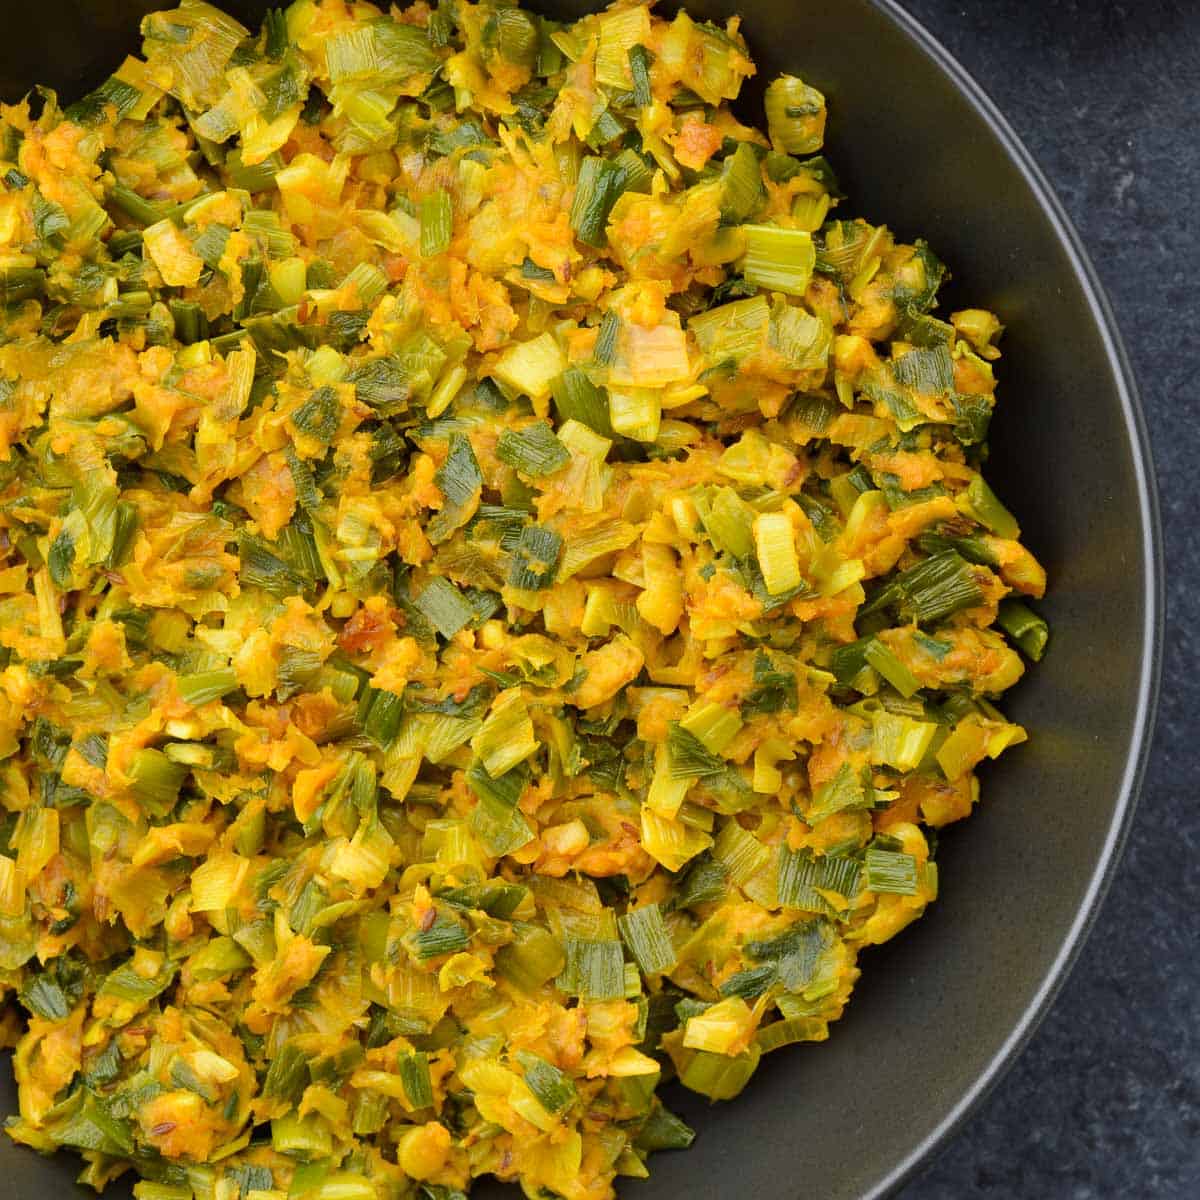
Puris or Pooris (Indian Fried Bread), when made right, are an absolute delight. Everything from the flavor to the texture makes your mouth water. And it can be easily paired with many dishes, like batata bhaji (potato subzi / curry), chole masala (chickpea curry), or even shrikhand (Indian sweet yogurt dessert).
Growing up, at our place, puris were made on every Gudi Padwa / Ugadi (Hindu New Year), and usually paired with shrikhand or aamras (mango pulp), based on whether the season's mangoes had started arriving. It's been a few years now, that we have also carried this foodie tradition on, and have started making puri shrikhand for either lunch or dinner on Gudi Padwa / Ugadi.
And this year, with the Hindu New Year a few weeks away, I am sharing this recipe on the blog for you guys, in case you would want to make it too, for the new year, or even otherwise.
If you plan to make it, I suggest reading this particular recipe carefully, along with the notes and the tips to make crispy, yet soft, fluffy & perfectly puffed puris - every single time.
Jump to:
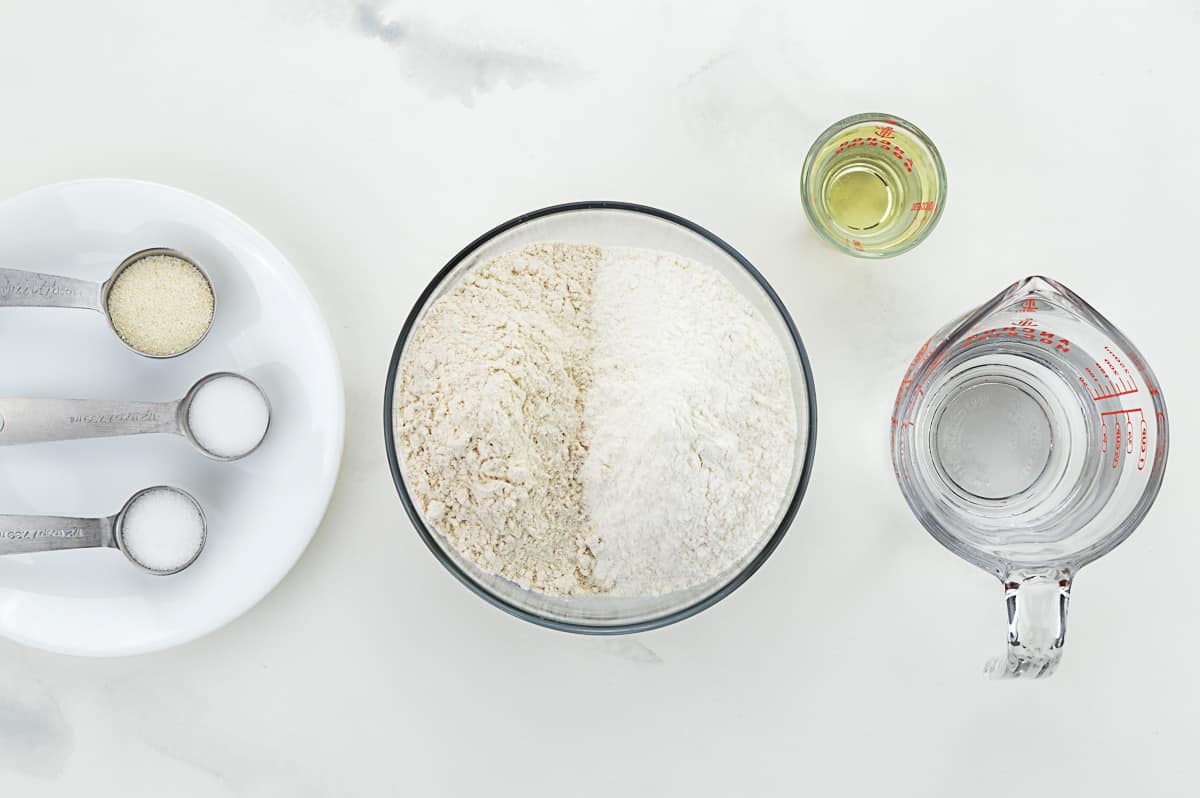
Ingredients You Need
Ingredient notes
Wheat flour puris / atta puris - I make puris using a mix of wheat flour and all purpose flour. You can make it using only wheat flour too.
Semolina / rava - This is considered optional, but I always add it, because it helps give puri the perfect crispy texture.
Salt & sugar - These are also considered optional, but I always add them, because they add to the flavor, and sugar also helps give puris the deep golden hue. Adjust quantity based on your preferences.
How to Make Puri (step by step recipe)
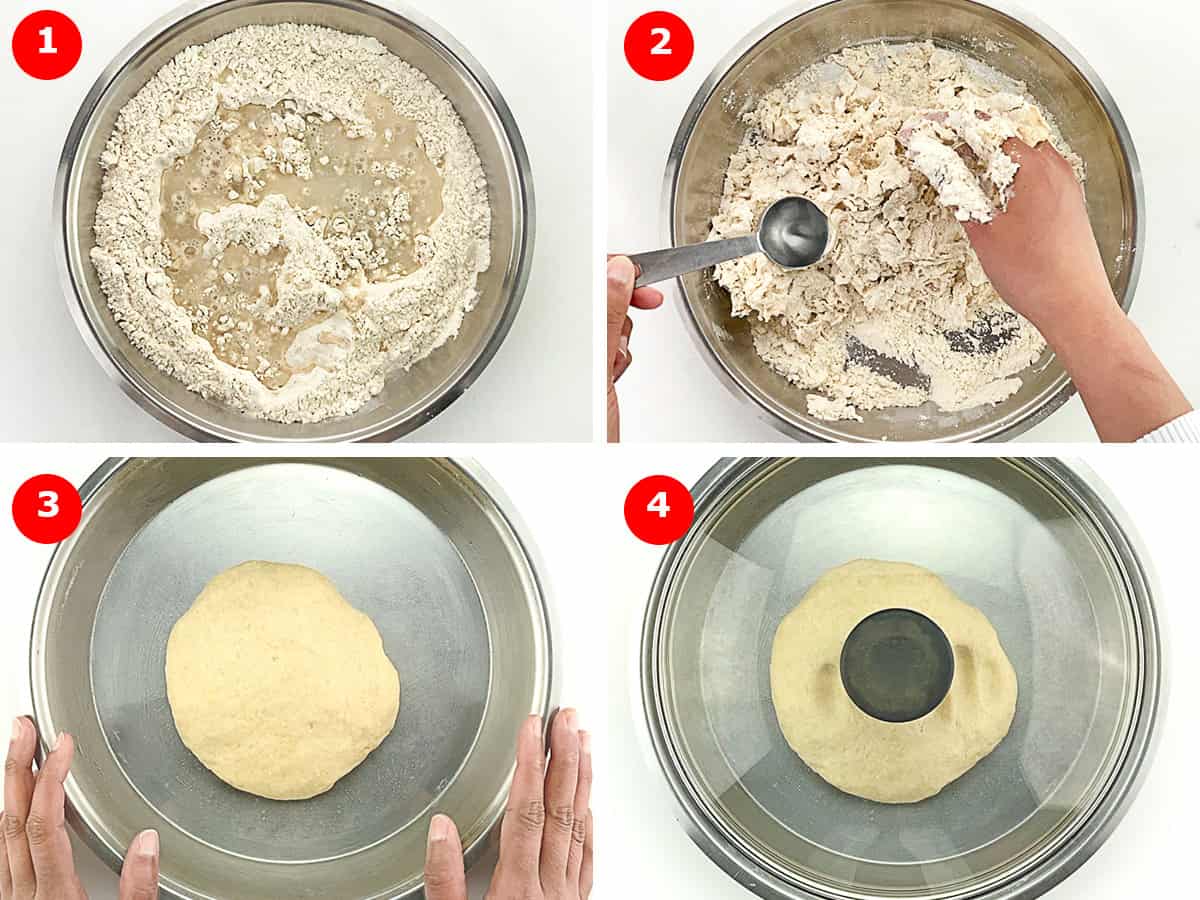
- In a wide bottomed utensil (paraat), add wheat flour, all purpose flour, semolina, salt & sugar, and give all the dry ingredients a quick mix.
- To this, add half of the oil, and start adding water, little by little, and knead till a hard dough is formed. Add rest of the oil towards the end to make a smooth dough.
- However do not over-knead this dough like for chapati. Only knead till you get a hard and smooth dough.
- Also dough should be hard (harder than regular chapati dough), but not dry and crumbly. If it is dry and crumbly, add a few spoons of water / oil to make a smooth dough.
- Cover & rest the dough for about 20 minutes, and then make even sized dough balls from the dough, and start to roll out the puris.
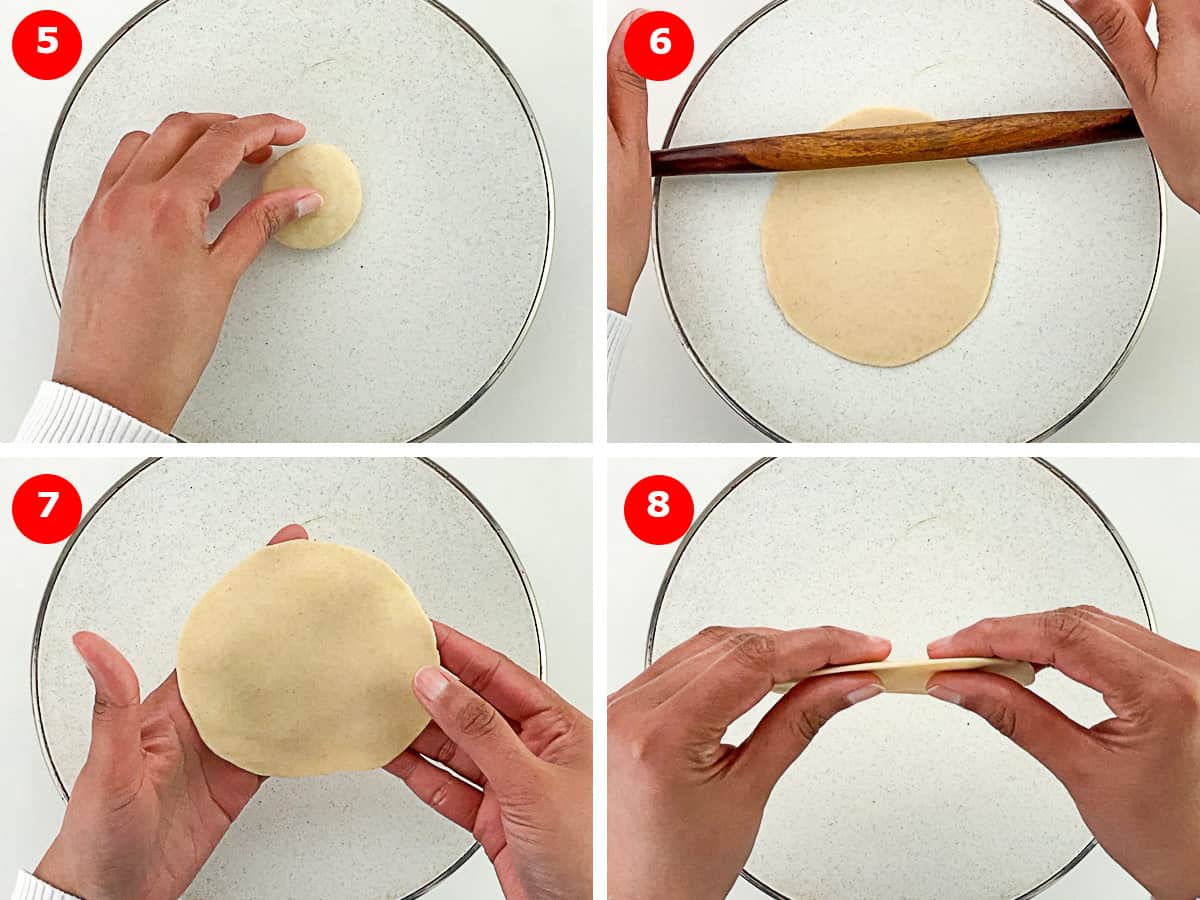
- Drizzle a few drops of oil in the rolling area, and spread out the oil on the surface, so that it is well greased.
- Start rolling out the puri, by flattening the dough ball from the center to the sides, to make an even round.
- You can use oil or flour to roll out puris. I prefer to use neither, but if required, I only use oil, and that too very little, since the surface is already greased. If you prefer to use flour, be sure to dust out excess flour before frying puris in oil.
- The flattened puri should not be too thick or too thin. If it is too thick, it will not be soft & light, and if it is too thin, it will be crispy like papad. If puri dough is flattened to moderate thickness, it will be soft & light, and puff up very well. See step images / video for reference.
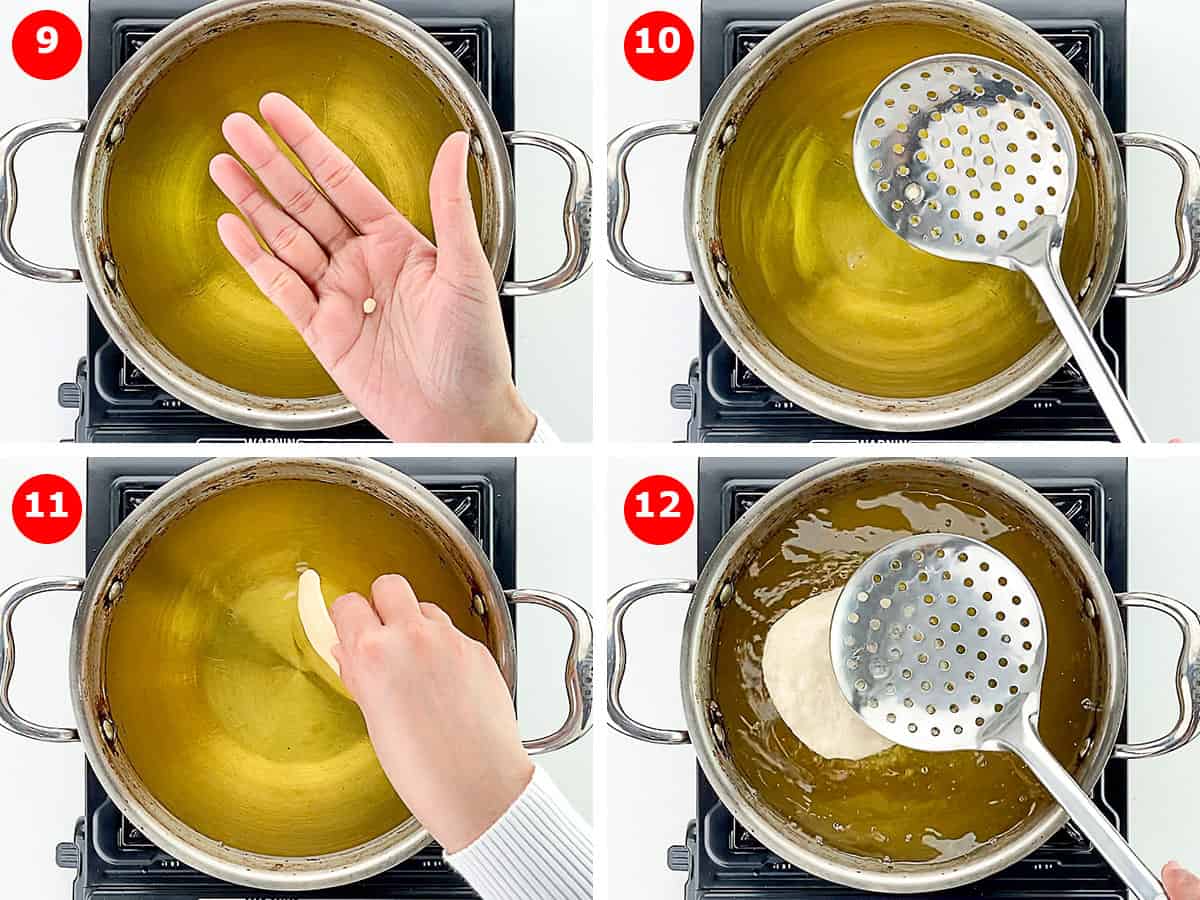
- In a pot, heat up oil really well for frying puris. For testing if the oil is hot, drop a small roundel of dough into hot oil. If it comes up immediately, without browning - oil is at the correct temperature.
- Slide the flattened puri carefully into the hot oil. Let it rise up a little from the bottom, and when it is almost halfway up, start pressing down on the top quickly, but gently, till the puri puffs evenly.
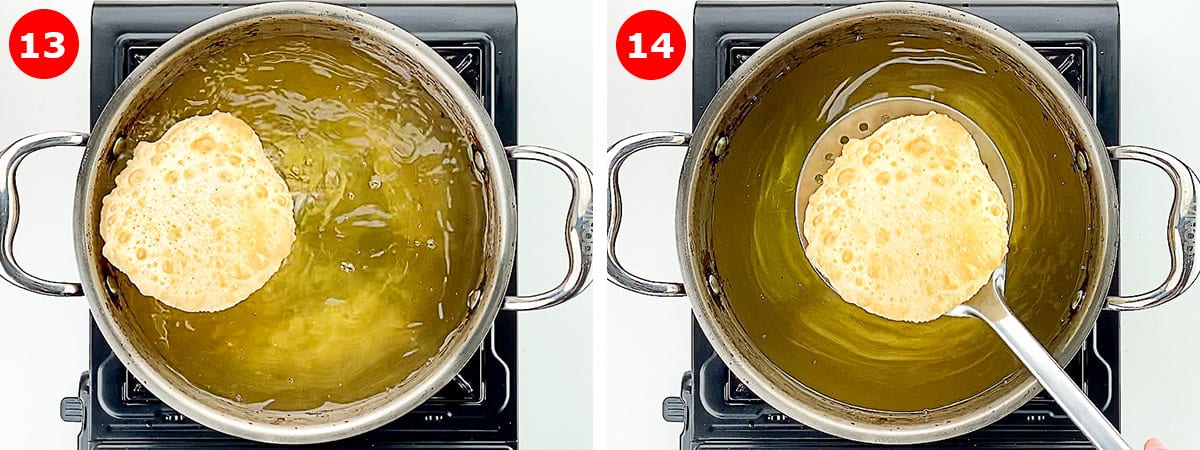
- When the puri has puffed, flip it to the other side, and fry till puri is light golden & crispy.
- When done right, you don't need to flip the puri in oil again, about 10 seconds each side is more than enough.
- Then remove the puri from the oil, and place it in a big steel colander, lined with paper towel.
- Fry the rest of the puris the same way.
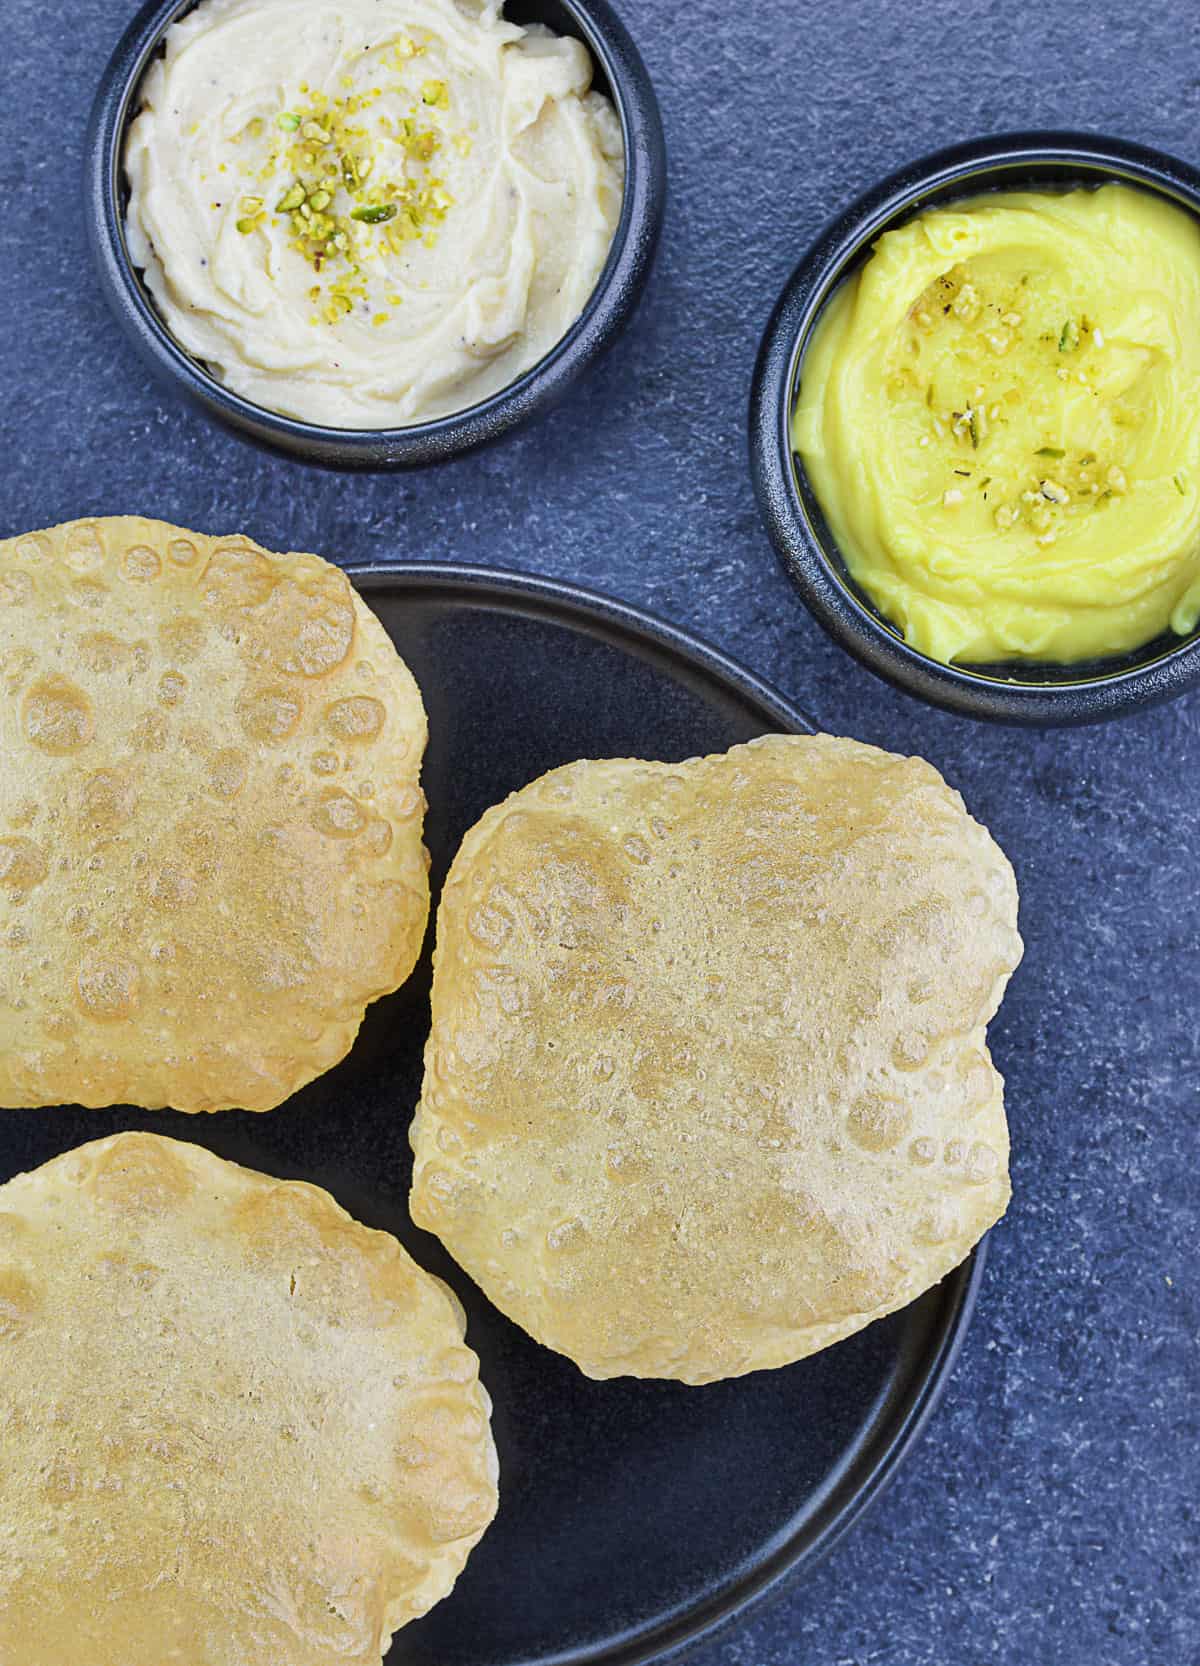
- Crispy, yet soft & fluffy, puffed puris are ready to serve.
Recipe Notes
Resting time for dough - It's important to rest the dough before frying the puris. I have tested out the resting time, and feel a minimum of 5, and a maximum of 20 minutes is ideal resting time. But I personally prefer resting for 20 minutes over 5 minutes.
Keeping dough & rolled out puris covered - Always keep the puri dough covered while resting. And try to fry it immediately after rolling out. I usually roll out 3-4 puris, fry them, and then roll out the next batch. Best to even try & keep the rolled out puris covered, if possible. So that they don't dry out, and get fried immediately.
Oil vs flour for rolling out puris - Ideally, it's best to only grease the surface, and not use oil or flour to roll out puris. But between the two I prefer oil over flour, because I don't like the excess flour getting into the oil while deep frying. But like I said, I prefer to not even use oil so as to not introduce excess moisture in the dough.
Tips to Make Perfect Puffed Puris
Making perfect puffed puris comes down to perfecting these 3 things.
Perfect dough - Puri dough should be hard (harder than regular soft chapati dough), and smooth (but not dry and crumbly).
Puris rolled out to even / moderate thickness - Evenly rolled out puris lead to evenly puffed puris. Also puris need to be rolled out to moderate thickness (see step image / recipe video for reference) - if they are rolled out too thick - they will not be light & fluffy, and if they are rolled out too thin - they will be crispy like papad.
Correct temperature of oil for frying puris - The oil needs to be at the correct temperature for light & crispy, puffed puris. Which is why, always test the oil with a small roundel of dough before frying the puris. The dough roundel should come up immediately without browning - that is the correct temperature to fry puris. Also, as you fry puris, the temperature of oil might need to be increased or decreased to be maintained at the correct temperature.
Serving Suggestion
Puris can be paired with many different things like potato subzi or chole masala (if you prefer savory), and shrikhand or aamras (to satisfy your sweet tooth).
Frequently Asked Questions
It's always best to make puris with freshly made dough. Though you can make puris with refrigerated dough as well. Just ensure to give it enough time to come to room temperature before rolling out the puris and frying them. That being said, there is a higher chance of puris made with refrigerated dough retaining oil and turning oily.
You can use most kinds of oil that have high smoke point. Like vegetable oil, canola oil, avocado oil etc.
There might be several reasons for this. Puris need a hard but smooth dough. If the dough is dry and crumbly, and not smooth, it can lead to hard puris, due to lack of sufficient moisture in the dough. Puris can also turn out hard if you have rolled them out too thin. Or if you have fried them in oil that was not at the correct temperature, and as a result fried them for longer in oil that was not hot enough. See recipe & notes for steps to follow and avoid this.
This can also be caused by a couple of reasons. Puri dough needs to be hard yet smooth. But if the dough is soft and sticky, and has too much moisture in it, the fried puris might retain oil. Also, if puris are fried in oil that is not at the correct temperature, and as a result fried for longer in oil that is not hot enough, then there is a higher chance the fried puris will retain oil. And sometimes puris made from dough that has been refrigerated can also retain oil, so it is best to use freshly made dough for puris.
First the dough has to be made right - so that it is hard and smooth. Then for puris to puff up, it's important to roll them out evenly, so that the flattened puris are not thick at some places and thin at others. Evenly rolled out puris will ensure evenly puffed puris. Also, the rolled out puris should not be rolled out too thick or too thin. If they are too thick, then fried puris will not be soft and light, and if they are too thin they will be hard and crispy like papad. Roll out to moderate thickness (see step images and video) for soft, light & puffed puris.
This can happen if there is excess moisture in the dough, or you don't have enough of fine semolina / rava in the dough. Because rava / fine semolina helps in puris staying puffed for longer.
Since puris are traditionally deep fried, it is always best to consume in moderation.
More Indian Breakfast Recipes to try..
⭐️ Idli Batter for Soft, Fluffy Idlis (detailed step by step guide)
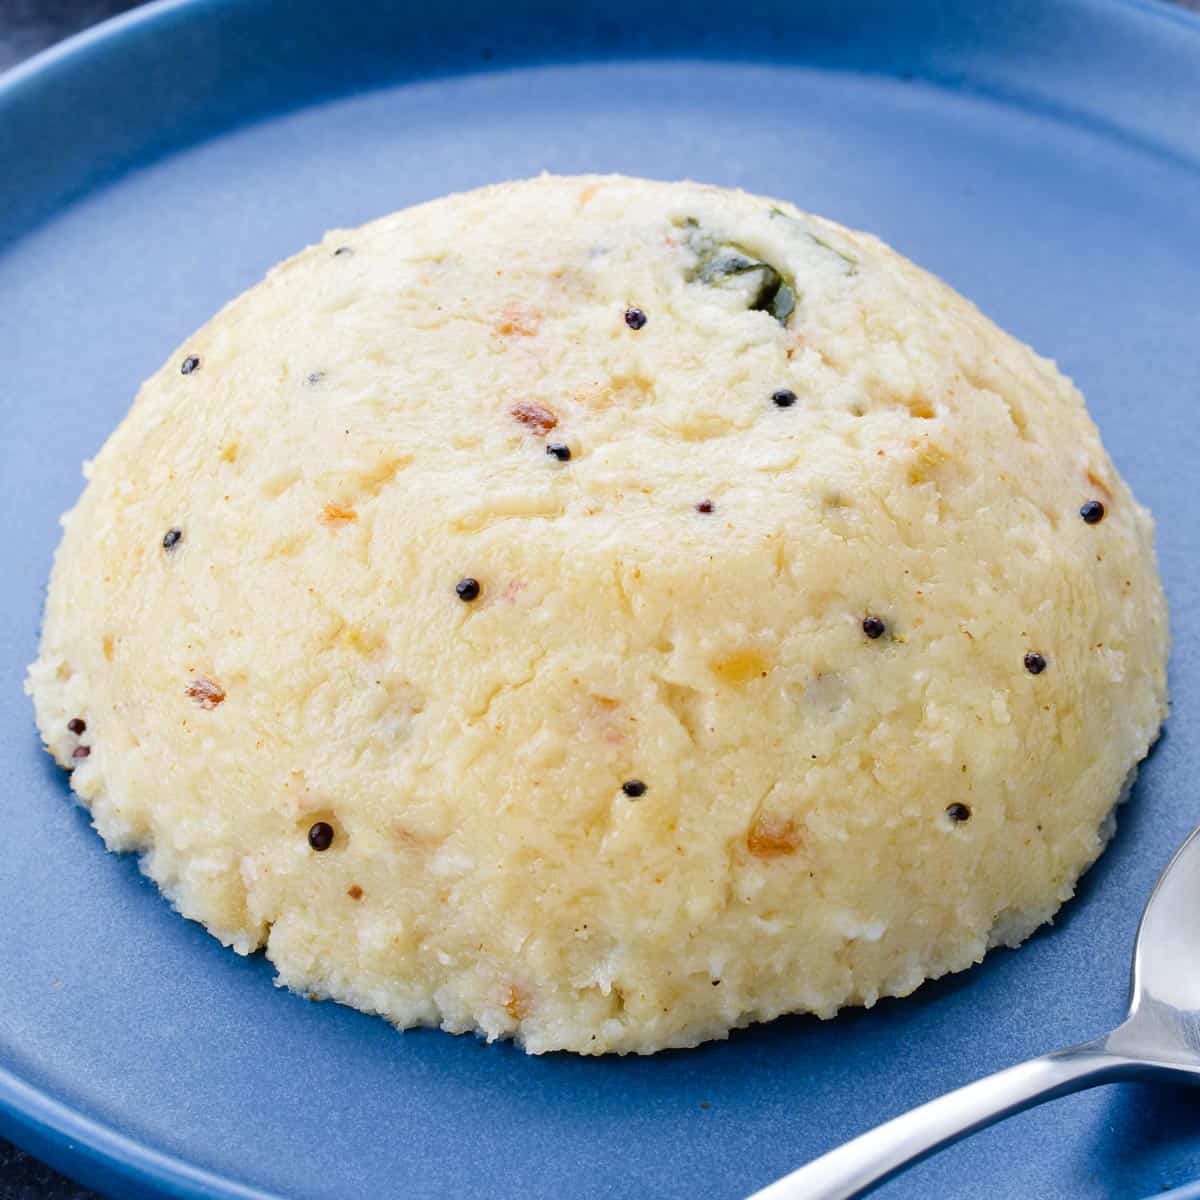
⭐️ How to Make Non Sticky Sabudana Khichdi (with pro tips)
⭐️ Spicy Hot Kolhapuri Misal (made from moong sprouts)
As always, I hope you found this recipe useful. If you did, please let me know your rating ⭐️ and feedback ? in the comments below, or simply rate the recipe right on the recipe card. I'd really appreciate it. ❤️
Puri Recipe (Poori Recipe)
Ingredients
- 1 cup wheat flour (chapati atta)
- 1 cup all purpose flour (maida)
- 2 teaspoon semolina (sada rava)
- 1 teaspoon salt
- 1 teaspoon sugar
- 1½-2 tablespoon oil
- ¾ cup water
Instructions
For making puri dough
- In a wide bottomed utensil (paraat), add wheat flour, all purpose flour, semolina, salt & sugar, and give all the dry ingredients a quick mix.
- To this, add half of the oil, and start adding water, little by little, and knead till a hard dough is formed. Add rest of the oil towards the end to make a smooth dough.
- However do not over-knead this dough like for chapati. Only knead till you get a hard and smooth dough.
- Also dough should be hard (harder than regular chapati dough), but not dry and crumbly. If it is dry and crumbly, add a few spoons of water / oil to make a smooth dough.
- Cover & rest the dough for about 20 minutes, and then make even sized dough balls from the dough, and start to roll out the puris.
For rolling out puris
- Drizzle a few drops of oil in the rolling area, and spread out the oil on the surface, so that it is well greased.
- Start rolling out the puri, by flattening the dough ball from the center to the sides, to make an even round.
- You can use oil or flour to roll out puris. I prefer to use neither, but if required, I only use oil, and that too very little, since the surface is already greased. If you prefer to use flour, be sure to dust out excess flour before frying puris in oil.
- The flattened puri should not be too thick or too thin. If it is too thick, it will not be soft & light, and if it is too thin, it will be crispy like papad. If puri dough is flattened to moderate thickness, it will be soft & light, and puff up very well. See step images / video for reference.
For frying puris
- In a pot, heat up oil really well for frying puris. For testing if the oil is hot, drop a small roundel of dough into hot oil. If it comes up immediately, without browning - oil is at the correct temperature.
- Slide the flattened puri carefully into the hot oil. Let it rise up a little from the bottom, and when it is almost halfway up, start pressing down on the top quickly, but gently, till the puri puffs evenly.
- When the puri has puffed, flip it to the other side, and fry till puri is light golden & crispy.
- When done right, you don't need to flip the puri in oil again, about 10 seconds each side is more than enough.
- Then remove the puri from the oil, and place it in a big steel colander, lined with paper towel.
- Fry the rest of the puris the same way.
- Crispy, yet soft & fluffy, puffed puris are ready to serve.
Notes
- Wheat flour puris / atta puris - As you see in the recipe, I make puris using a mix of wheat flour and all purpose flour. You can make it using only wheat flour too.
- Semolina / rava - This is considered optional, but I always add it, because it helps give puri the perfect crispy texture.
- Salt & sugar - These are also considered optional, but I always add them, because they add to the flavor, and sugar also helps give puris the deep golden hue. Adjust quantity based on your preferences.
- Resting time for dough - It's important to rest the dough before frying the puris. I have tested out the resting time, and feel a minimum of 5, and a maximum of 20 minutes is ideal resting time. But I personally prefer resting for 20 minutes over 5 minutes.
- Keeping dough & rolled out puris covered - Always keep the puri dough covered while resting. And try to fry it immediately after rolling out. I usually roll out 3-4 puris, fry them, and then roll out the next batch. Best to even try & keep the rolled out puris covered, if possible. So that they don't dry out, and get fried immediately.
- Oil vs flour for rolling out puris - Ideally, it's best to only grease the surface, and not use oil or flour to roll out puris. But between the two I prefer oil over flour, because I don't like the excess flour getting into the oil while deep frying. But like I said, I prefer to not even use oil so as to not introduce excess moisture in the dough.
Nutrition
Video Recipe
If you'd like FREE recipes and meal prep ideas delivered directly to your email inbox every Friday in one short email, then subscribe to the Foodie Friday list HERE, and never run out of ideas on what to cook over the weekend or prep for the week ahead. 🙂

Kala Ravi says
My eternal favourite...puri with absolutely anything. I never knew about adding rawa or sugar to the dough. Will try this tip. Love your food trysts Shantala!
The Love of Spice says
Thank you so much, Kala. So happy to see you back!