


Learn how to make roti / chapati dough (atta) in KitchenAid Stand Mixer - in just 5 minutes, and totally handsfree (and mess-free!). And you'll never want to knead atta any other way!
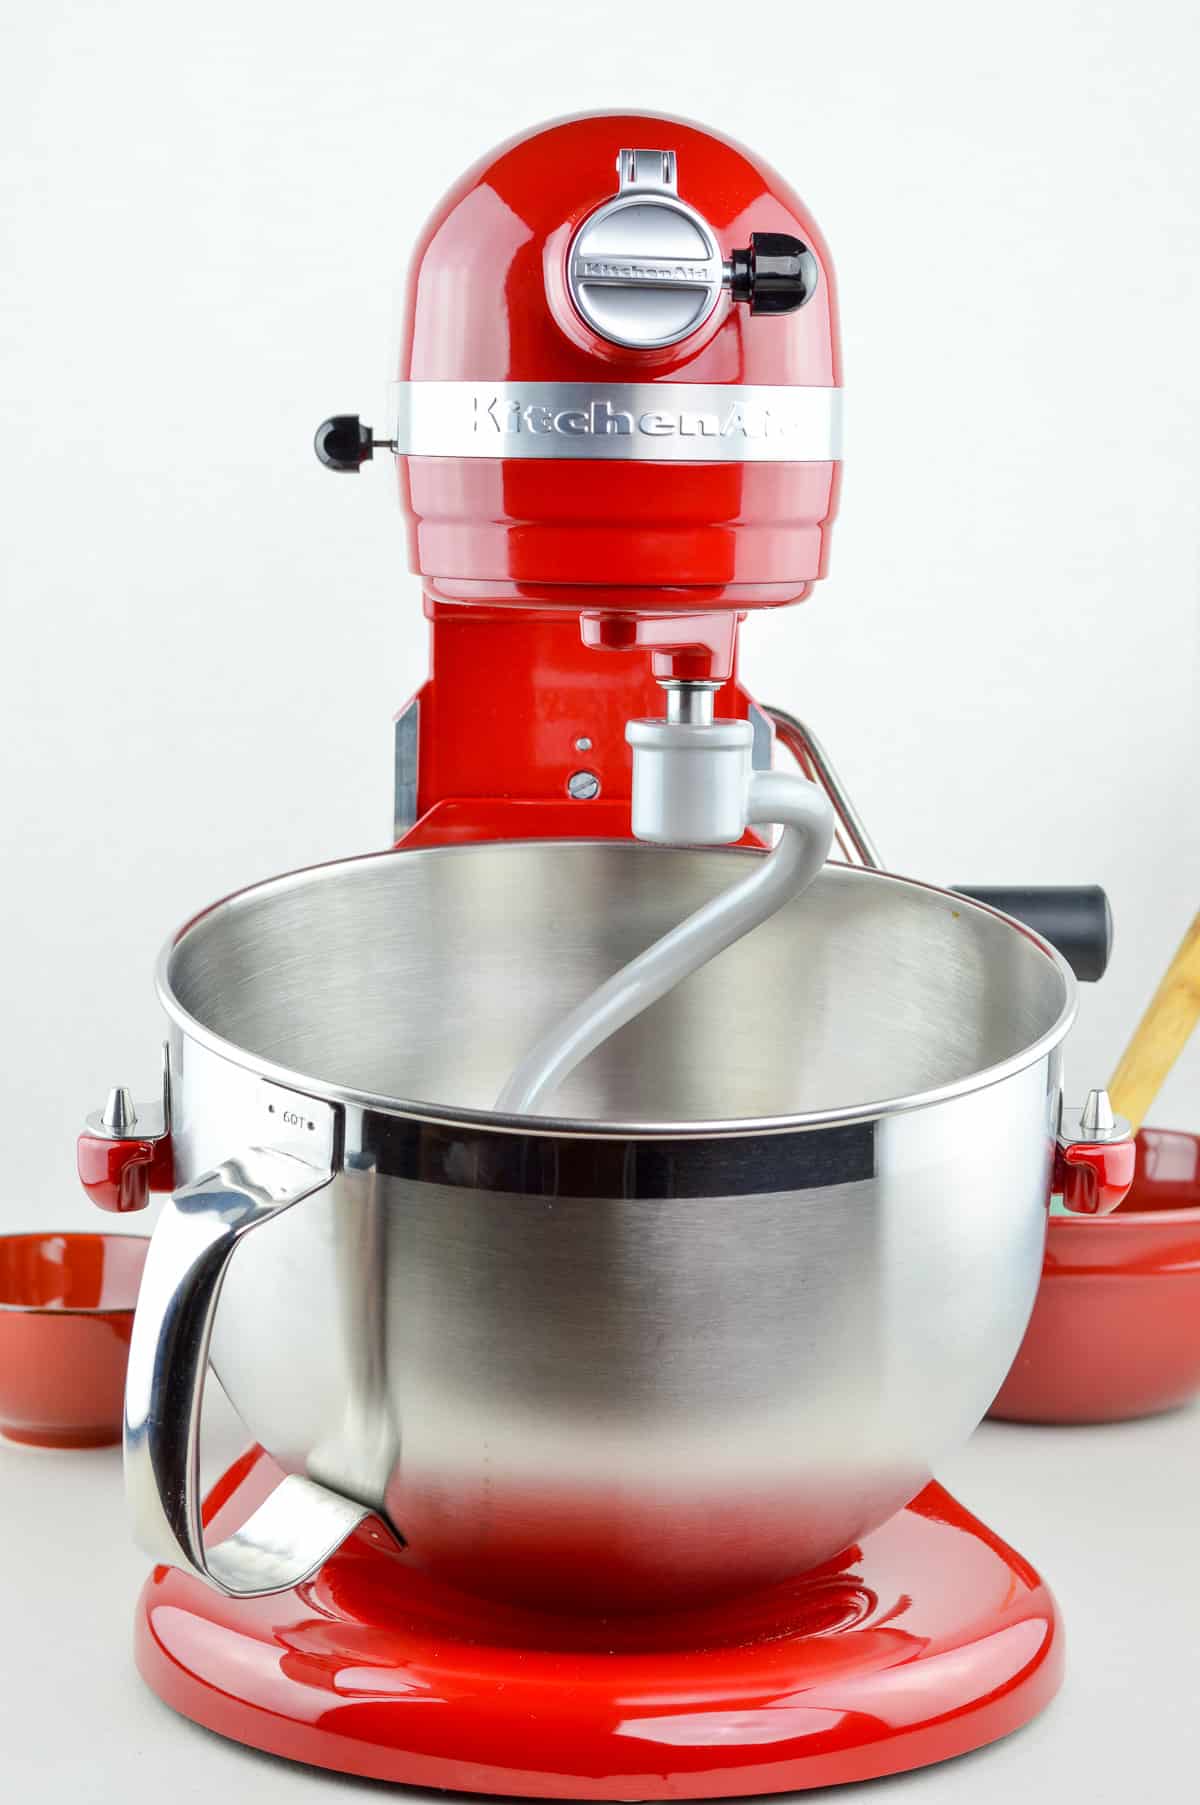
I had my eye on the KitchenAid Stand Mixer from ages, but I kept procrastinating on getting it because I wasn't sure whether I could justify the counter space. Because this isn't the kind of gadget you can put in the cabinet & remove when in use. It's too heavy for that.
But now that I finally took the plunge & got it, I felt like I should have gotten it AGES ago, because it's SO worth it.
And I haven't even started using it regularly for making cake & cookie batters yet. Which I know is why most people get it. But honestly, I essentially got it to make roti / paratha dough, and if that's all I could have done with it, I would have still found it super useful. The fact that it can be used so widely for baking, and making all kinds of doughs for Indian breads, and pizza even, is just a happy bonus!
Though I have to mention here that I also procrastinated getting this because I have been making chapati dough / atta by hand for close to 2 decades now, and with relative ease. So I second guessed whether I even needed this.
I mean I could see that this would be a dream come true for newbies, who did not know how to make atta by hand, but I wondered if it would make all that much of a difference to the folks who knew how to make atta.
But trust me, it does! This machine will save you time, energy, and mess while making atta - a literal win-win-win on all three fronts. And you'll get perfect soft chapati/ roti dough at the end.
Just follow the steps outlined below, and you'll be all set.
What You Need to Make the Dough / Atta
Wheat Flour - this is the chapati flour you get in Indian stores, and not the wheat flour you get in American grocery stores
Water - warm, room temperature water is best
Salt - just a pinch
Oil - this is optional, but recommended
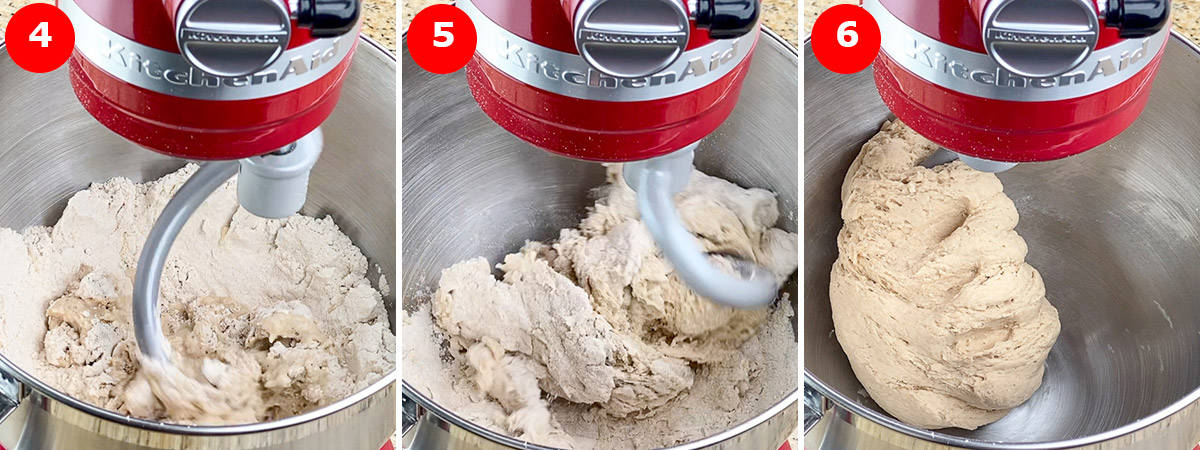
How to Knead Roti / Chapati Dough (Atta) in KitchenAid
As you'll see kneading roti atta in the kitchenaid is ridiculously simple. Essentially all you need to do is add the flour, salt, water, and oil, start the machine, and watch the magic.
No really, there is not much to do. But of-course there are a few things to keep in mind for ideal results.
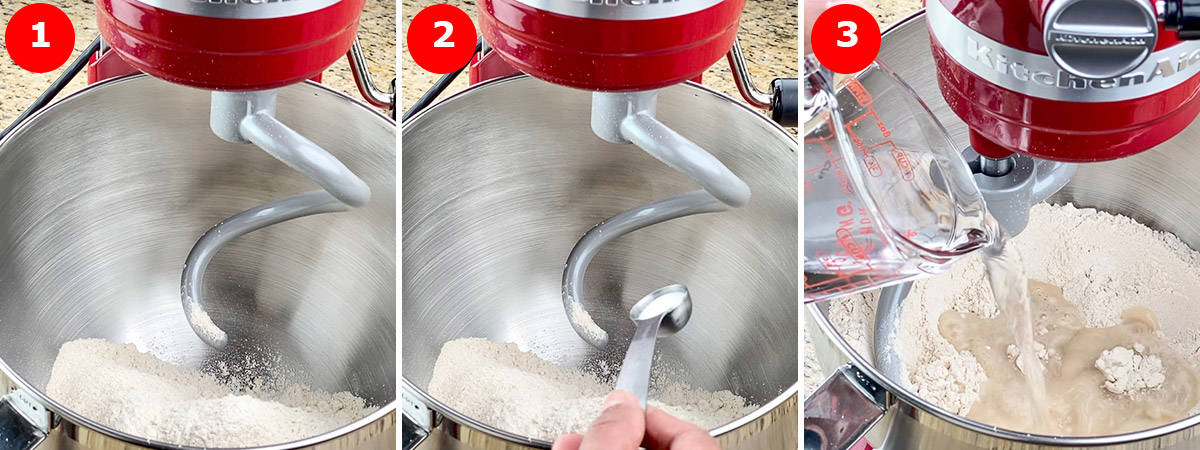
- Start with adding the flour & salt, and mixing them together first (by using the stir setting)
- Add water little by little, and not all at once. This is the most crucial thing, at-least until you get a good idea on how much water you need to make the dough to your liking.
- Once you've added the water, you can increase the setting to 2 (max 4) to knead faster, but it's best to not use the higher settings, and stick to the lower settings, as that'll be enough.
- If you are adding oil, it's best to add it when you start adding water or even before adding water. But-of course you can also add it at the very end. Some prefer to not add oil at all, and knead the dough by hand with a little oil, after removing it from the KitchenAid. So it's a preference thing.
- When the dough is kneaded to your liking, turn it off. It usually takes only 3-5 minutes from start to finish.
Note
- Just before it is done, the dough might appear a little dry, and in need of water, but hold off a bit, before you add more water, especially over the amount mentioned in the recipe, because the dryness is usually not due to lack of water, it probably just needs to be kneaded for an additional minute or so. If you wait, and the dough still doesn't seem to come together, you can then add water, a couple spoons at a time.
- The method outlined above is what gives me ideal results, but feel free to tweak it to your preference.
- I have mentioned the exact quantity of ingredients in the recipe card below, but this might vary a bit based on the kind of flour you are using etc. So use the recipe as a jumping off point, and tweak it to your preference.
Watch this Quick Video on Making Roti Dough in KitchenAid
Popular NOW!
⭐ How to Turn Your Pressure Cooker into an Air Fryer
⭐ The BEST Two Ways to Store / Freeze Indian Green Chillies
⭐ Motichoor Cream Cheese Cups - Indian Fusion Dessert Recipe
⭐ Delicious & Crispy Mumbai Style Prawns Koliwada Recipe
As always, I hope you found this recipe useful. If you did, please let me know your rating ⭐️ and feedback ? in the comments below, or simply rate the recipe right on the recipe card. I'd really appreciate it. ❤️
How to Make Chapati / Roti Dough in KitchenAid
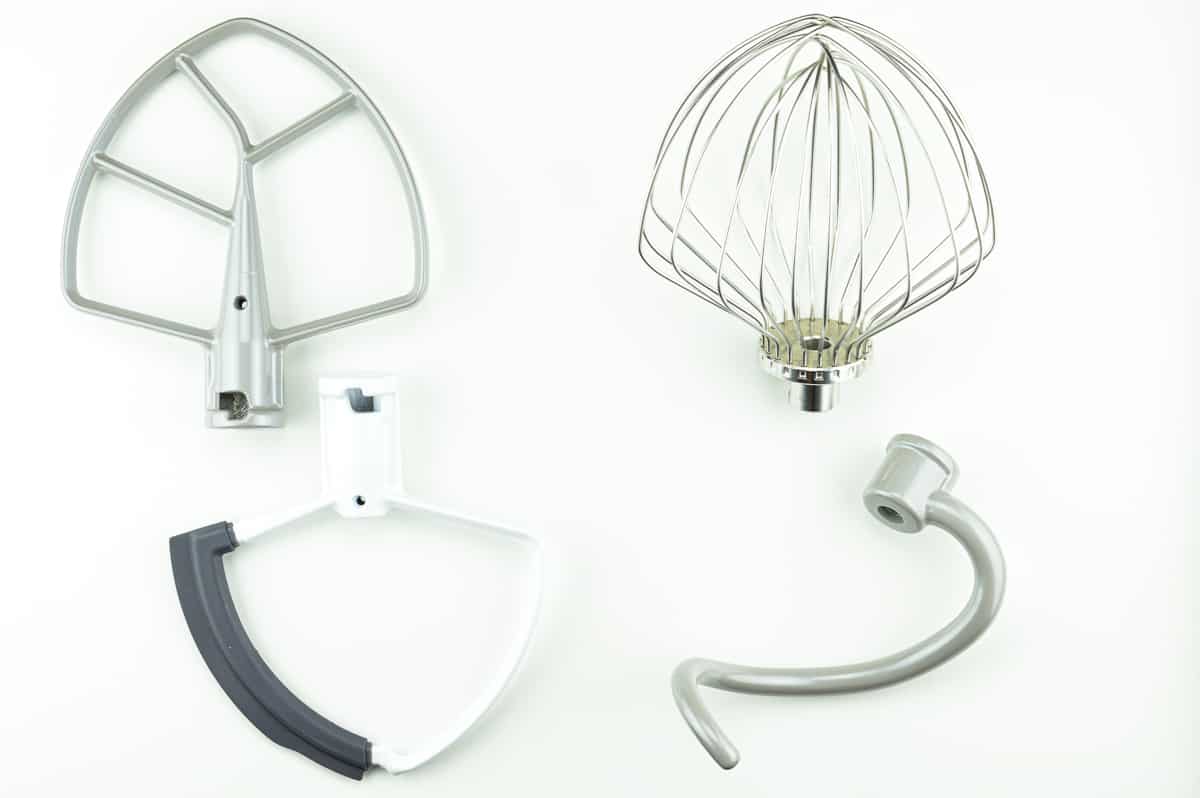
Equipment
- KitchenAid Stand Mixer
Ingredients
- 3 cup atta / wheat flour
- ¾ teaspoon salt
- 1 + ¼ cup water
- 2 tablespoon oil
Instructions
- In the bowl of the stand mixer, add 3 cups of flour & ¾ teaspoon salt, and start the machine on the STIR setting for 15-20 seconds, just to mix the two together.
- Then add 1 cup of water and 1 tablespoon oil, start the machine on the lower settings (either 2 or max 4 - I usually keep on 4), and let it run for 30-60 seconds, till the dough just about starts to come together.
- After which, over the next 1 minute, add in the rest of the water, about 4 tablespoons, but only add in a little at a time, like a spoonful at a time. And towards the end of the minute, when the dough has almost come together, add 1 tablespoon oil.
- Now let the machine knead the dough well for another minute or so. This will give you soft and pliable roti dough.
- Note: It's best to let this dough rest covered for at-least 20 minutes, before starting to make balls out of it, and rolling it out to make rotis / chapatis.
Notes
- Some choose to not add salt or oil, and simply knead the dough with flour and water, and it's a preference thing, so go with what you prefer. If you do skip oil, then you may need to add a few spoons more water, so adjust accordingly to get a soft and pliable, yet non-sticky dough.
- The lower settings are ideal for dough, so stick to the lowest two settings - 2 or 4. Either is okay. The only difference is that if you run it on 4, the dough will be ready in about 3 minutes, and on 2, it might take about 5 minutes, that's all.
- Just before the dough is ready, it might appear a little dry, and in need of water, but hold off a bit, before you add more water, especially over the amount mentioned in the recipe, because the dryness is usually not due to lack of water, it probably just needs to be kneaded for an additional minute or so. If you wait, and the dough still doesn't seem to come together, you can then add water, a spoonful at a time.
Nutrition
Video Recipe
If you'd like FREE recipes and meal prep ideas delivered directly to your email inbox every Friday in one short email, then subscribe to the Foodie Friday list HERE, and never run out of ideas on what to cook over the weekend or prep for the week ahead. 🙂

Sunitha Blossom says
Thank you for putting steps in making atta together! I got my new Kitchen aid weeks ago like you in i never thought its needed. I looked at you instructions above, and made the atta in just 4 mins..wow its such a delight.
The Love of Spice says
So glad to hear that, Sunitha. Thanks for taking the time to share.
Kavi says
Thanks for sharing detail process and techniques
I also just bought it and it’s really helpful
I noticed in your video that bowl was not locked from back.
Once you fix from side it should lock from back as well. Please check some videos
Thanks
The Love of Spice says
Hi Kavi, glad that you found it helpful. I did figure out the base was not firmly attached during filming, but only after I uploaded. ?♀️ I will probably re-shoot it again, and replace this video. But thank you for taking the time to help. ?
Roshi says
I use food processor to make dough. Atta I use is not store bought. I have chakki at my place. So perfect ratio for atta and water is 2:1 for me.
The Love of Spice says
That's interesting. Which chakki do you use?